
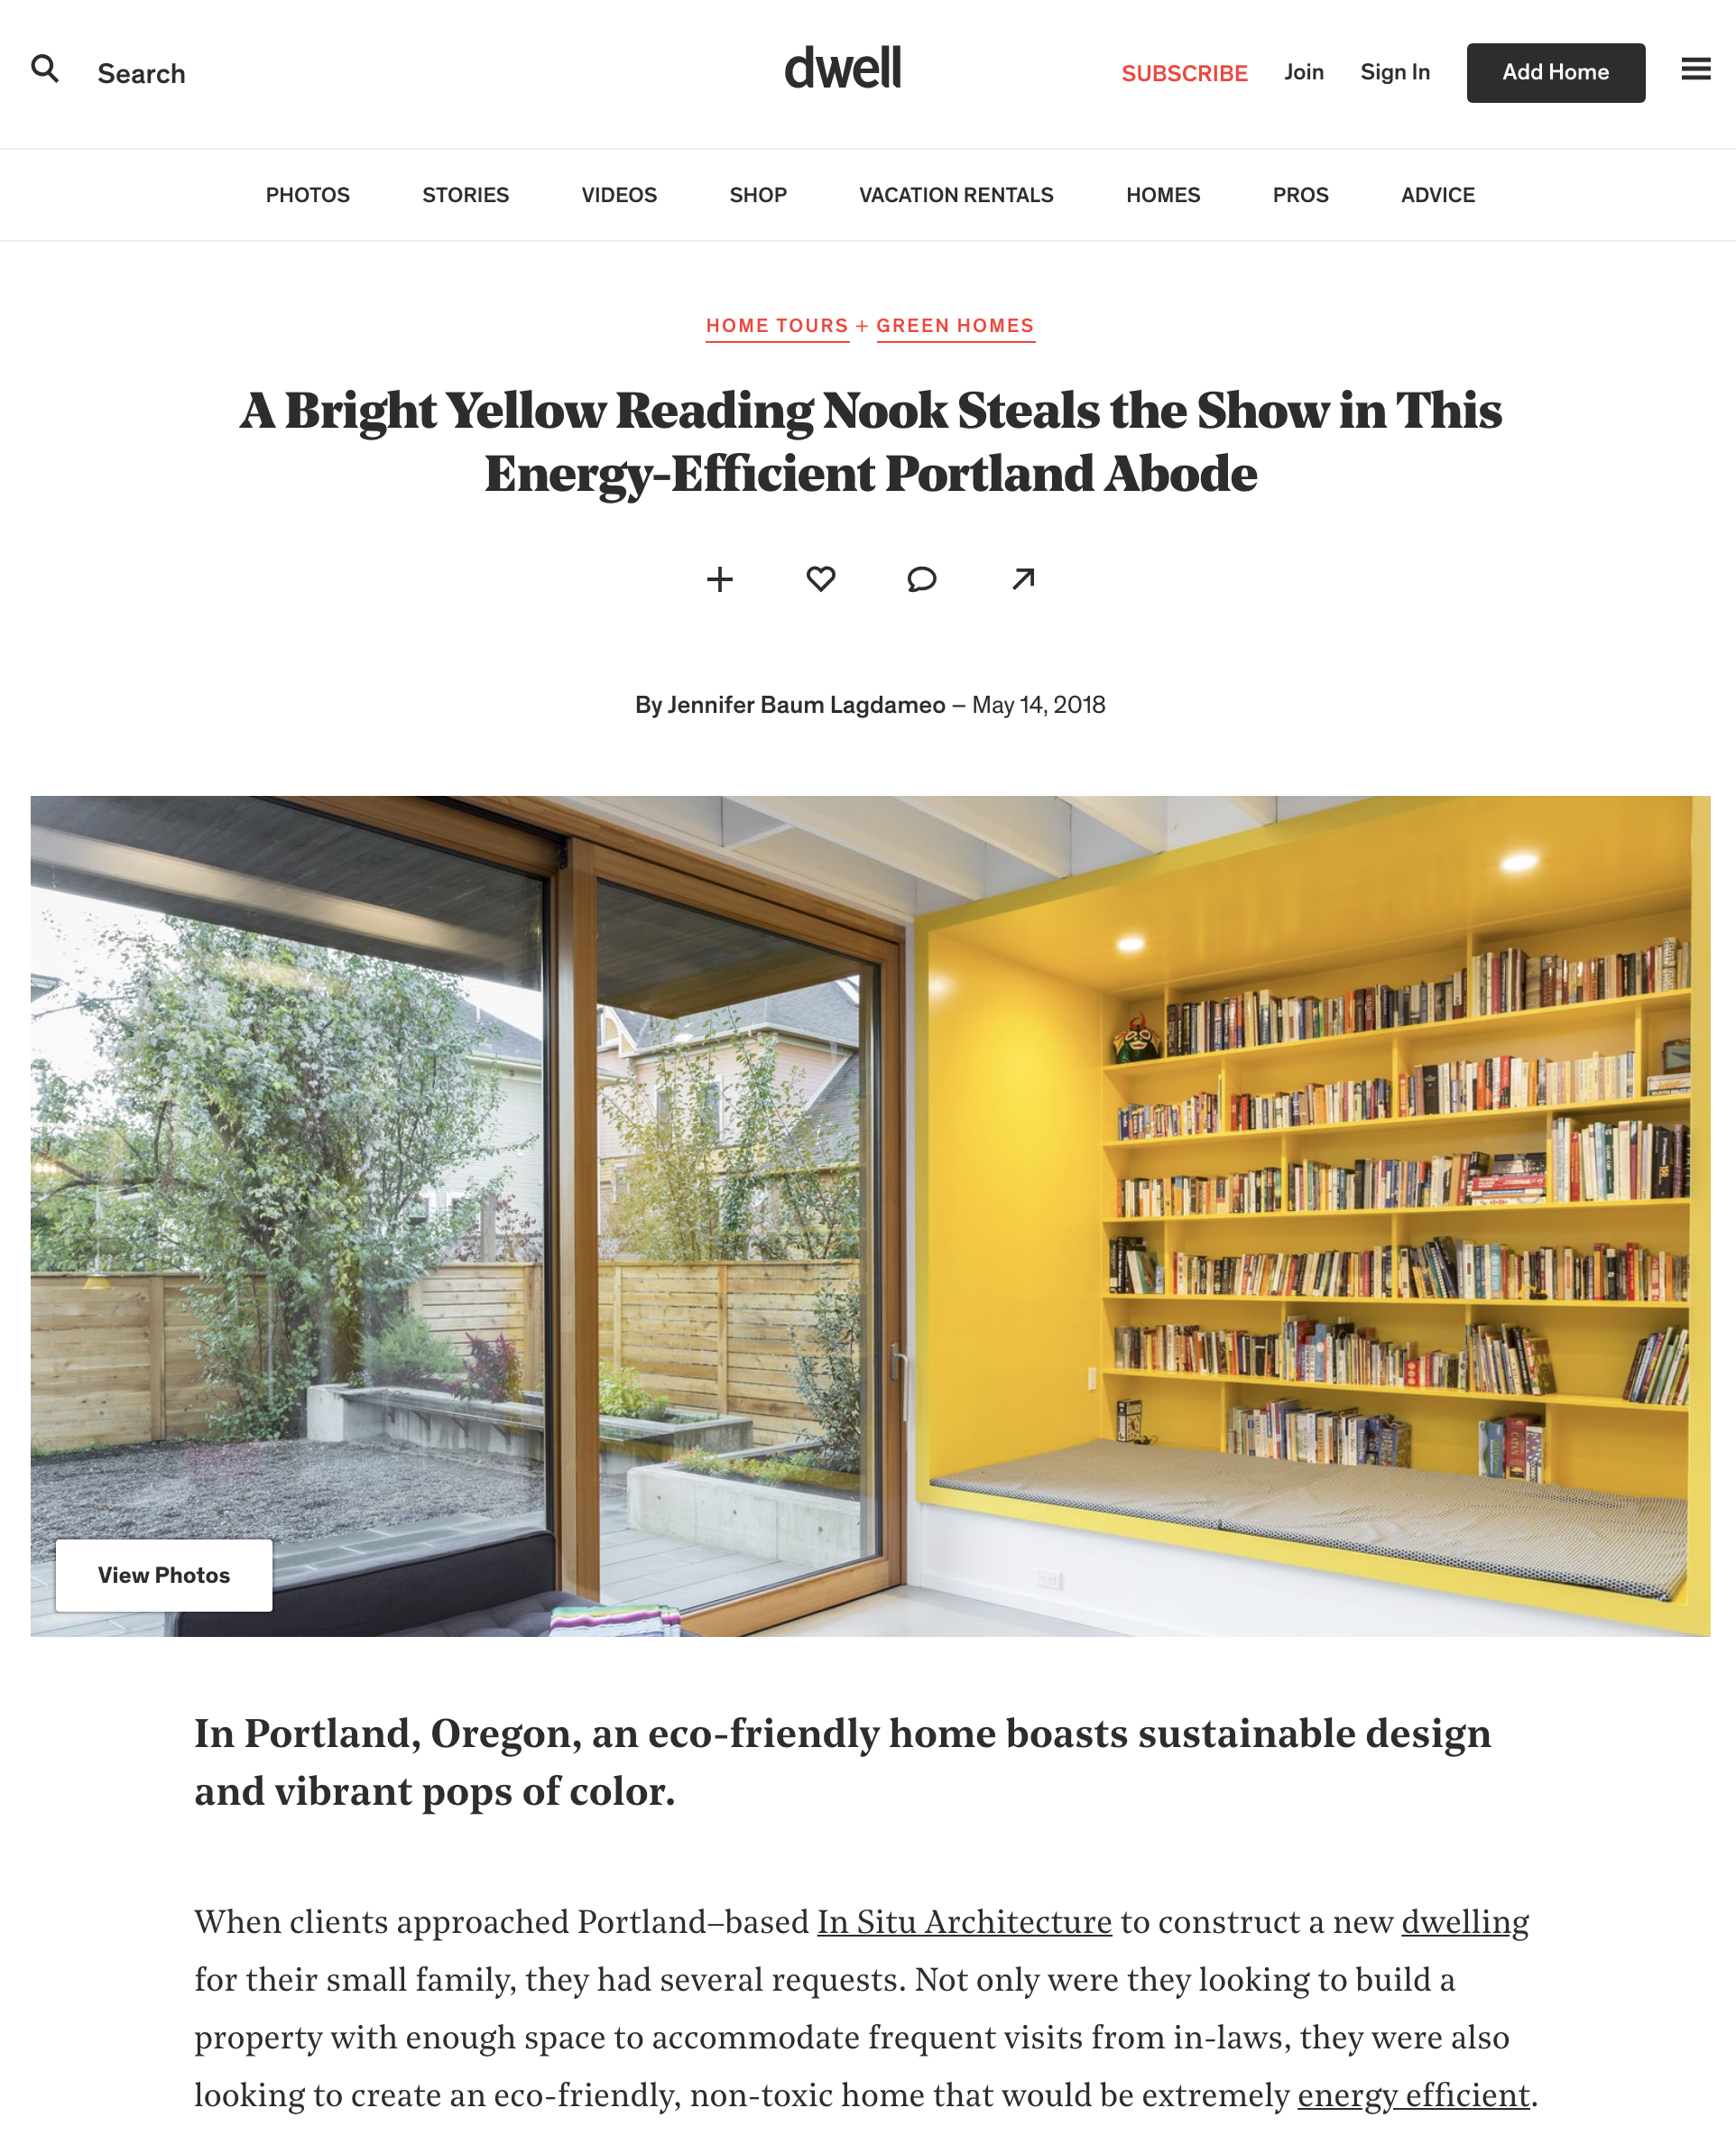
18th Ave House is featured on Dwell. Check it out here.
blow


stained cedar siding
siding work has mostly wrapped up. the vertical siding is installed on rainscreen over rigid exterior insulation. see this past post for more info on the assembly. here's a first look at the siding pretty much completed.

the siding is off the shelf 1x6 channel made from tight knot cedar. it's stained with 1 coat of olympic semi-transparent stain in ebony.

the large south windows (and doors) have exterior motorized aluminum sun shades supplied by hella. the siding has been detailed to allow the shades to stack in recessed pockets. in this photo the shades are down about 9 inches and just visible on the 2 living room units (lift / slide door and fixed upper unit). more on the shading later.

the "breezeway" features a south facing door / window with a wood canopy (to be painted black) topped with clear tempered glass.
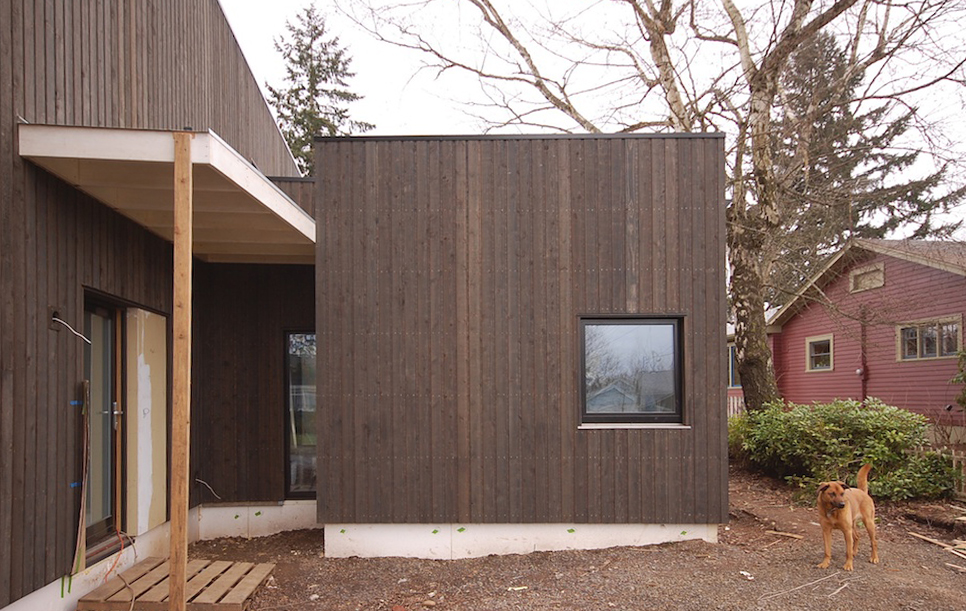
the entry door at left features acid etched glass for privacy and has a smooth accent panel adjacent that will be painted a deep red. the wood canopy will painted black and features a simple galvanized metal pan roof. steel rod will be used to hang the canopy from a bracket mounted to the wall above. a mahogany deck will eventually complete the front porch.

the north street facade also features a narrow smooth accent panel that will be painted with the same deep red. the same siding runs horizontally to form an accent between floors.
check back soon for more.
going solar
the rare sunny portland winter day has allowed us to regale in the golden rays.
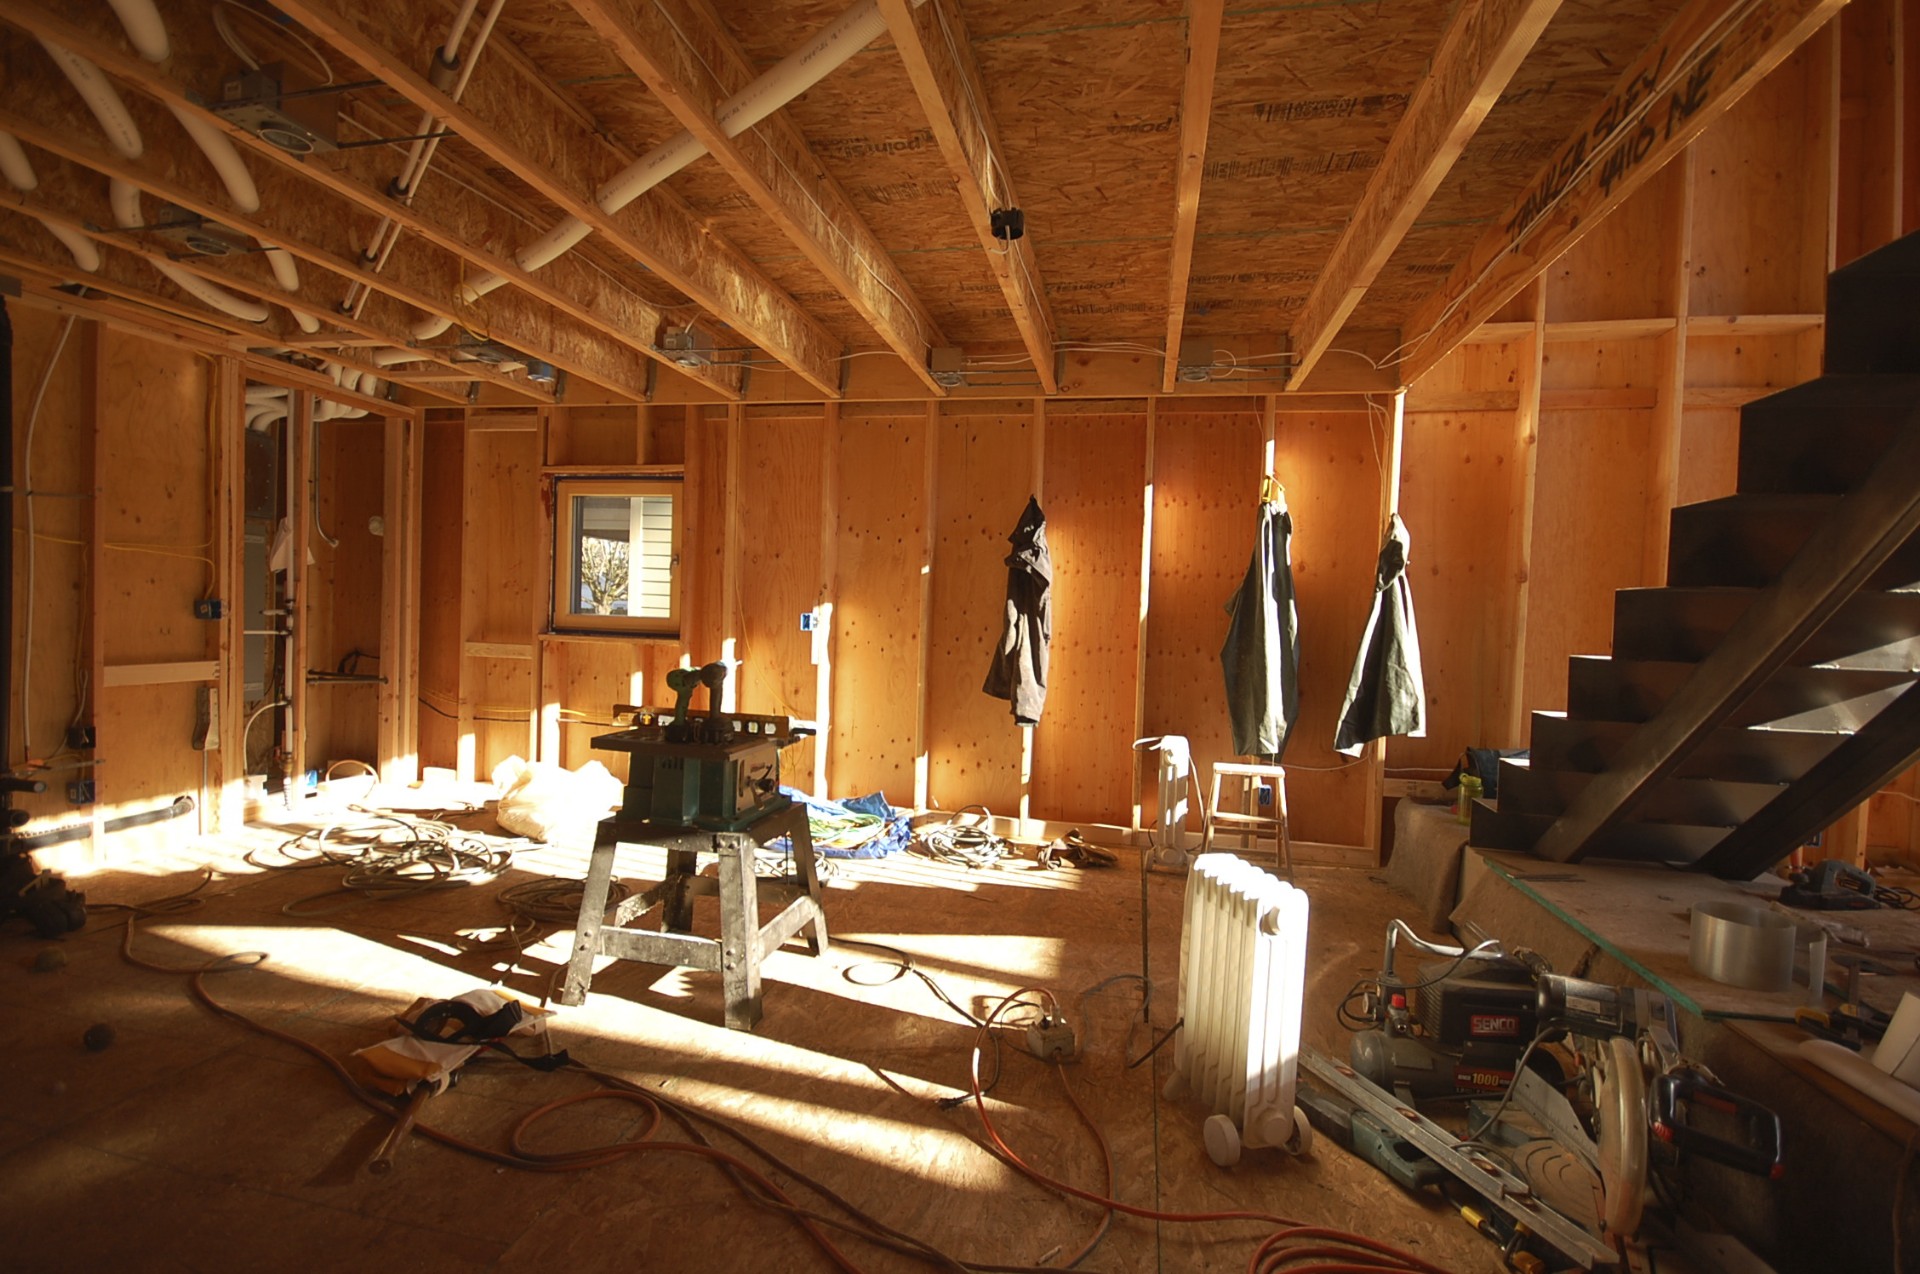
glorious sun reaches all the way to the back of the kitchen.
the south facing windows / heaters are working.
the studio flooded in mid-day sun.
the breezeway will be a study in light and dark.
rejoice.
in addition to direct gain, we will have a small PV system on the roof. more on that later.
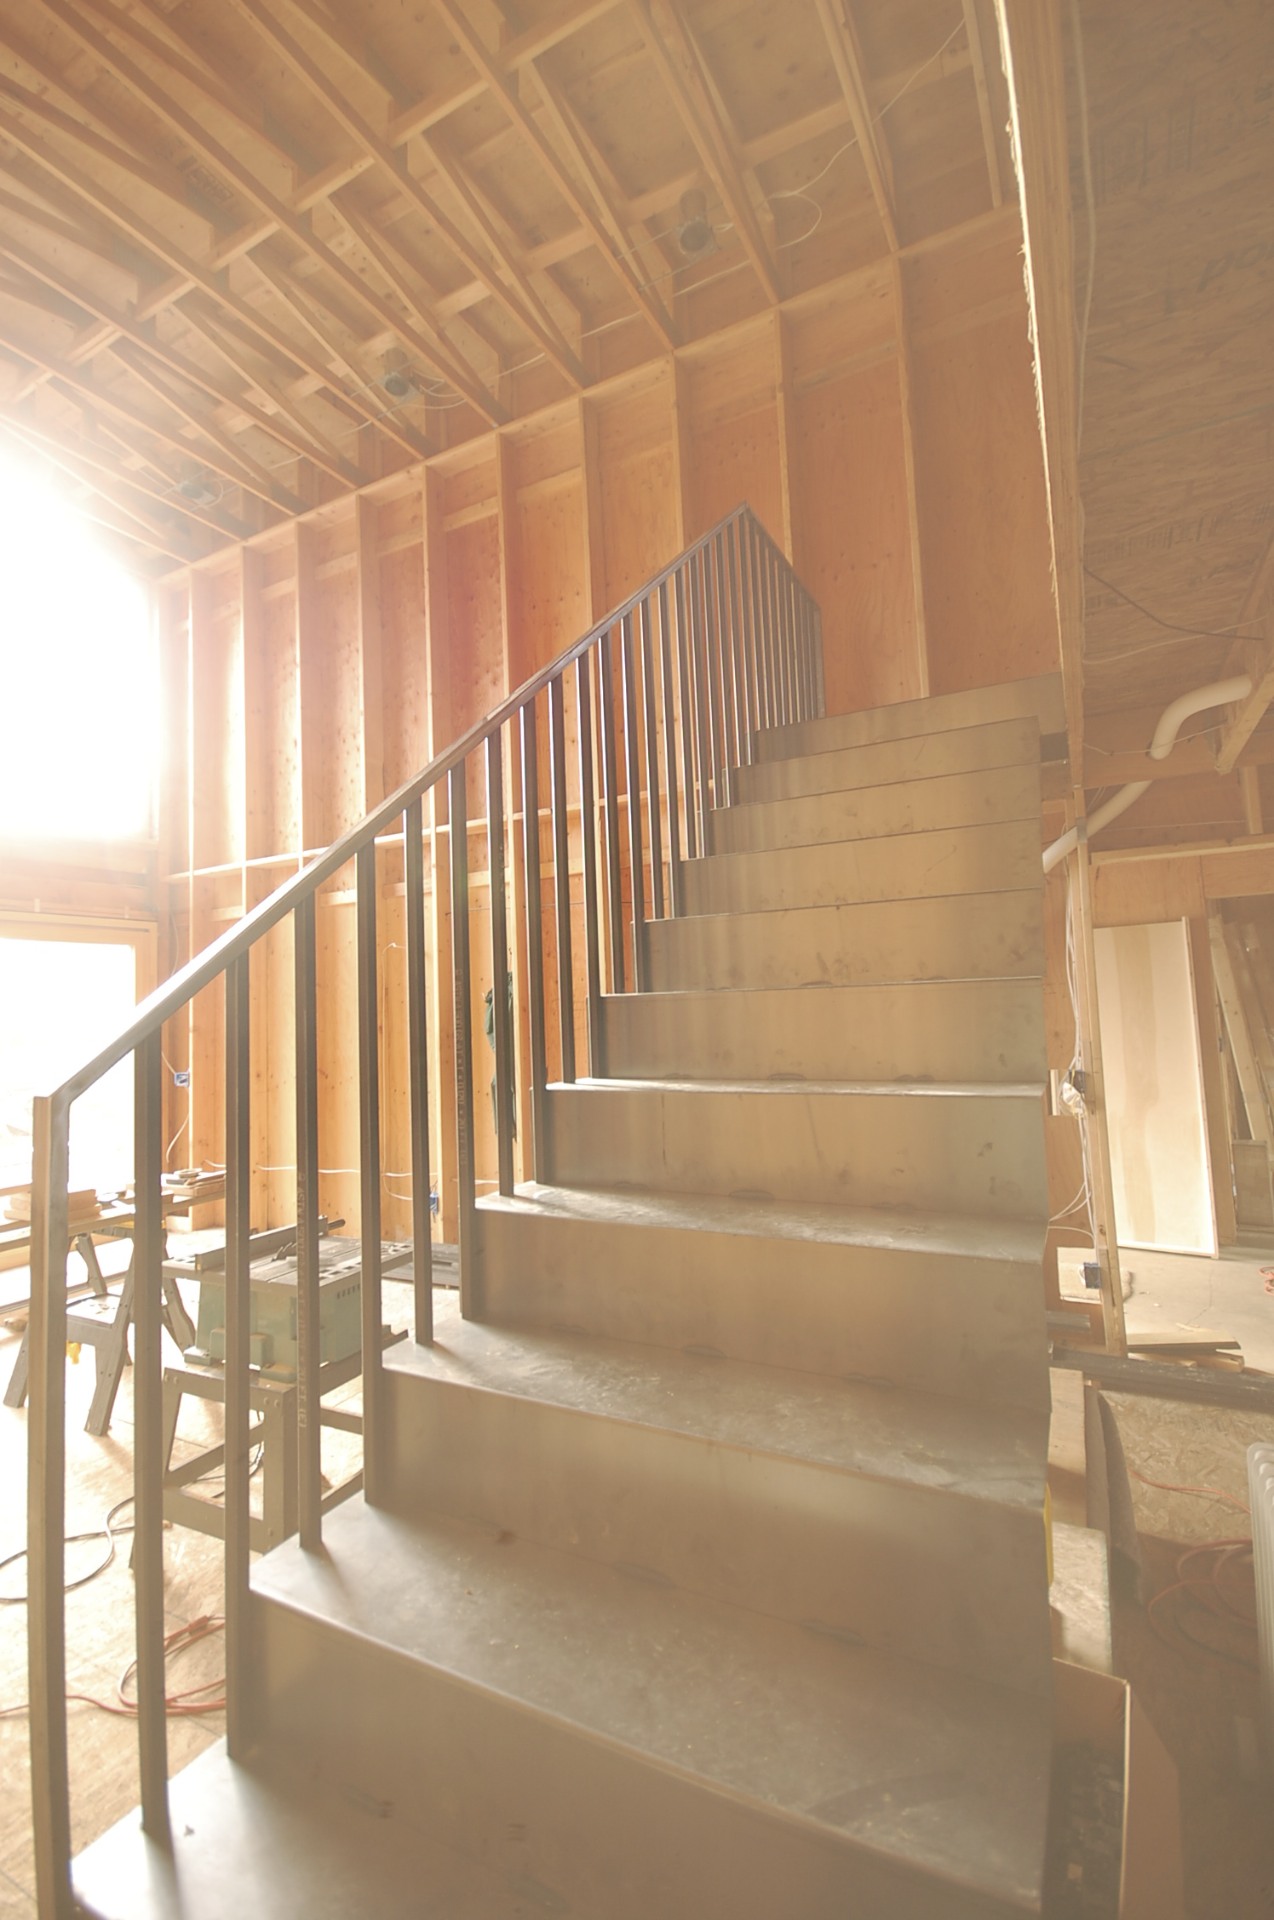
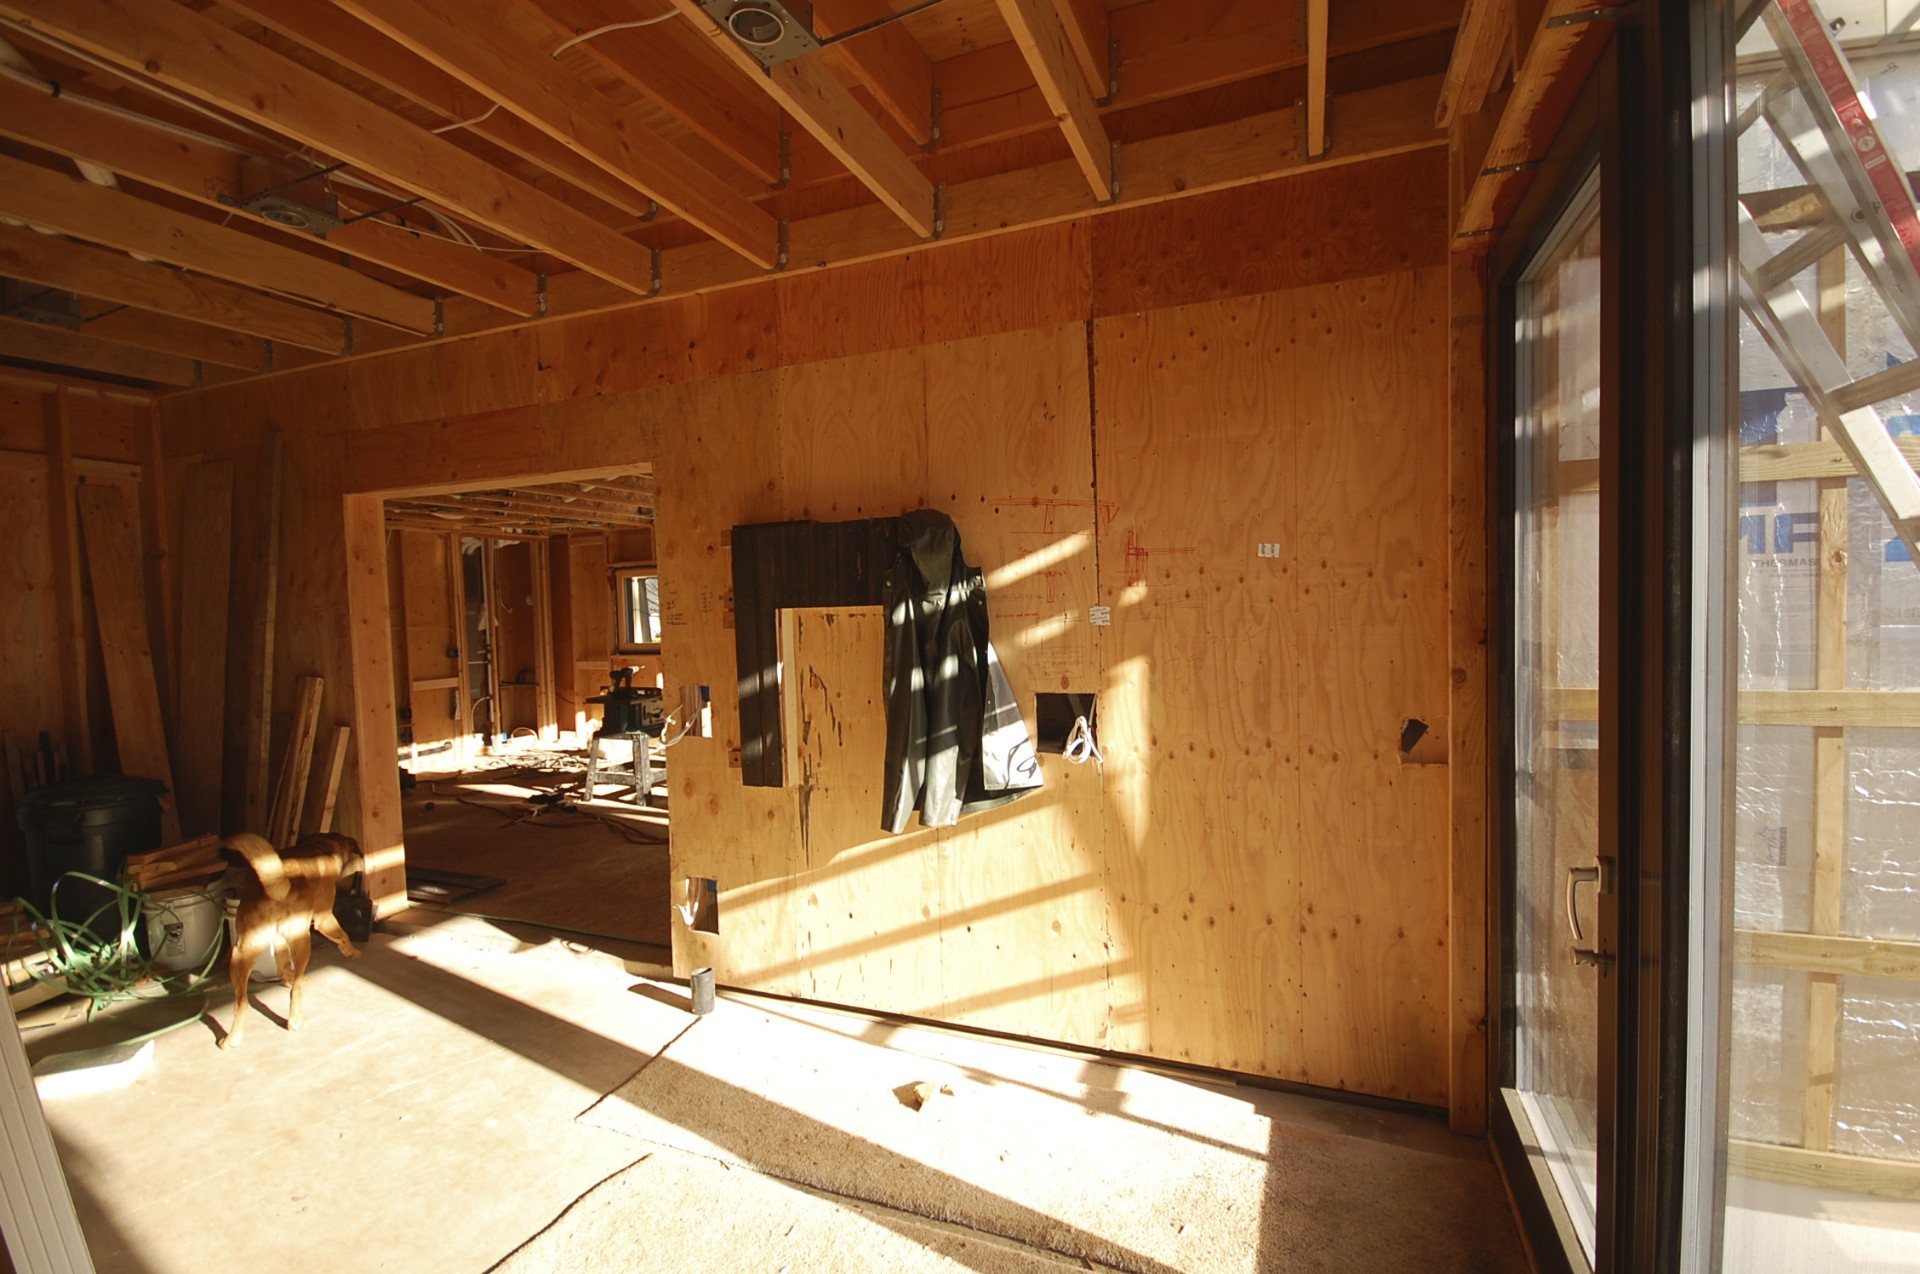
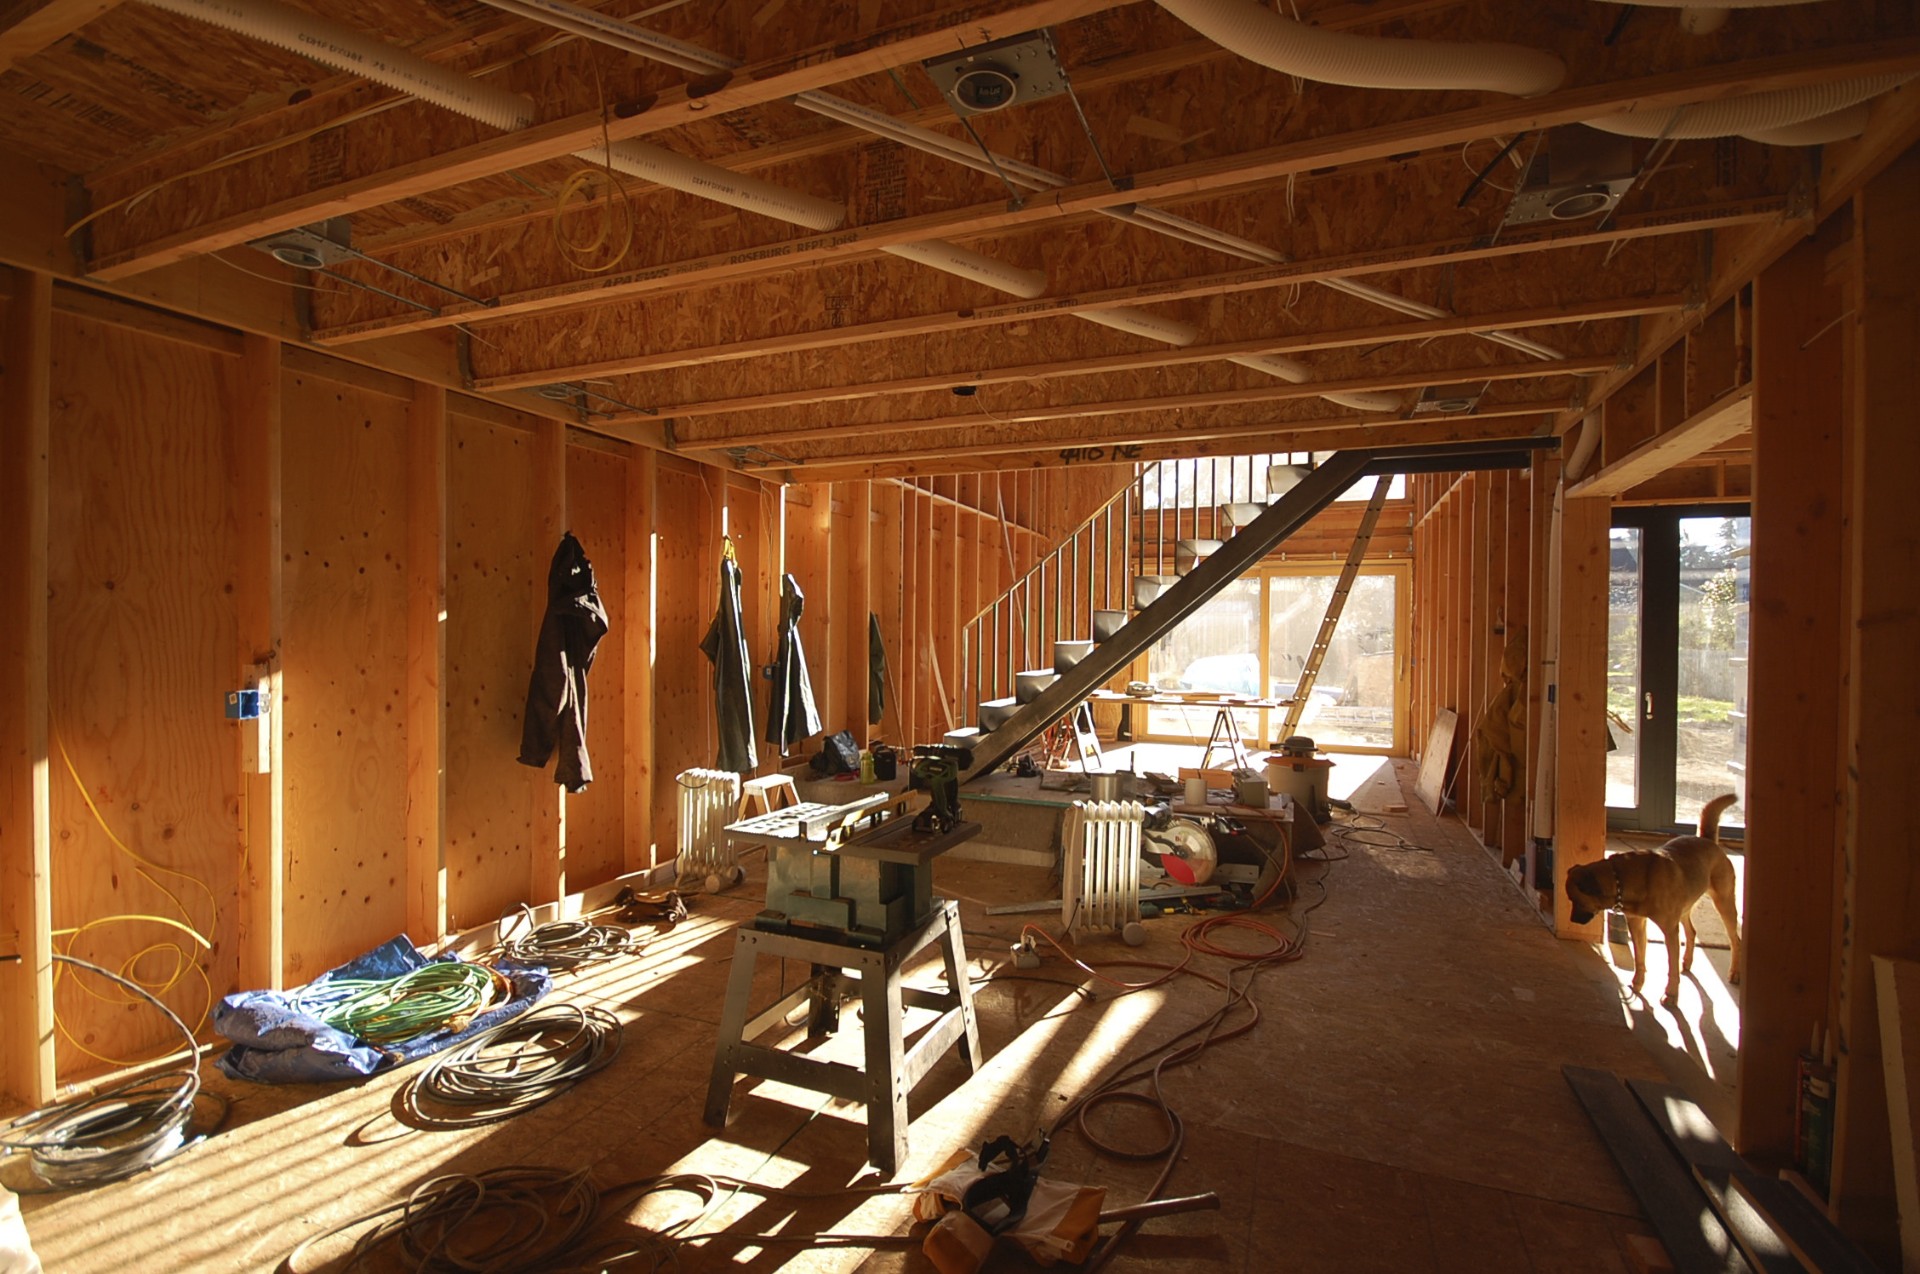
stair progresses
while most of the attention has been focused on the insulation, windows and air sealing, the interior stair has made slow but steady progress.
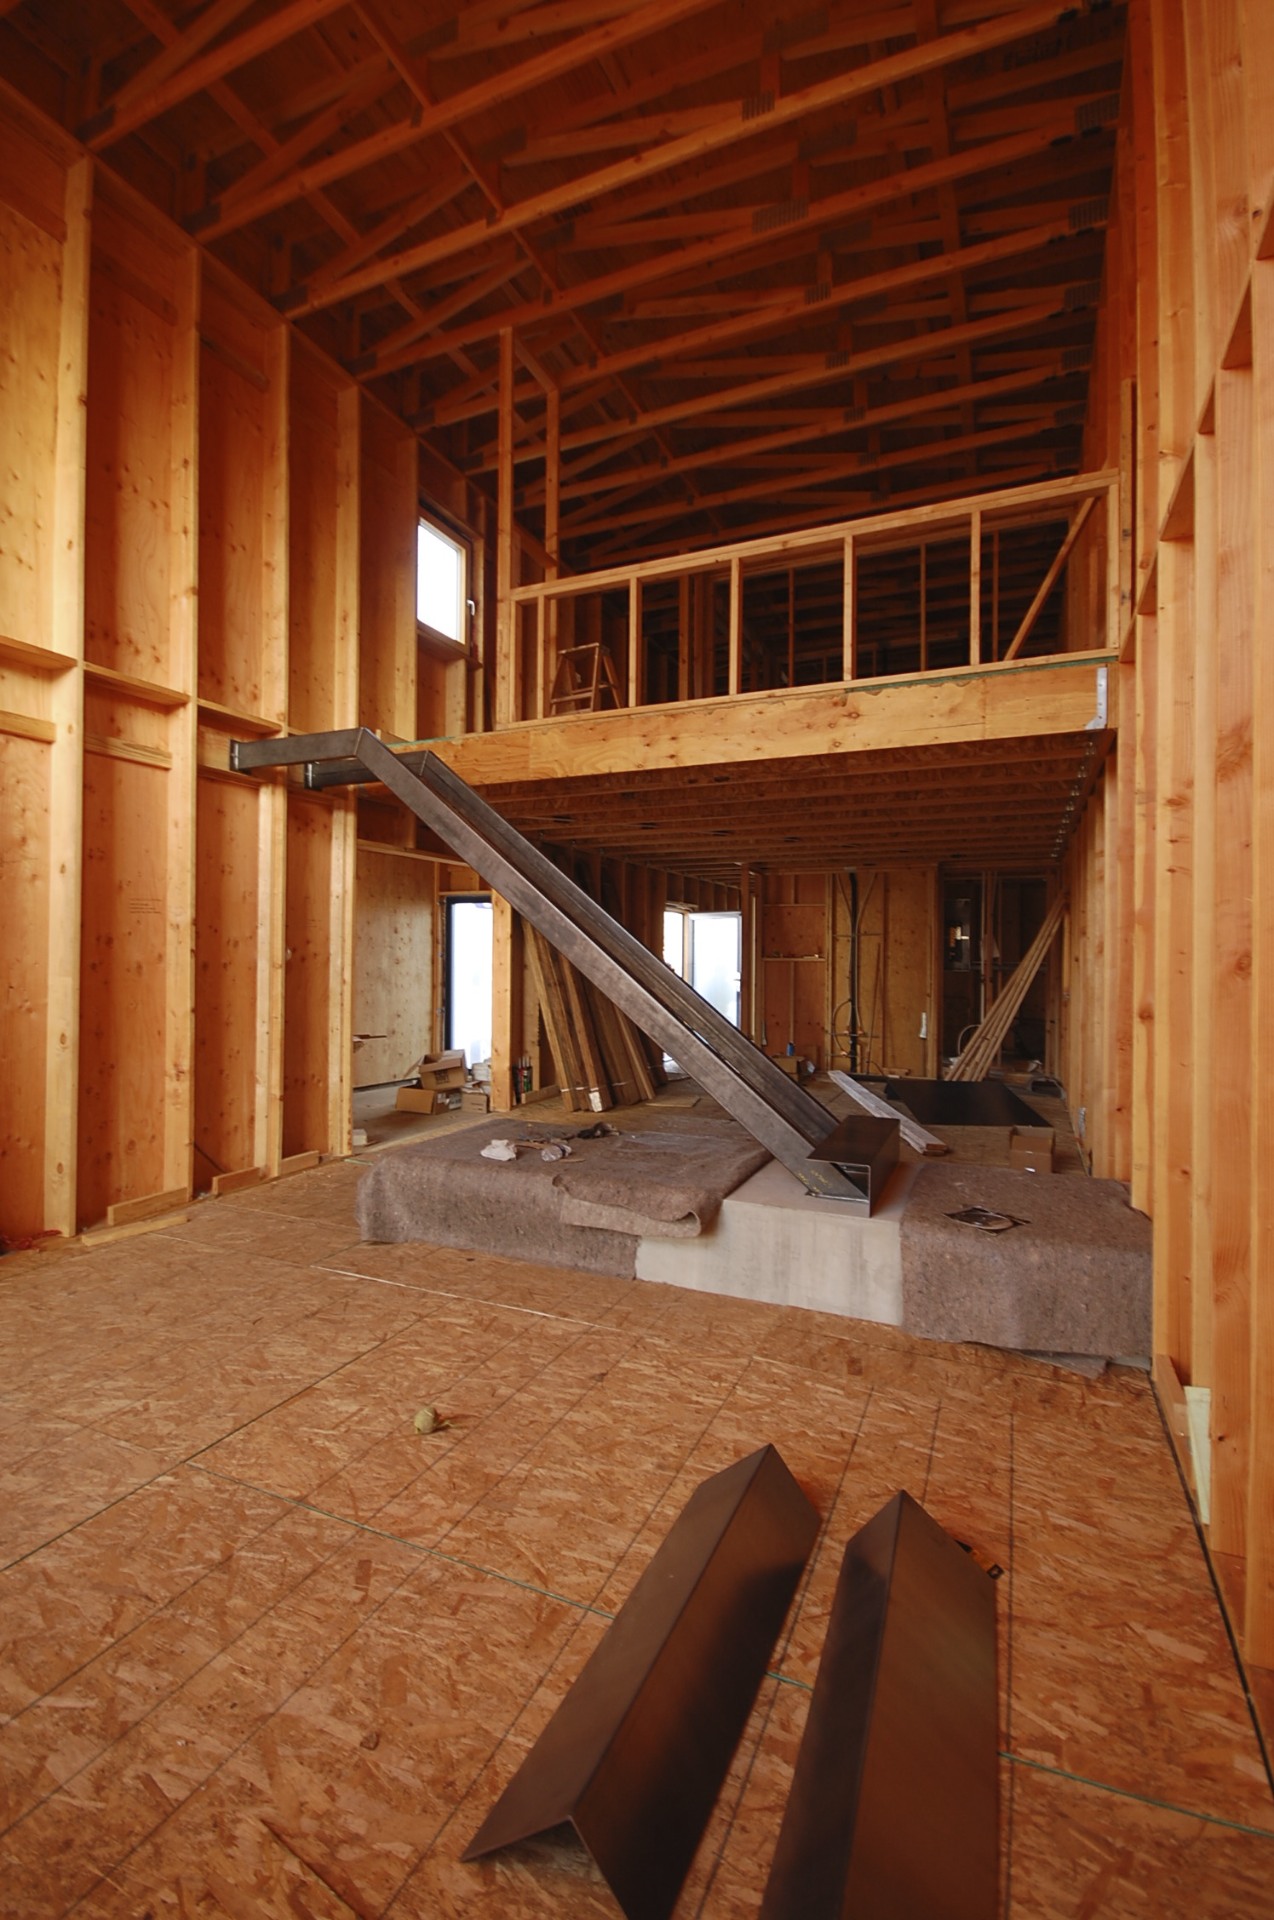

stringers are tube steel bolted to concrete landing and wood wall

tread risers are 1/8" thick bent plate steel
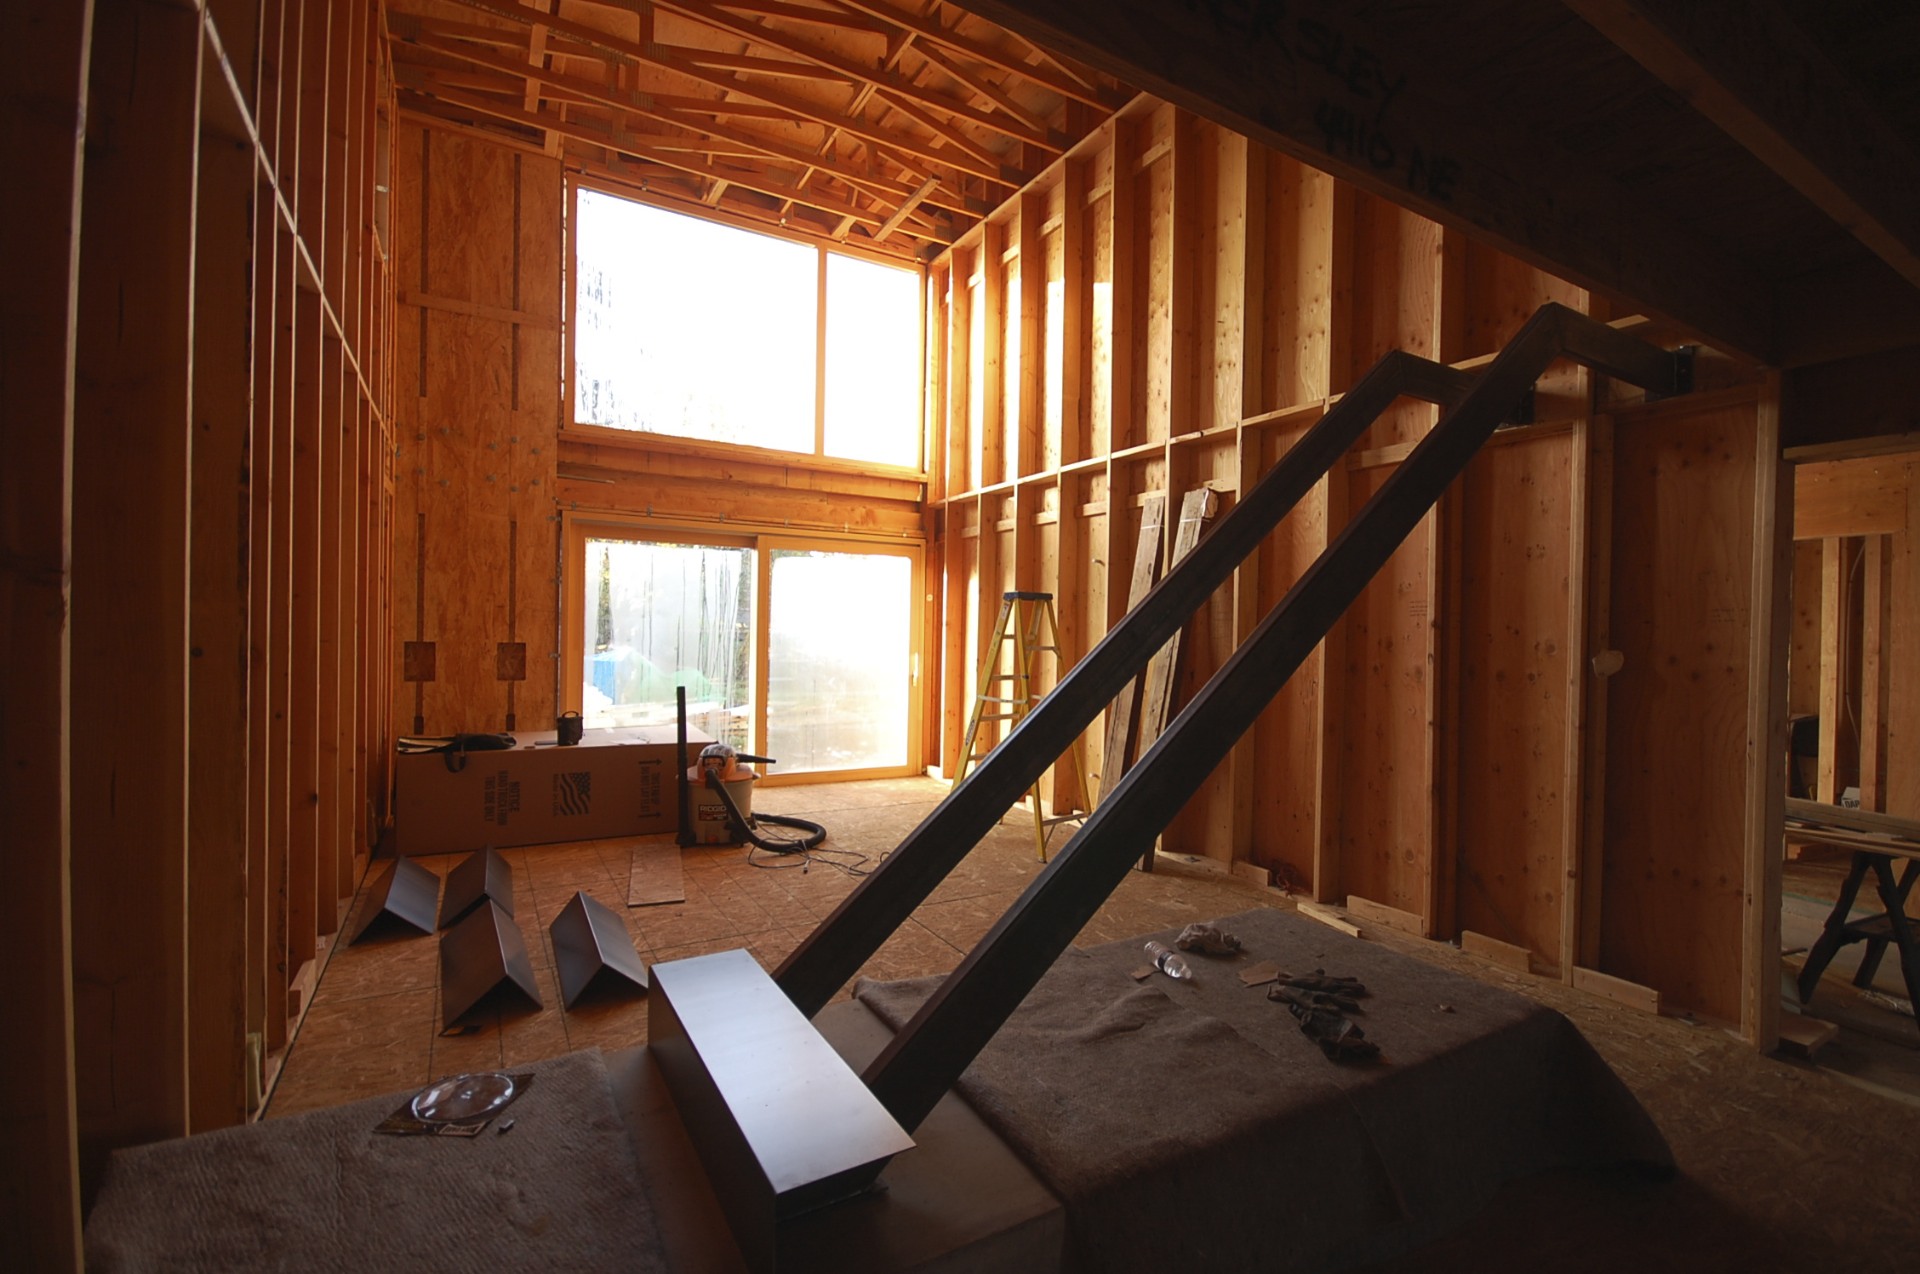

everything is fit up and welded in place

guardrail is 1" sq tube steel verticals


steel will be left natural with all the signs of fabrication exposed

a clear coat will be applied at completion
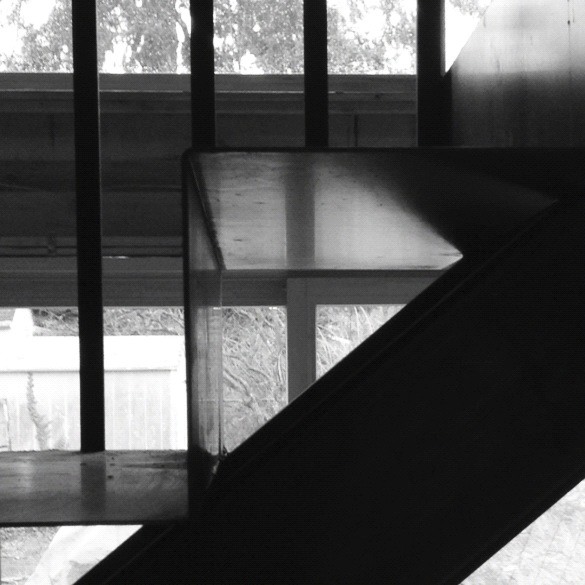
still more to go but we think it's coming along nicely.
thanks to alameda metal works for their fine work.
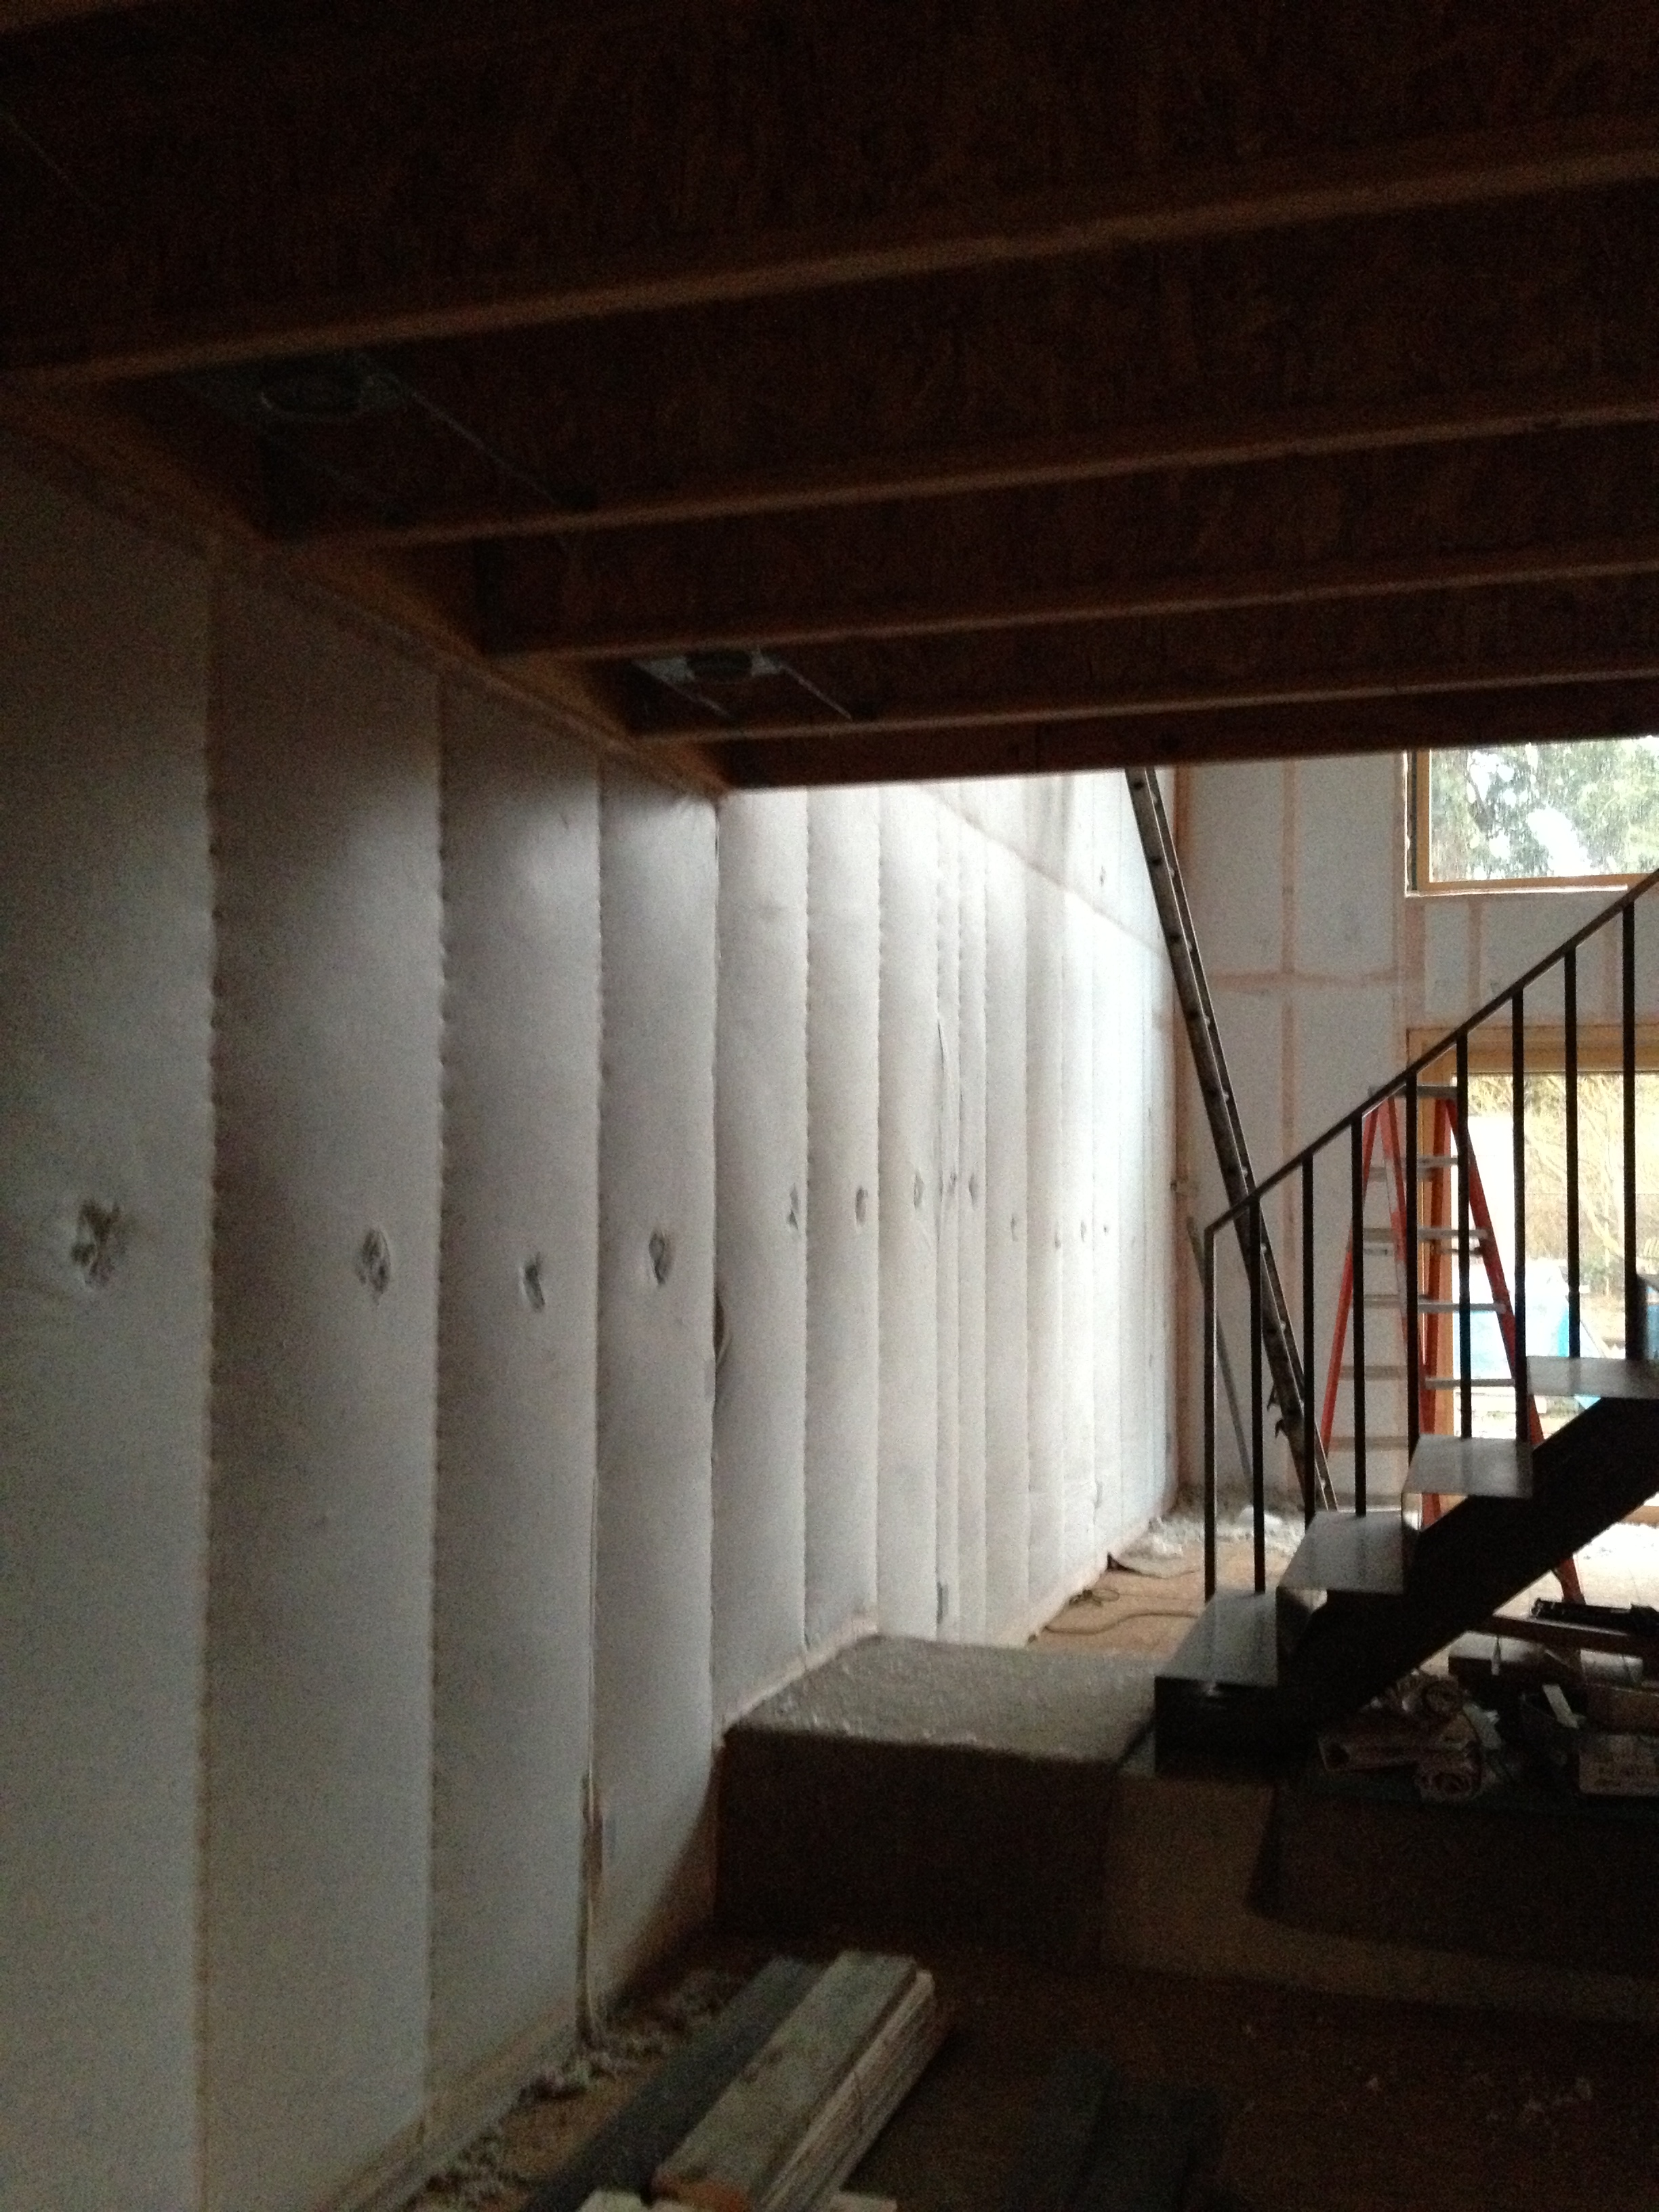
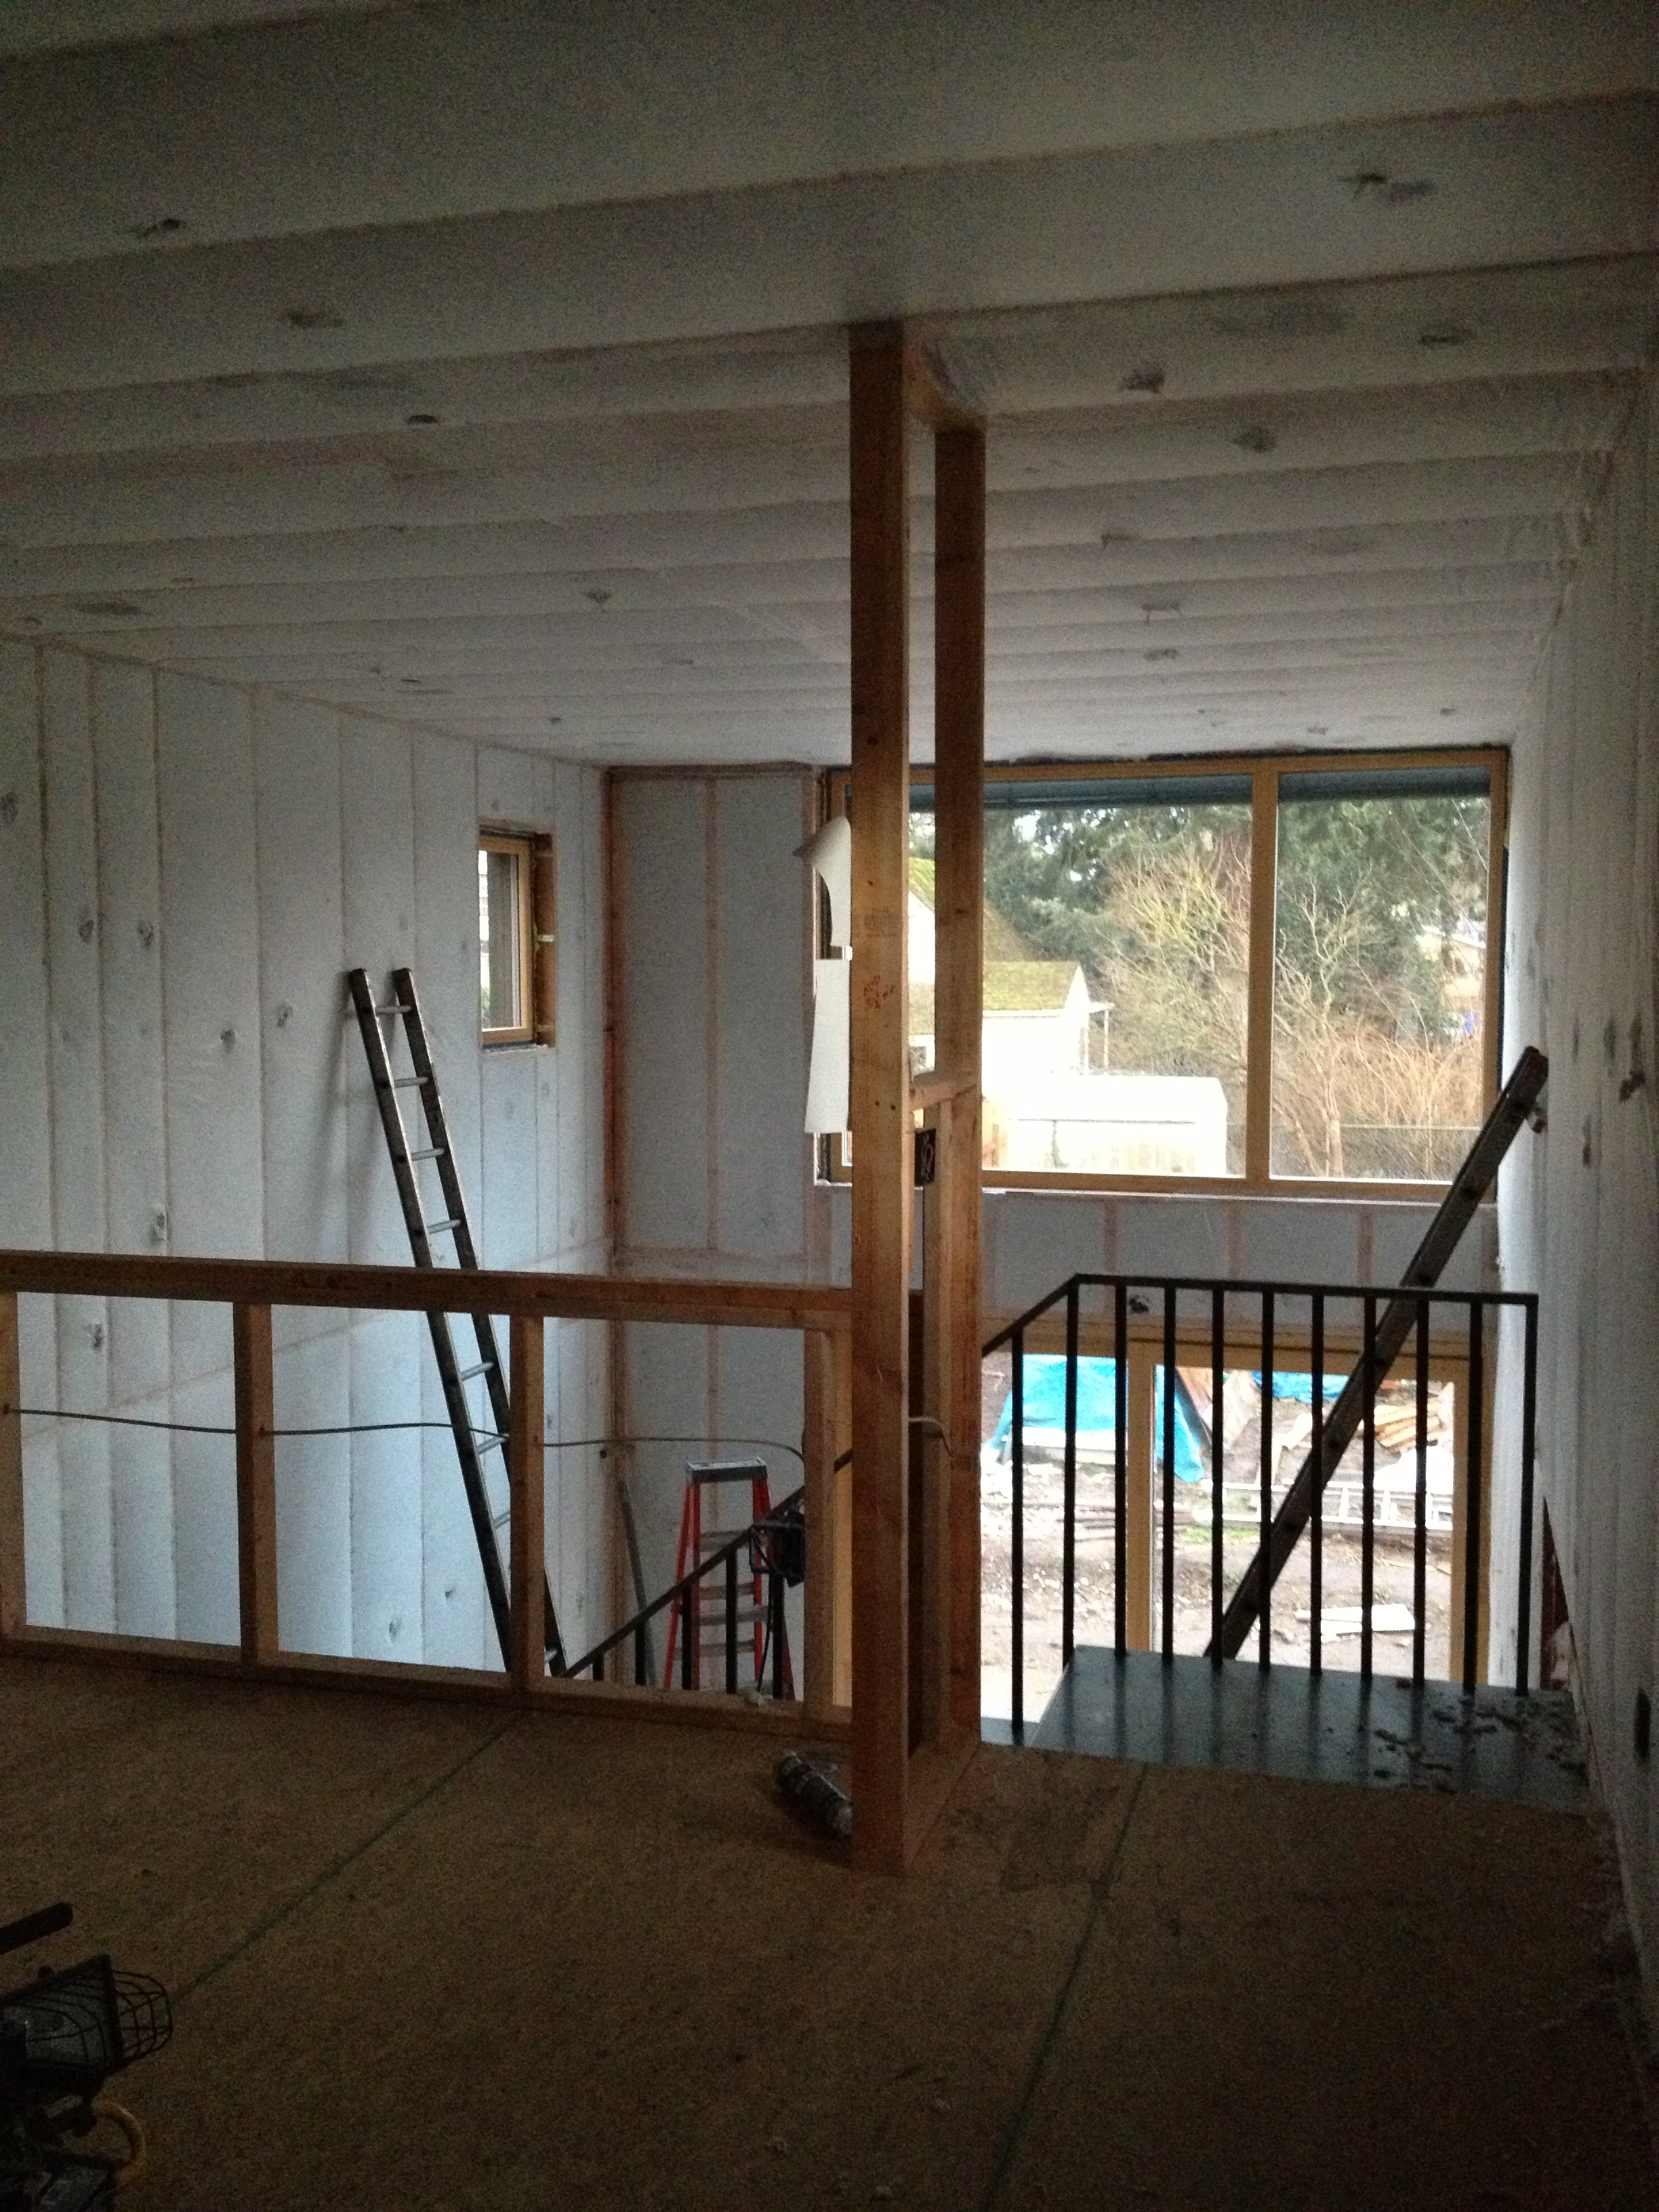
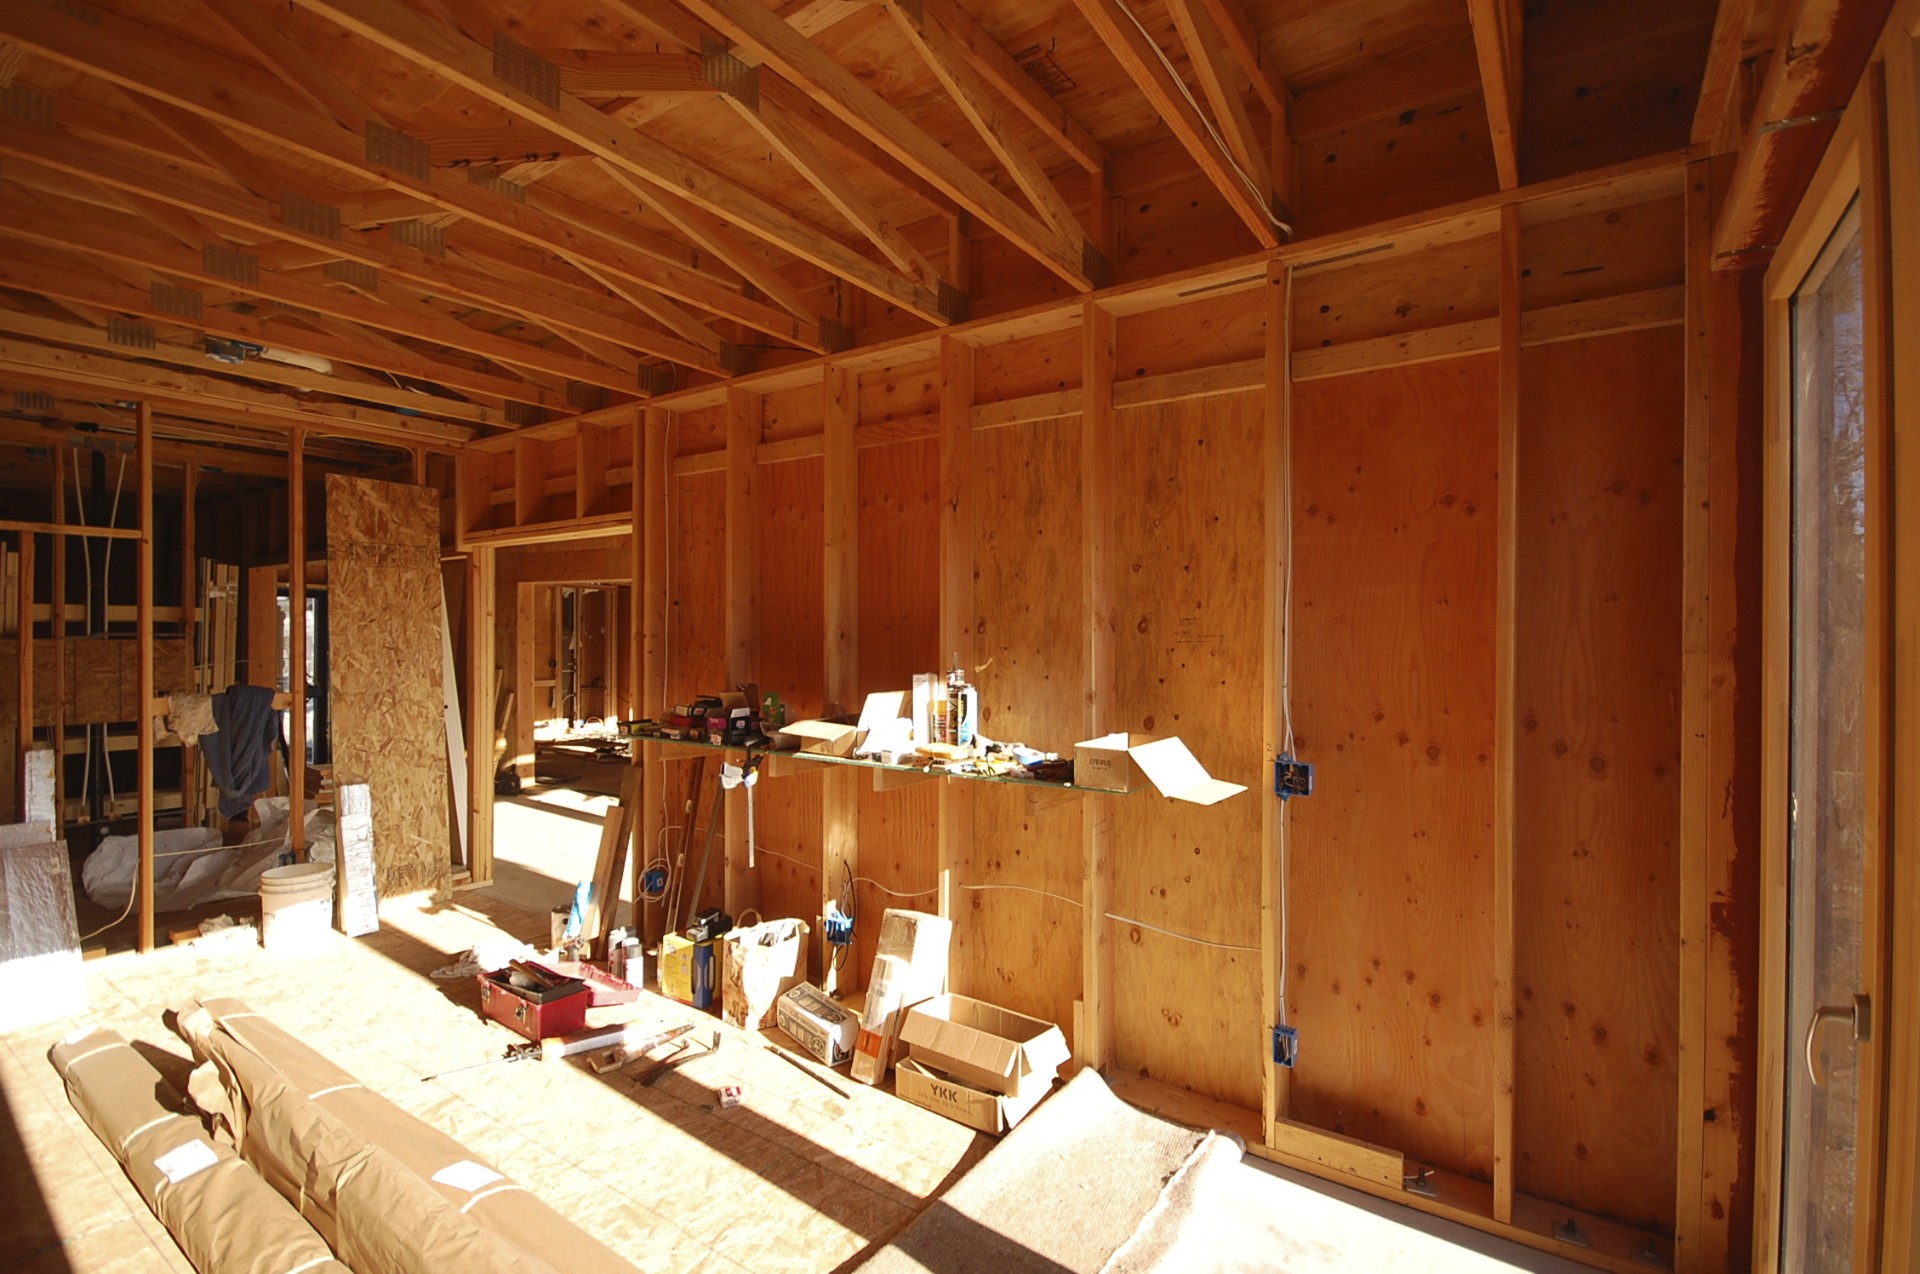
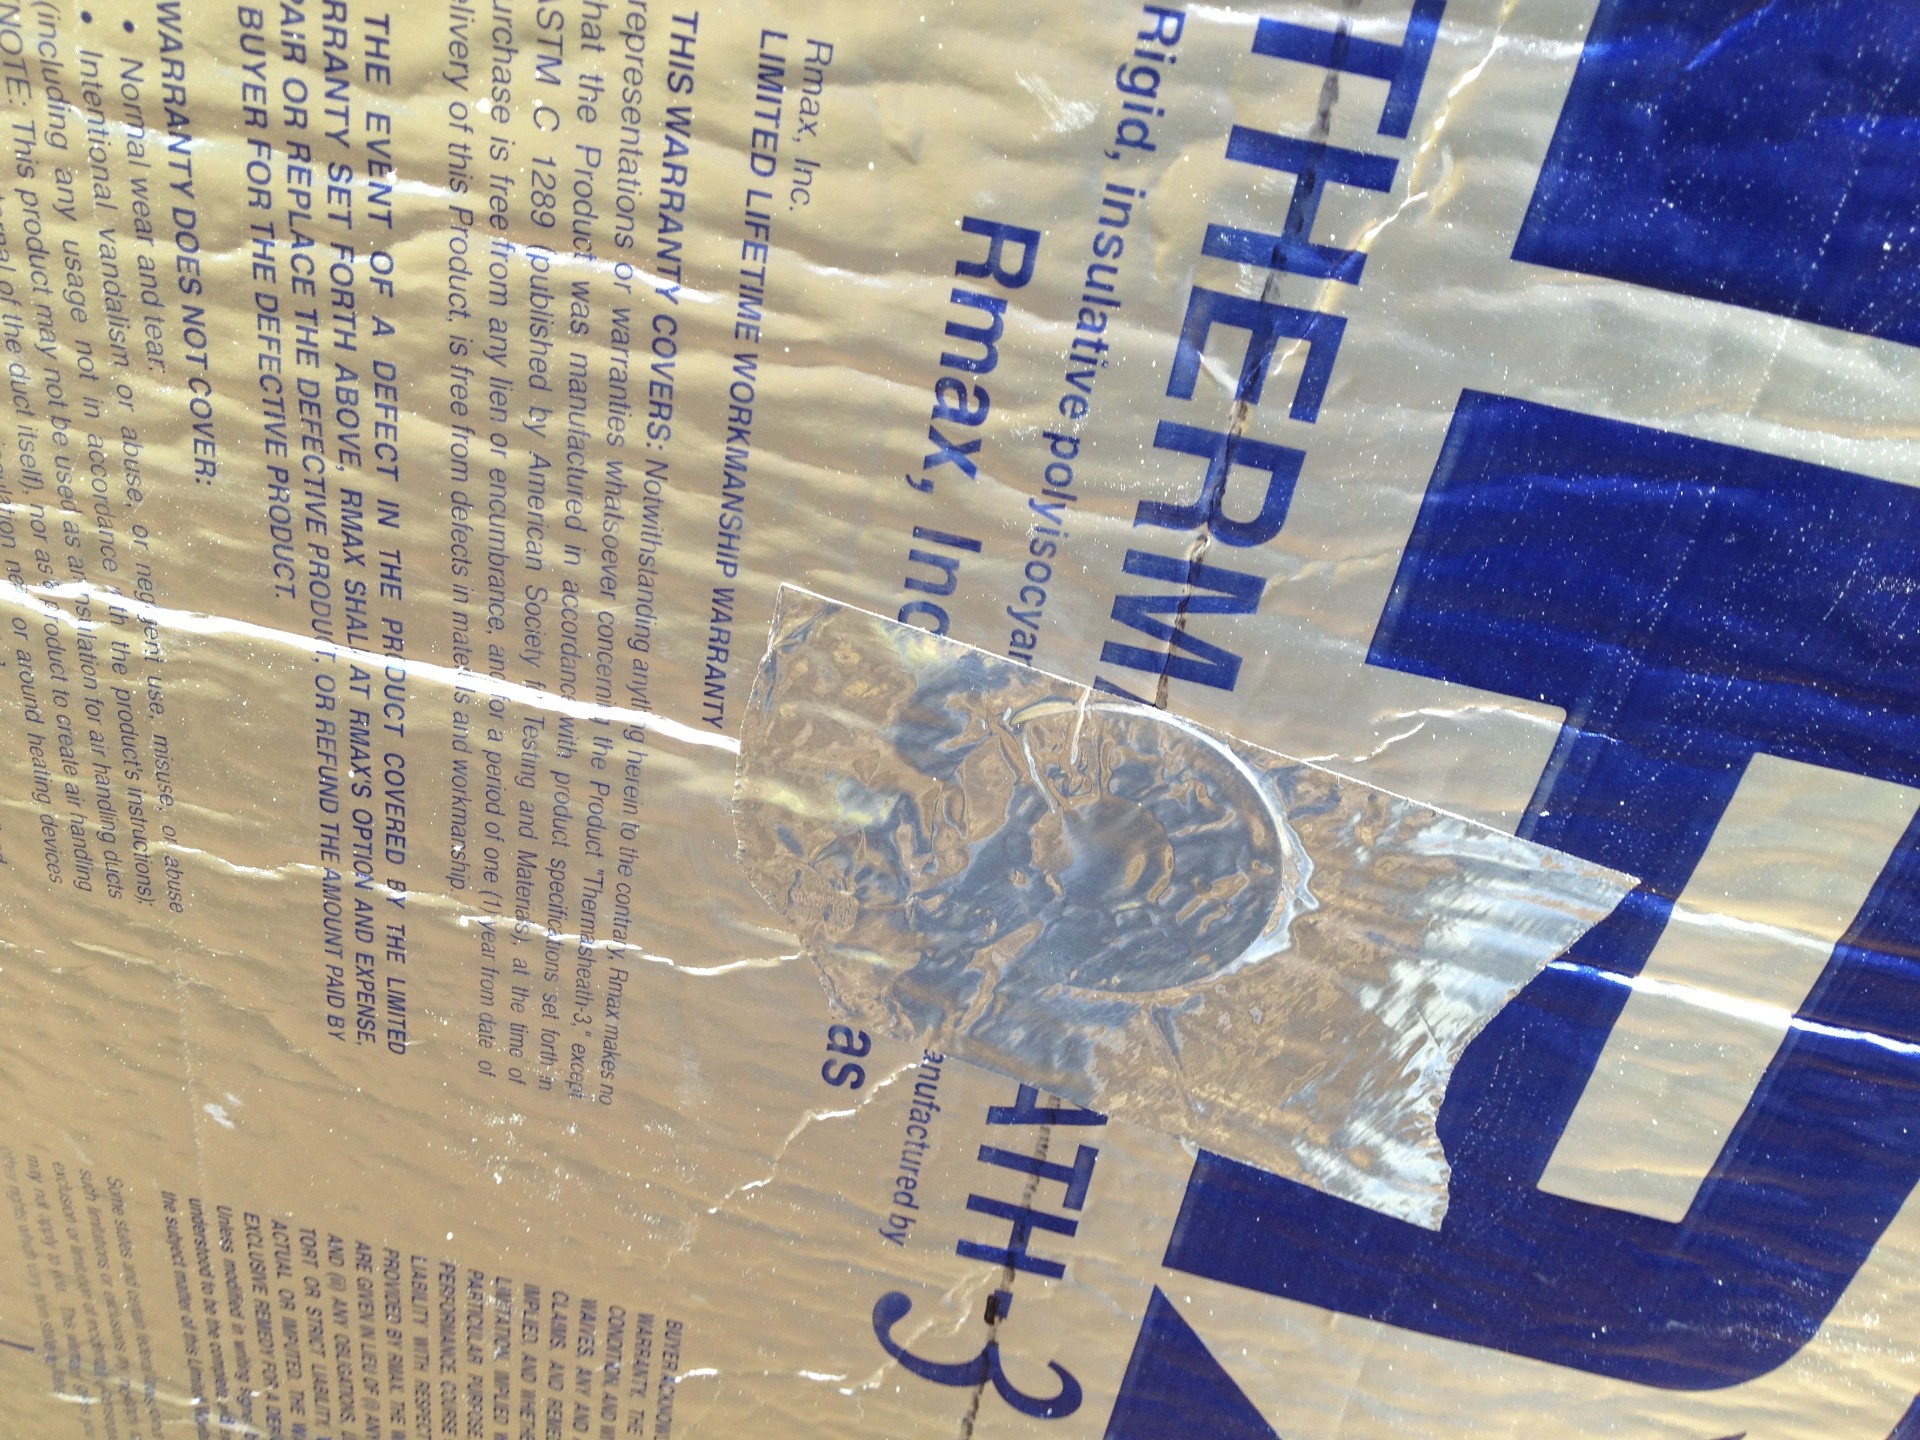
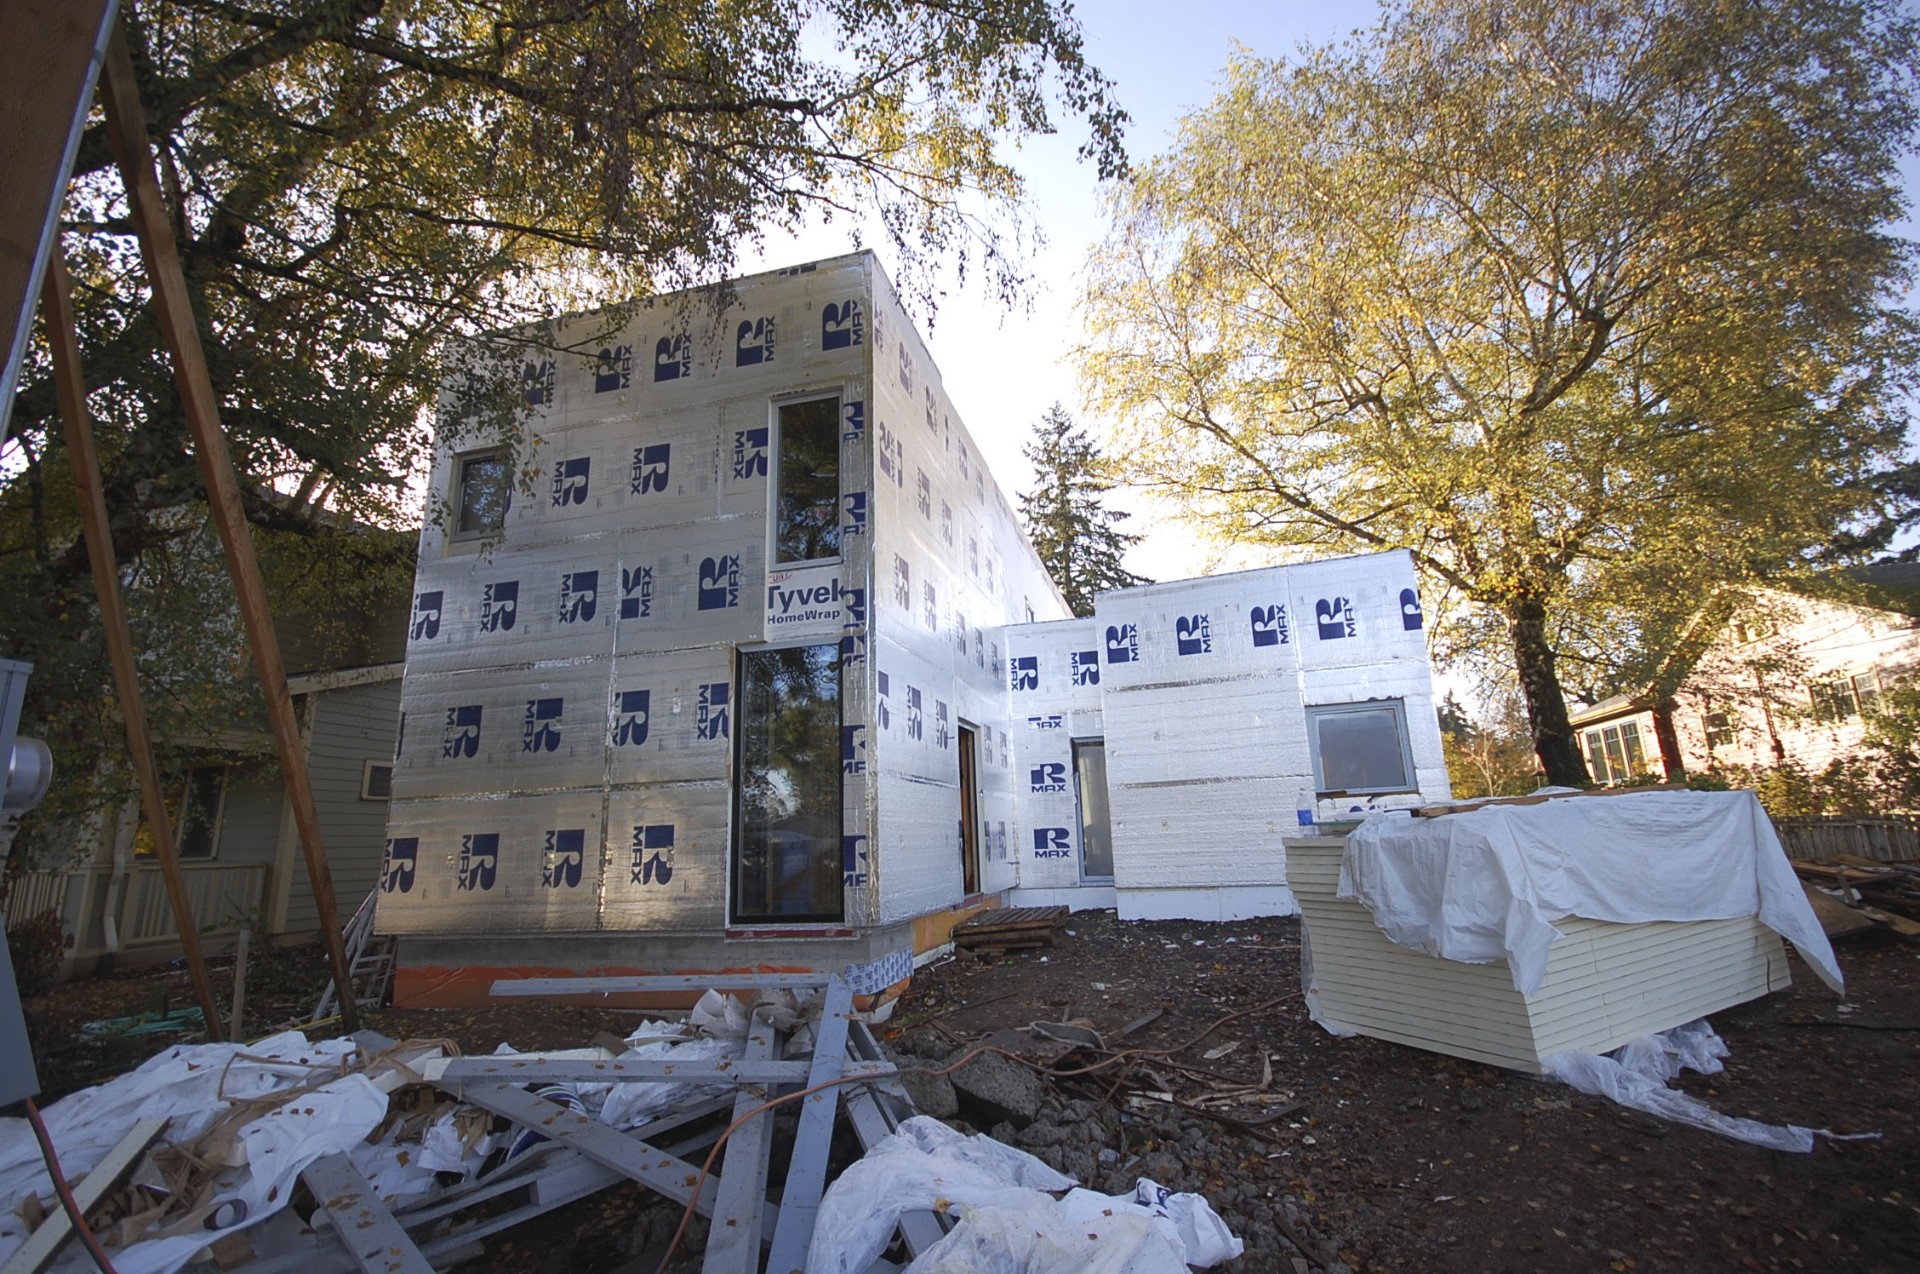
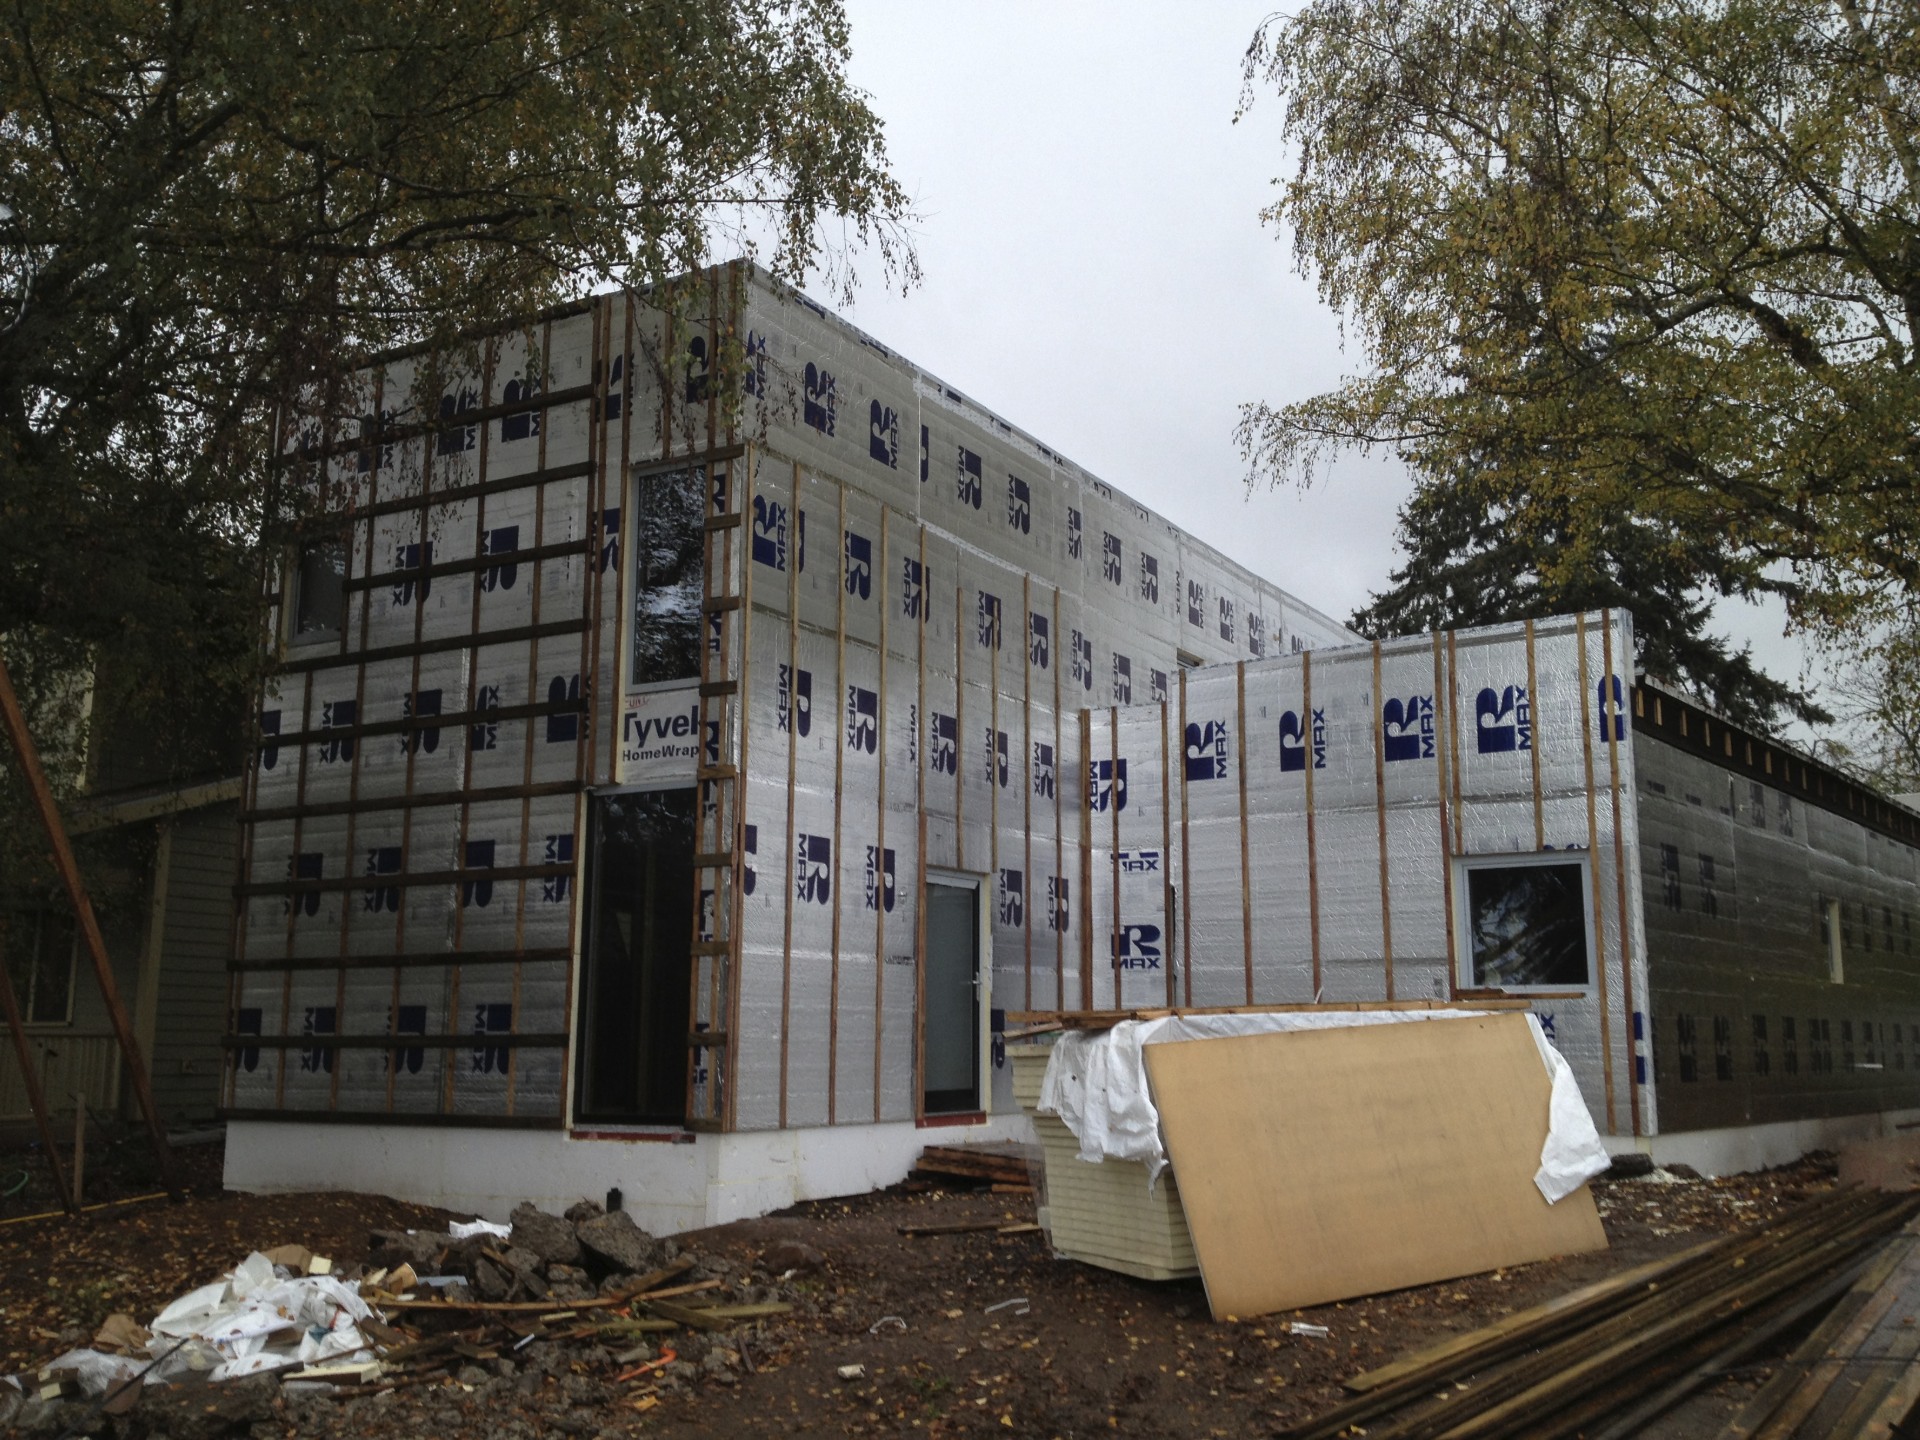
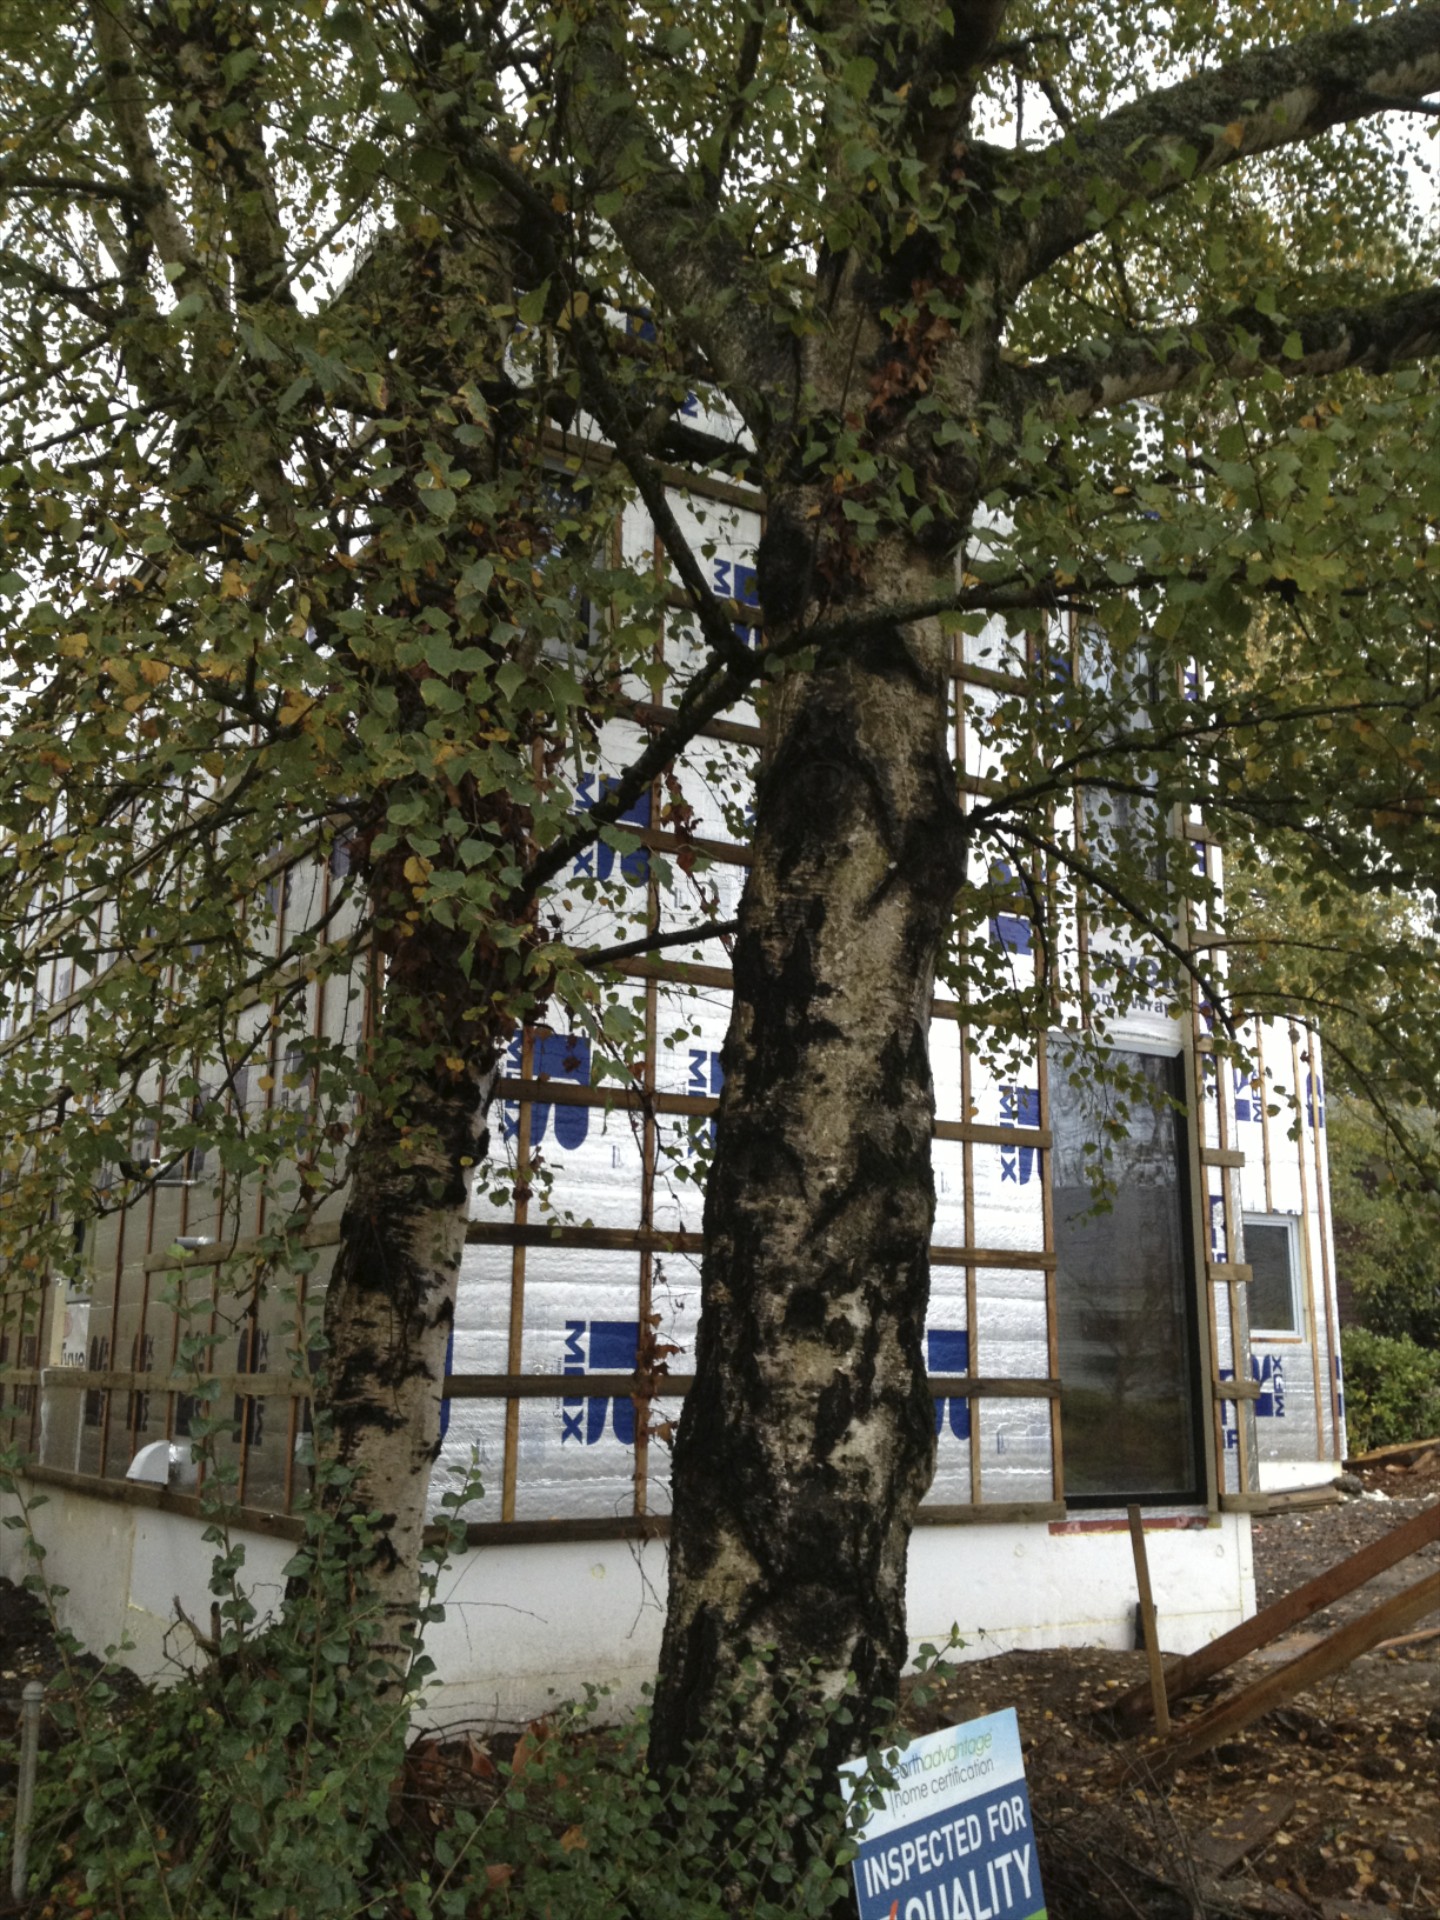
thermal bridge free exterior
next up on skidmore passivhaus is installing the outsulation on the walls along with the rainscreen furring.
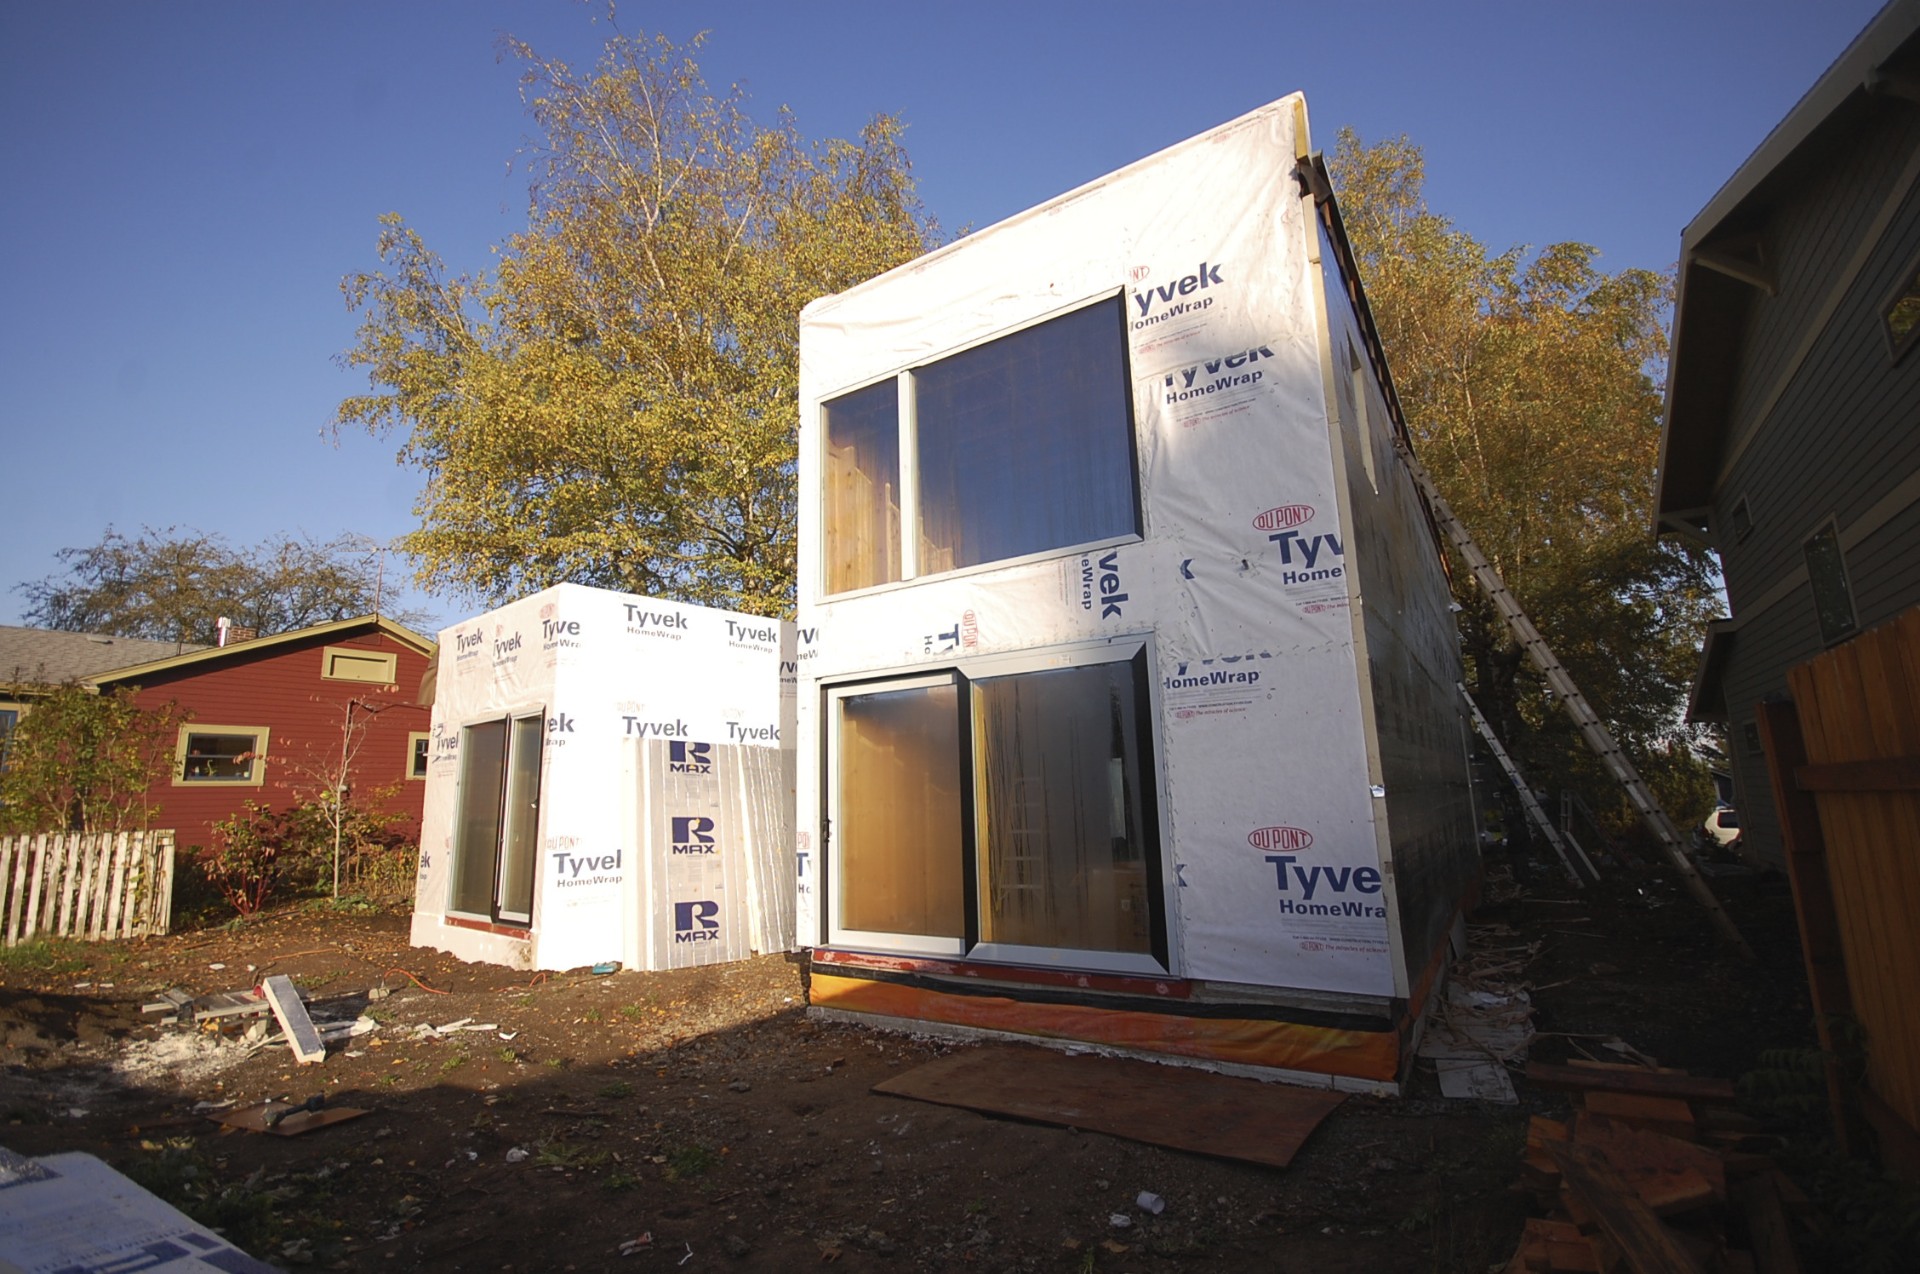
the plywood sheathing was first covered by a weather resistive barrier with metal head flashings at the windows and doors.
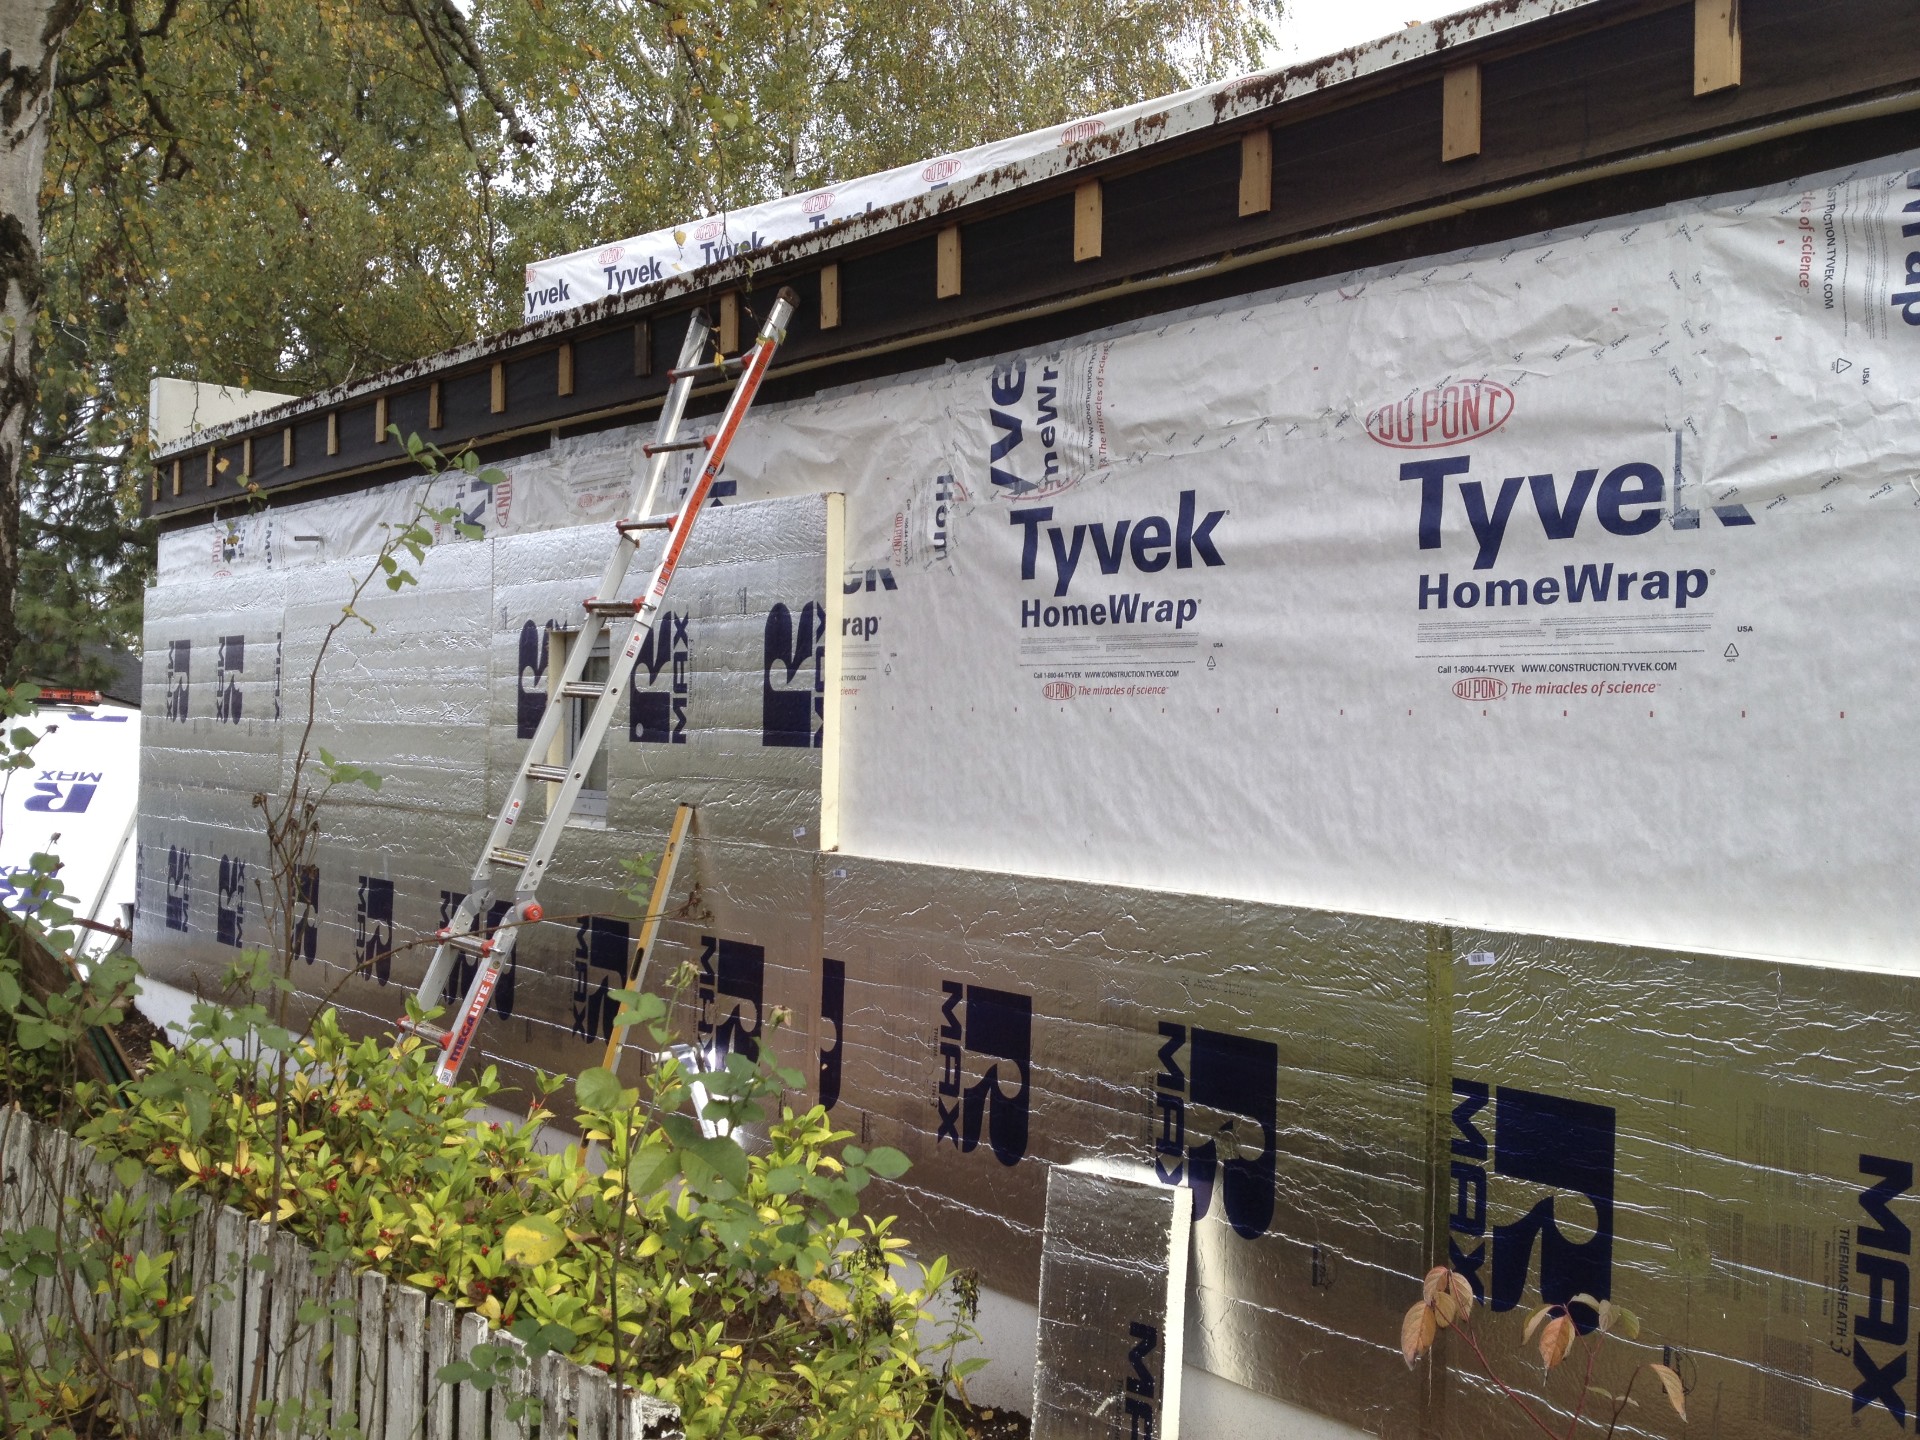
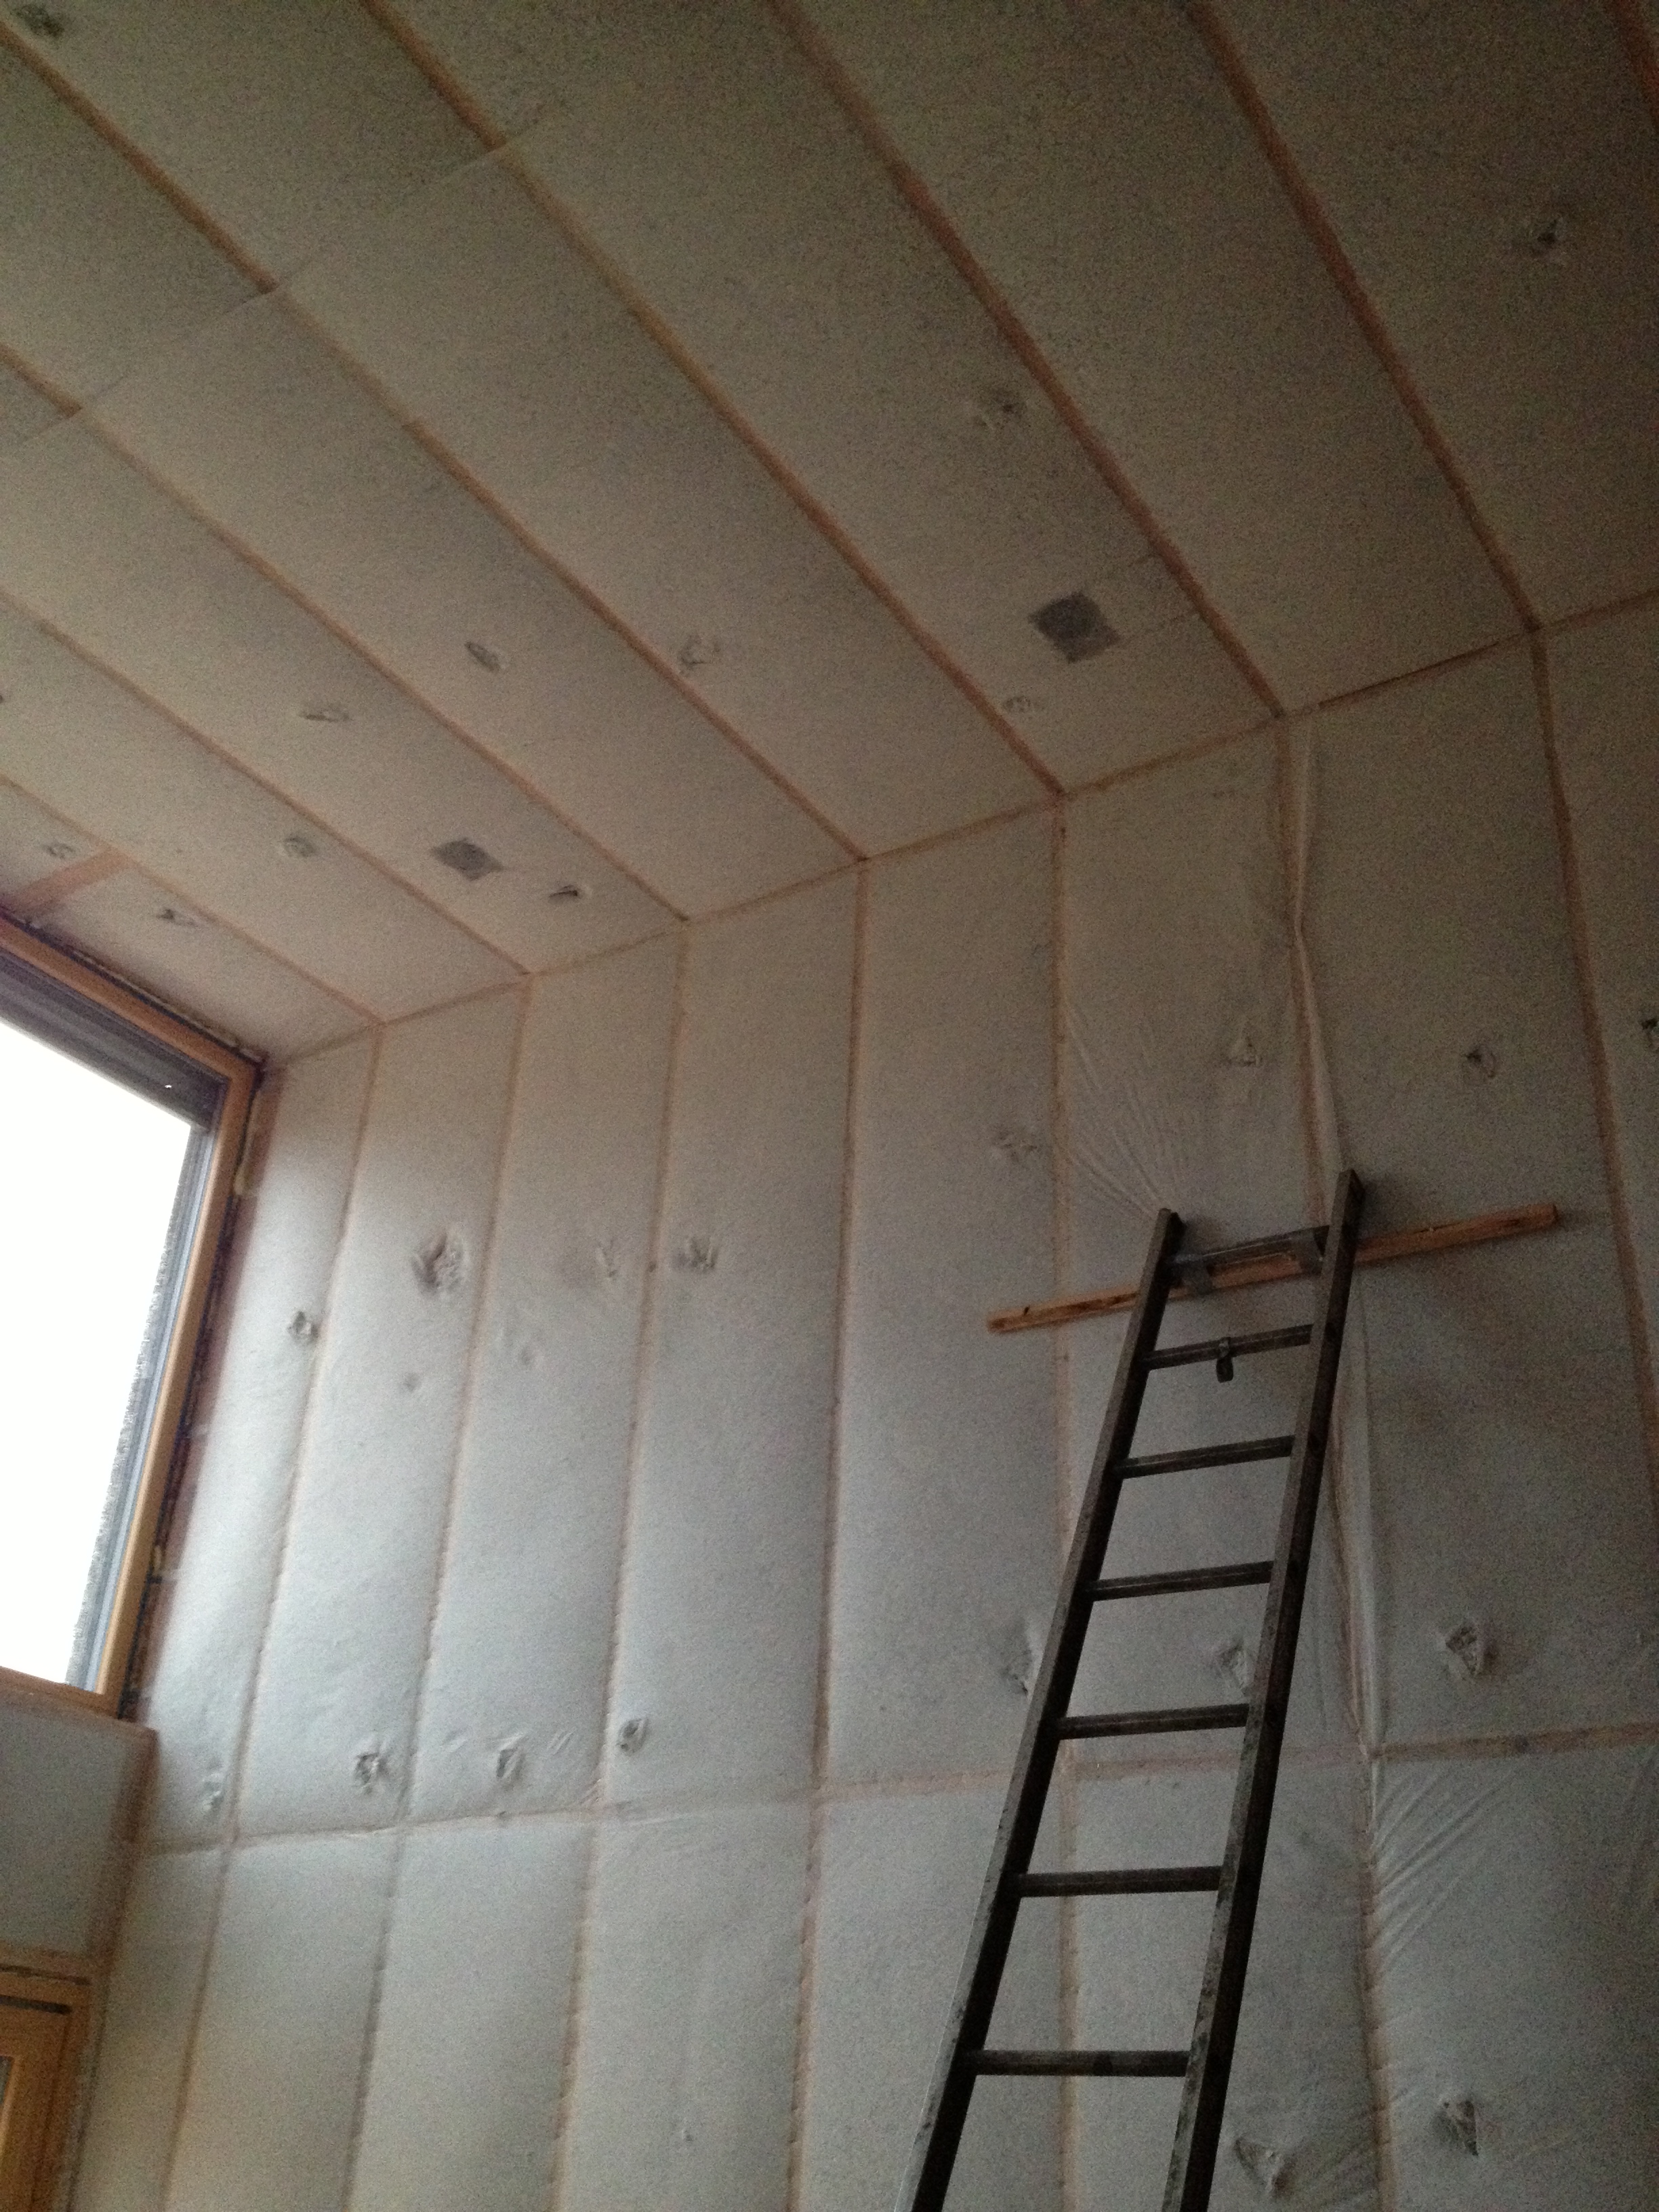
most walls get a layer of 3" poly-iso, while the south wall will get 4" to match the recessed pocket for the exterior shades.
2 screws (with plastic washer) per 4x8 sheet hold it in place until the furring strips are installed.
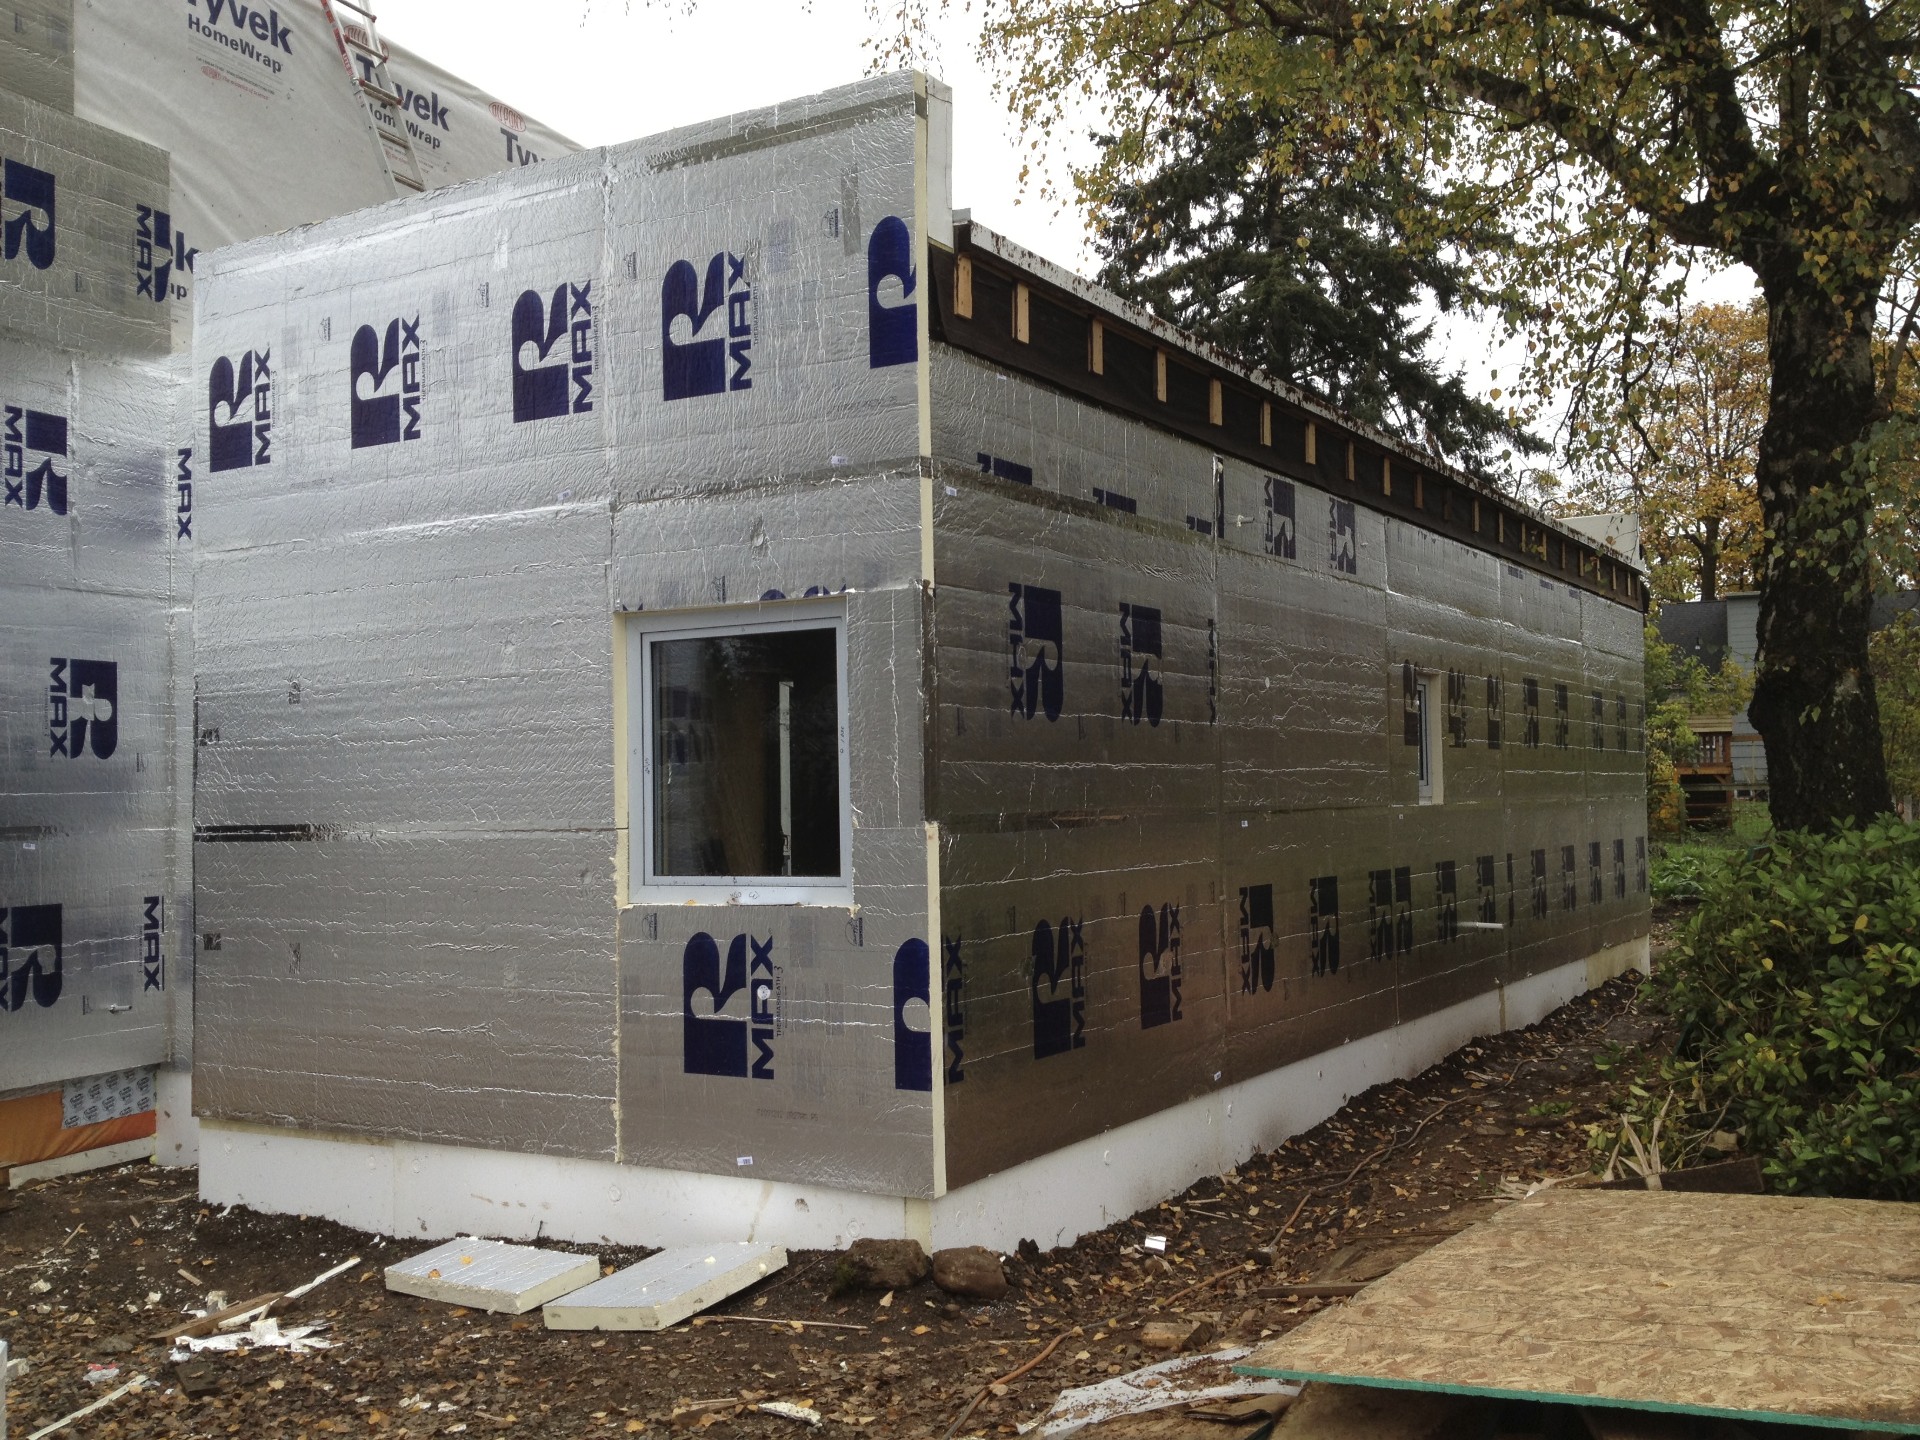
all seams and fasteners are taped. the face of the insulation is treated as a second weather resistive barrier.
additional flashings at all doors and windows will be taped to the insulation as the wood trim is installed.
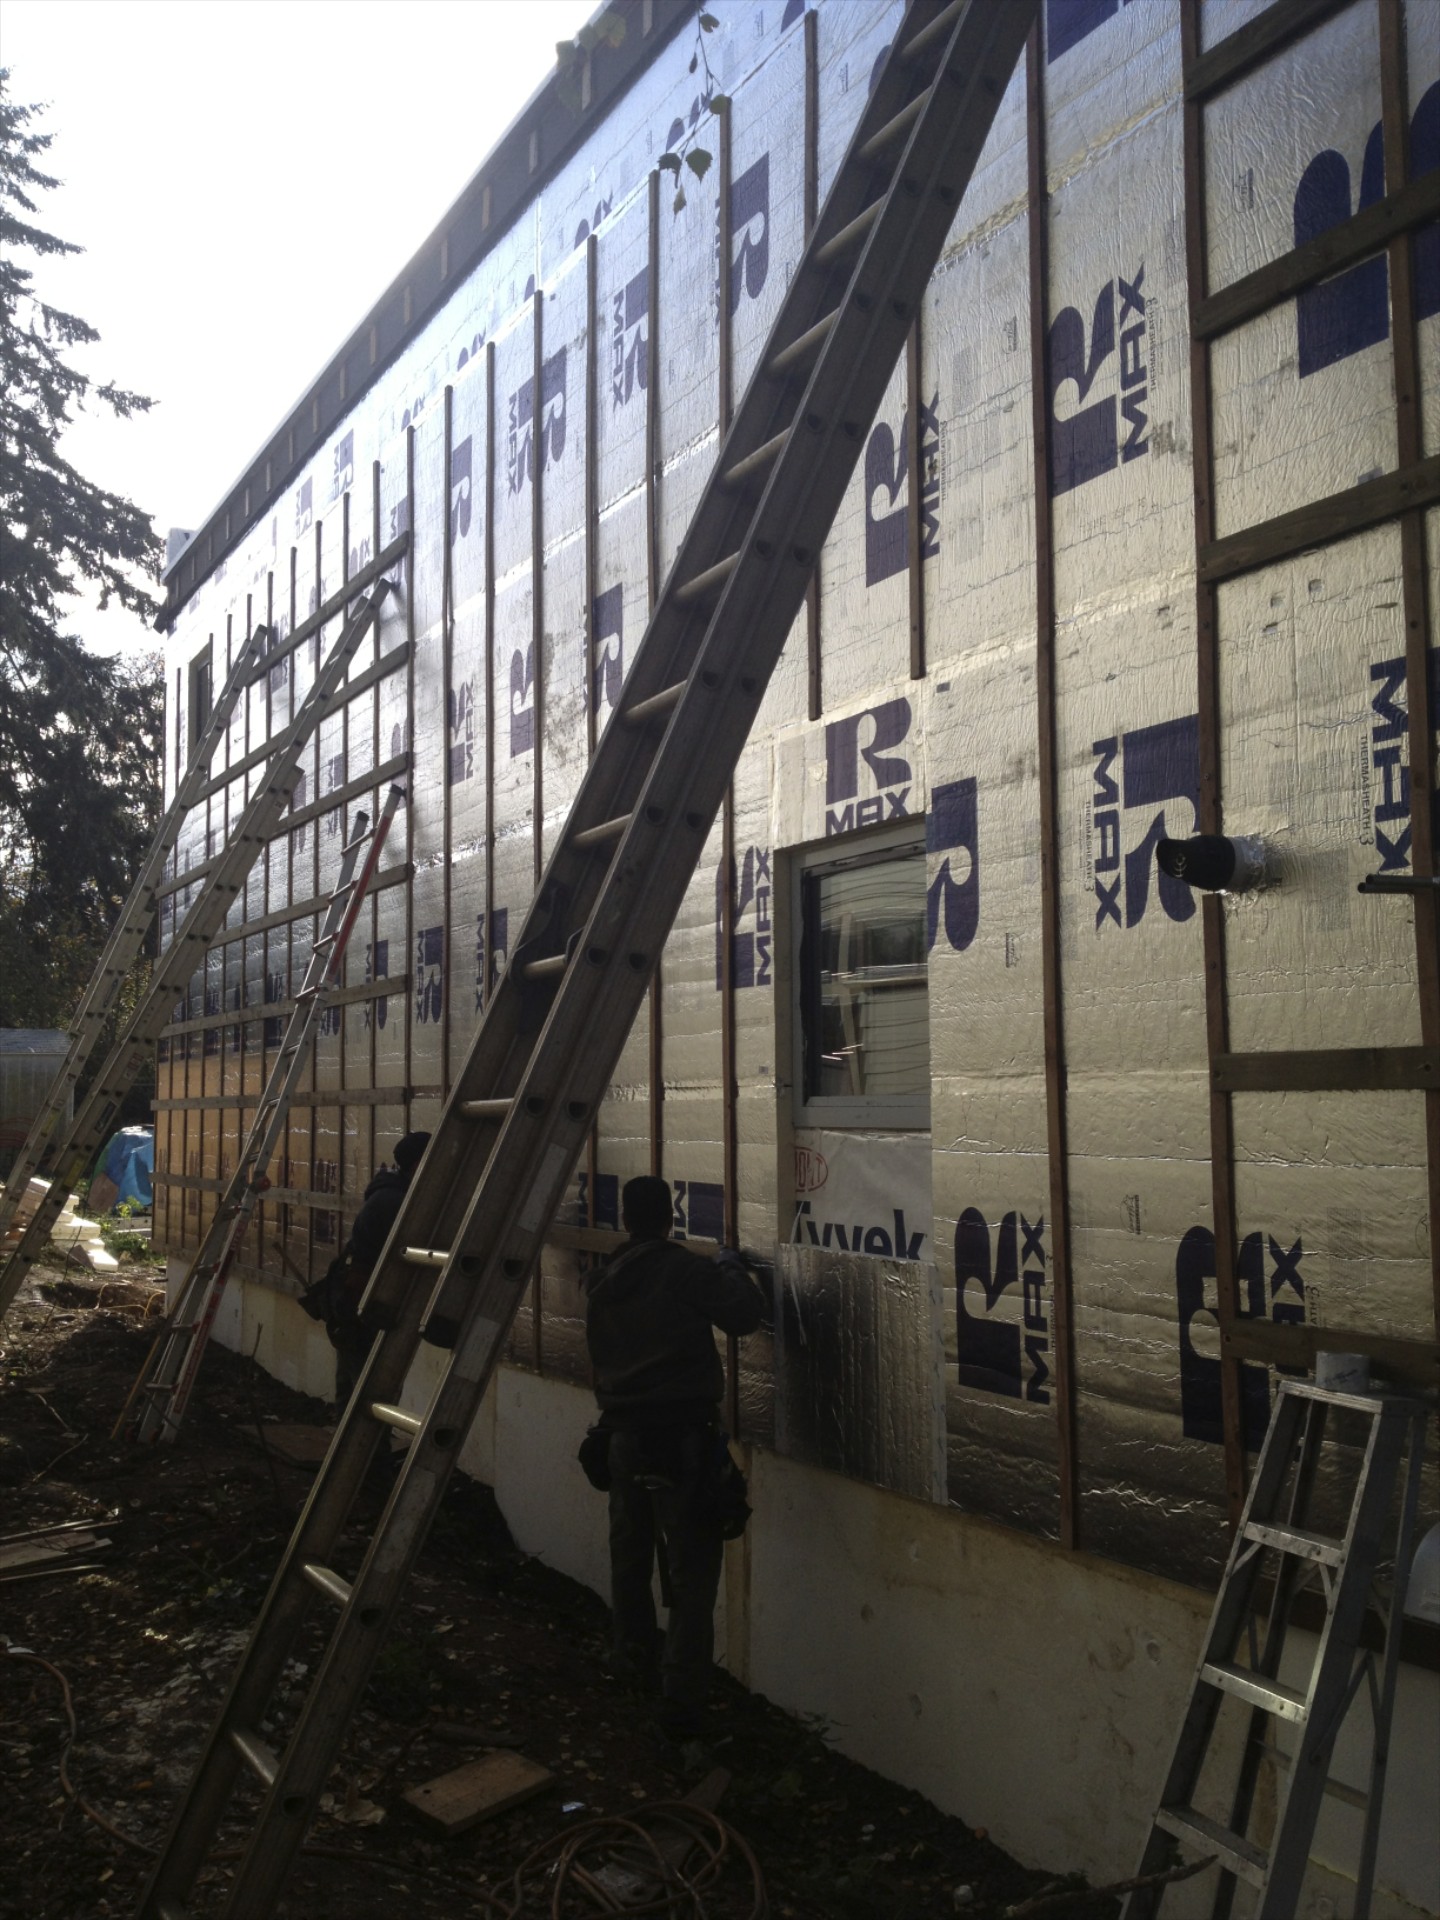
1/2" x 2" pt plywood furring strips run vertically to create the drainage plane. they are held in place by just a few fasteners until the next layer is installed.
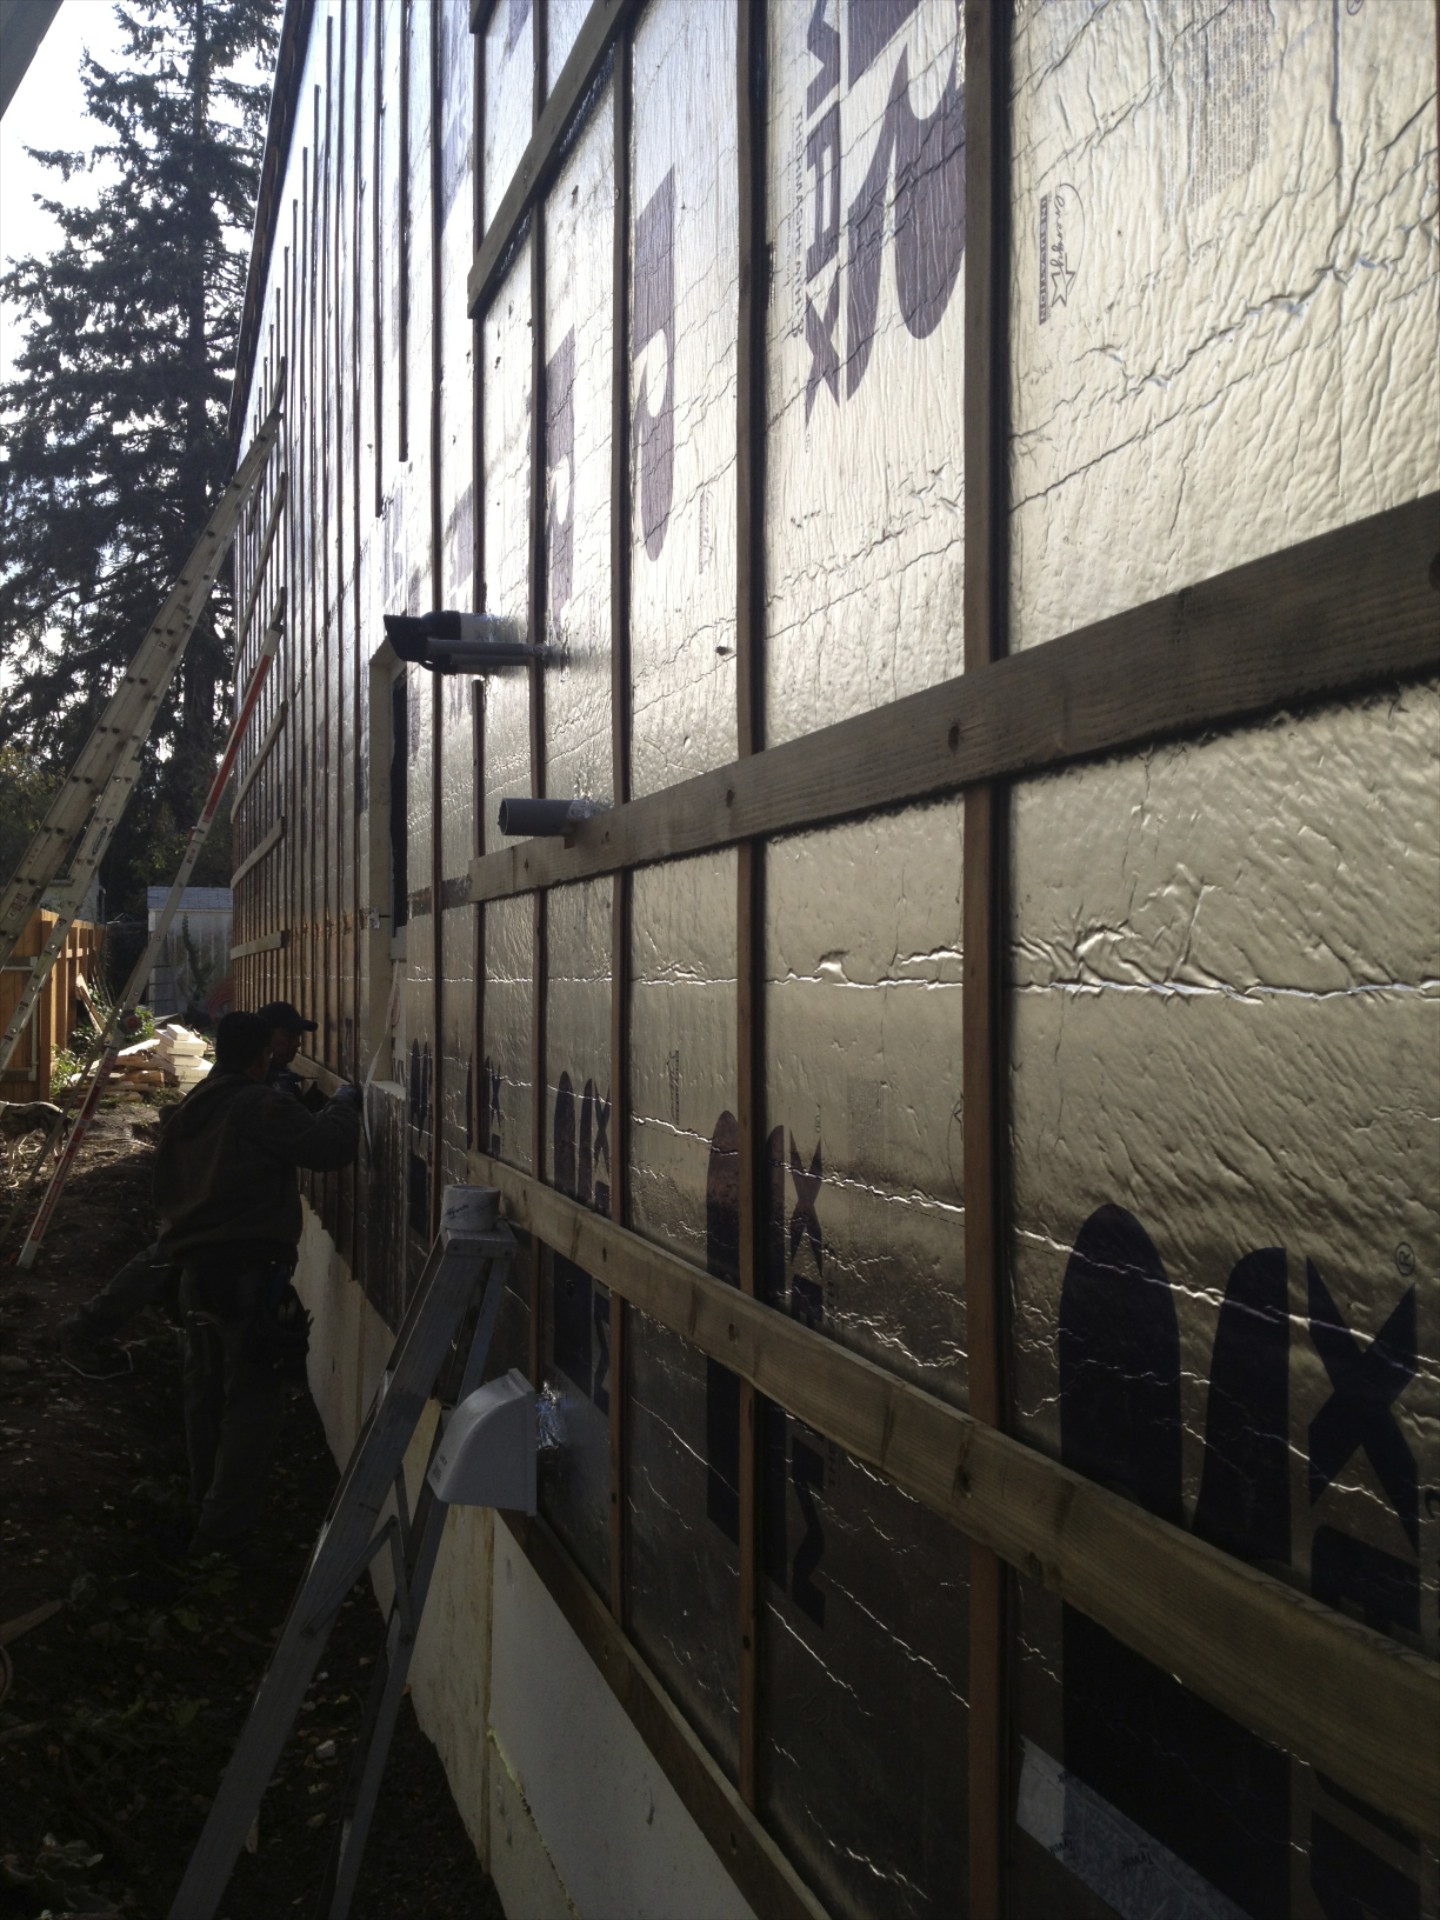
since we are using vertical siding, a second layer of furring runs horizontally. we used pt 1x4 as a solid nailing base for the siding.
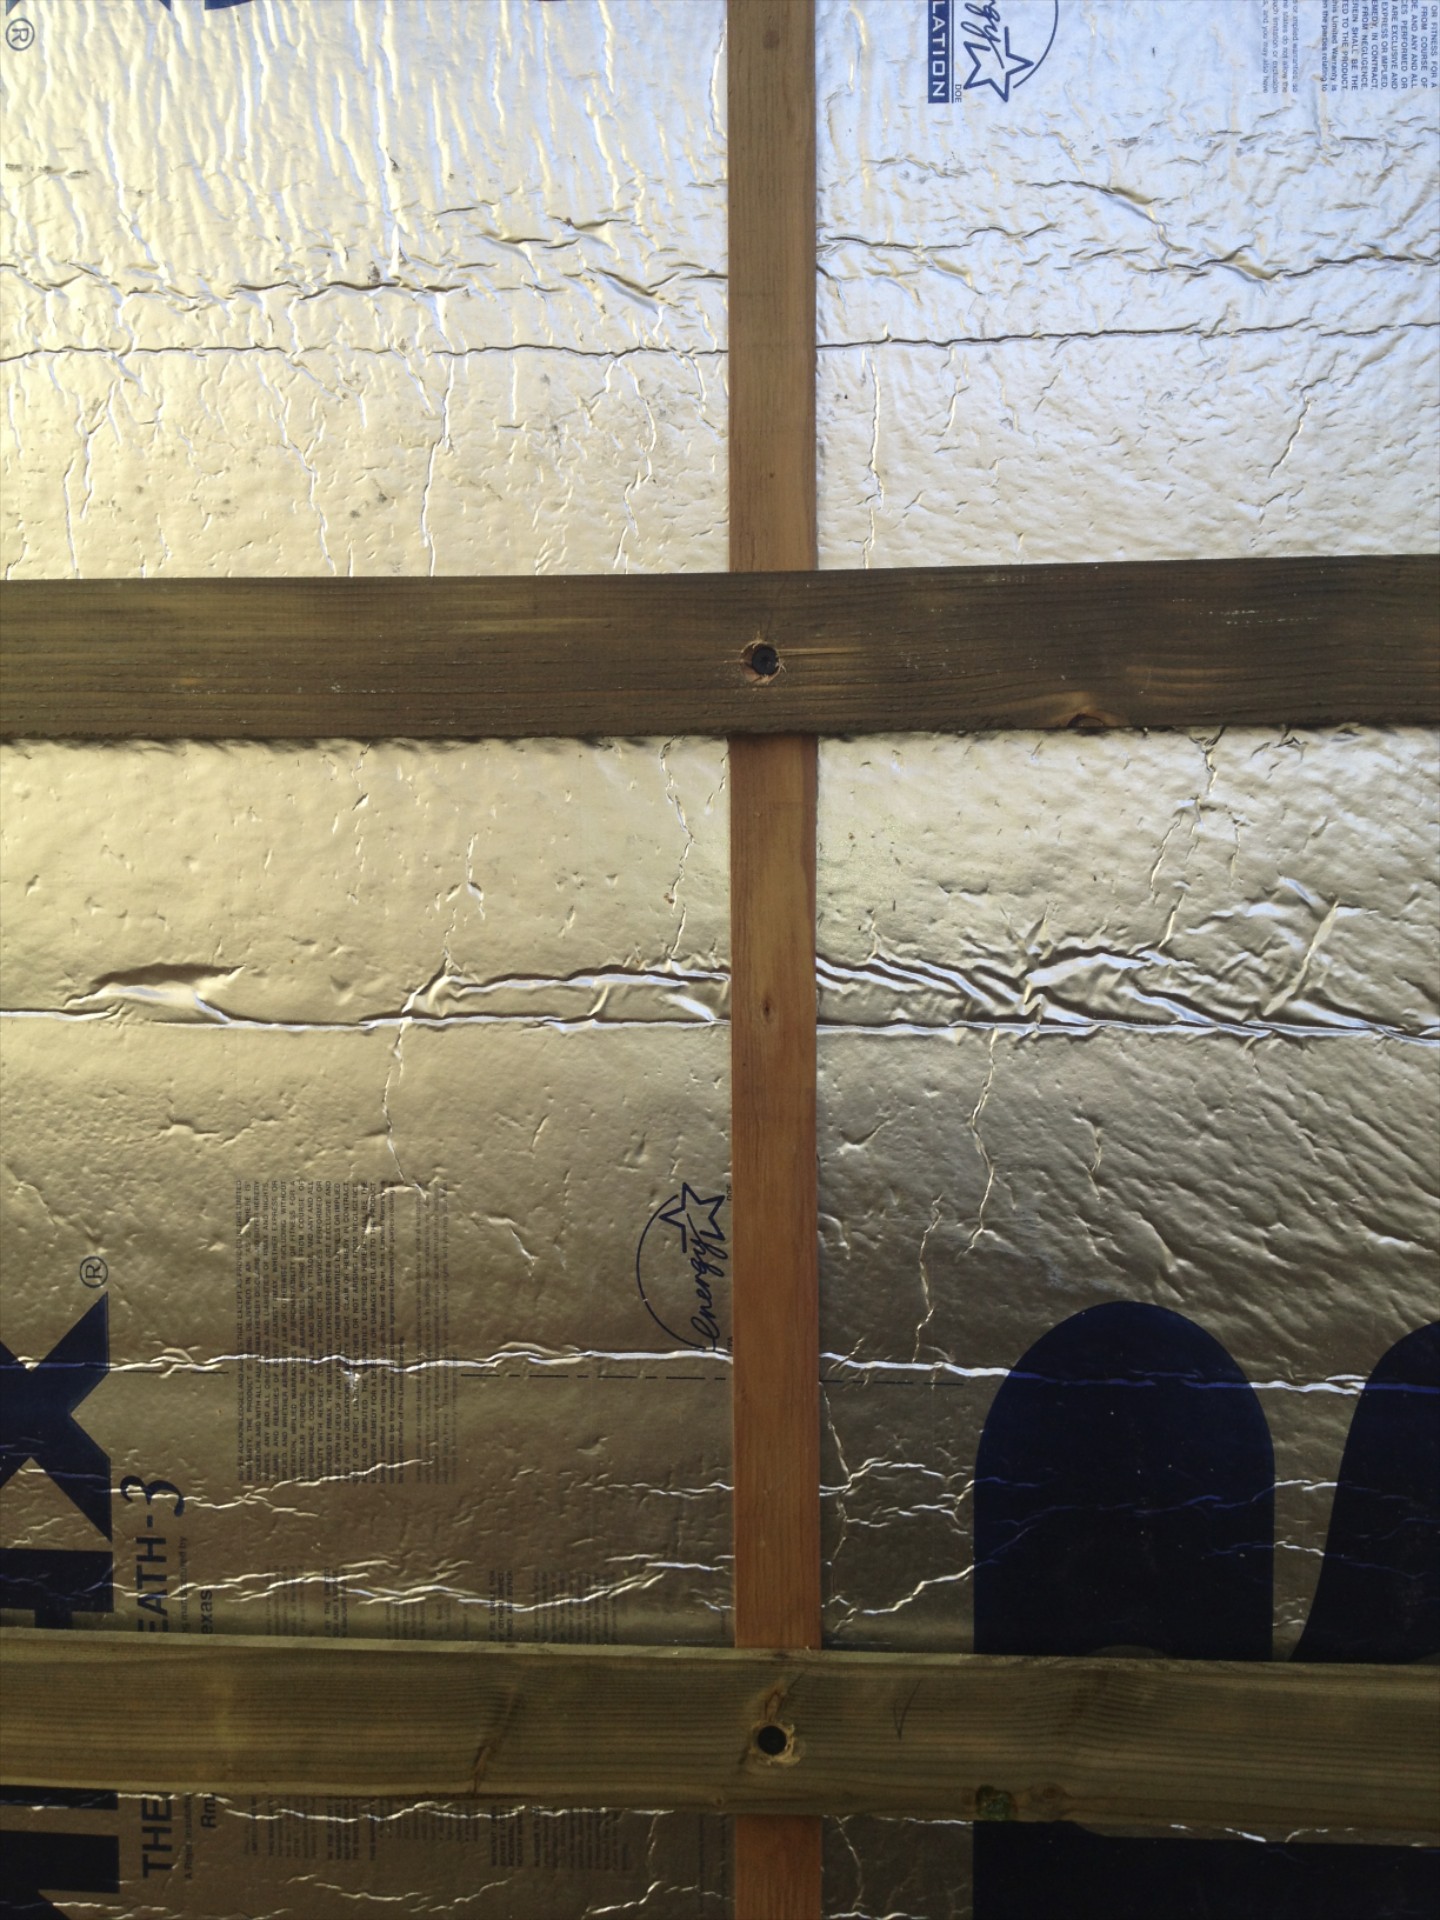
long fasteners secure the second layer of furring strips running horizontally through the foam to the studs. the straightforward framing layout makes the studs much easier to locate.
keep in mind that long fasteners get expensive. we settled on grabber #10 x 6" square drive coated screws (from nw staple).
next up on the exterior is trimming windows and installing siding.
stop by again soon.
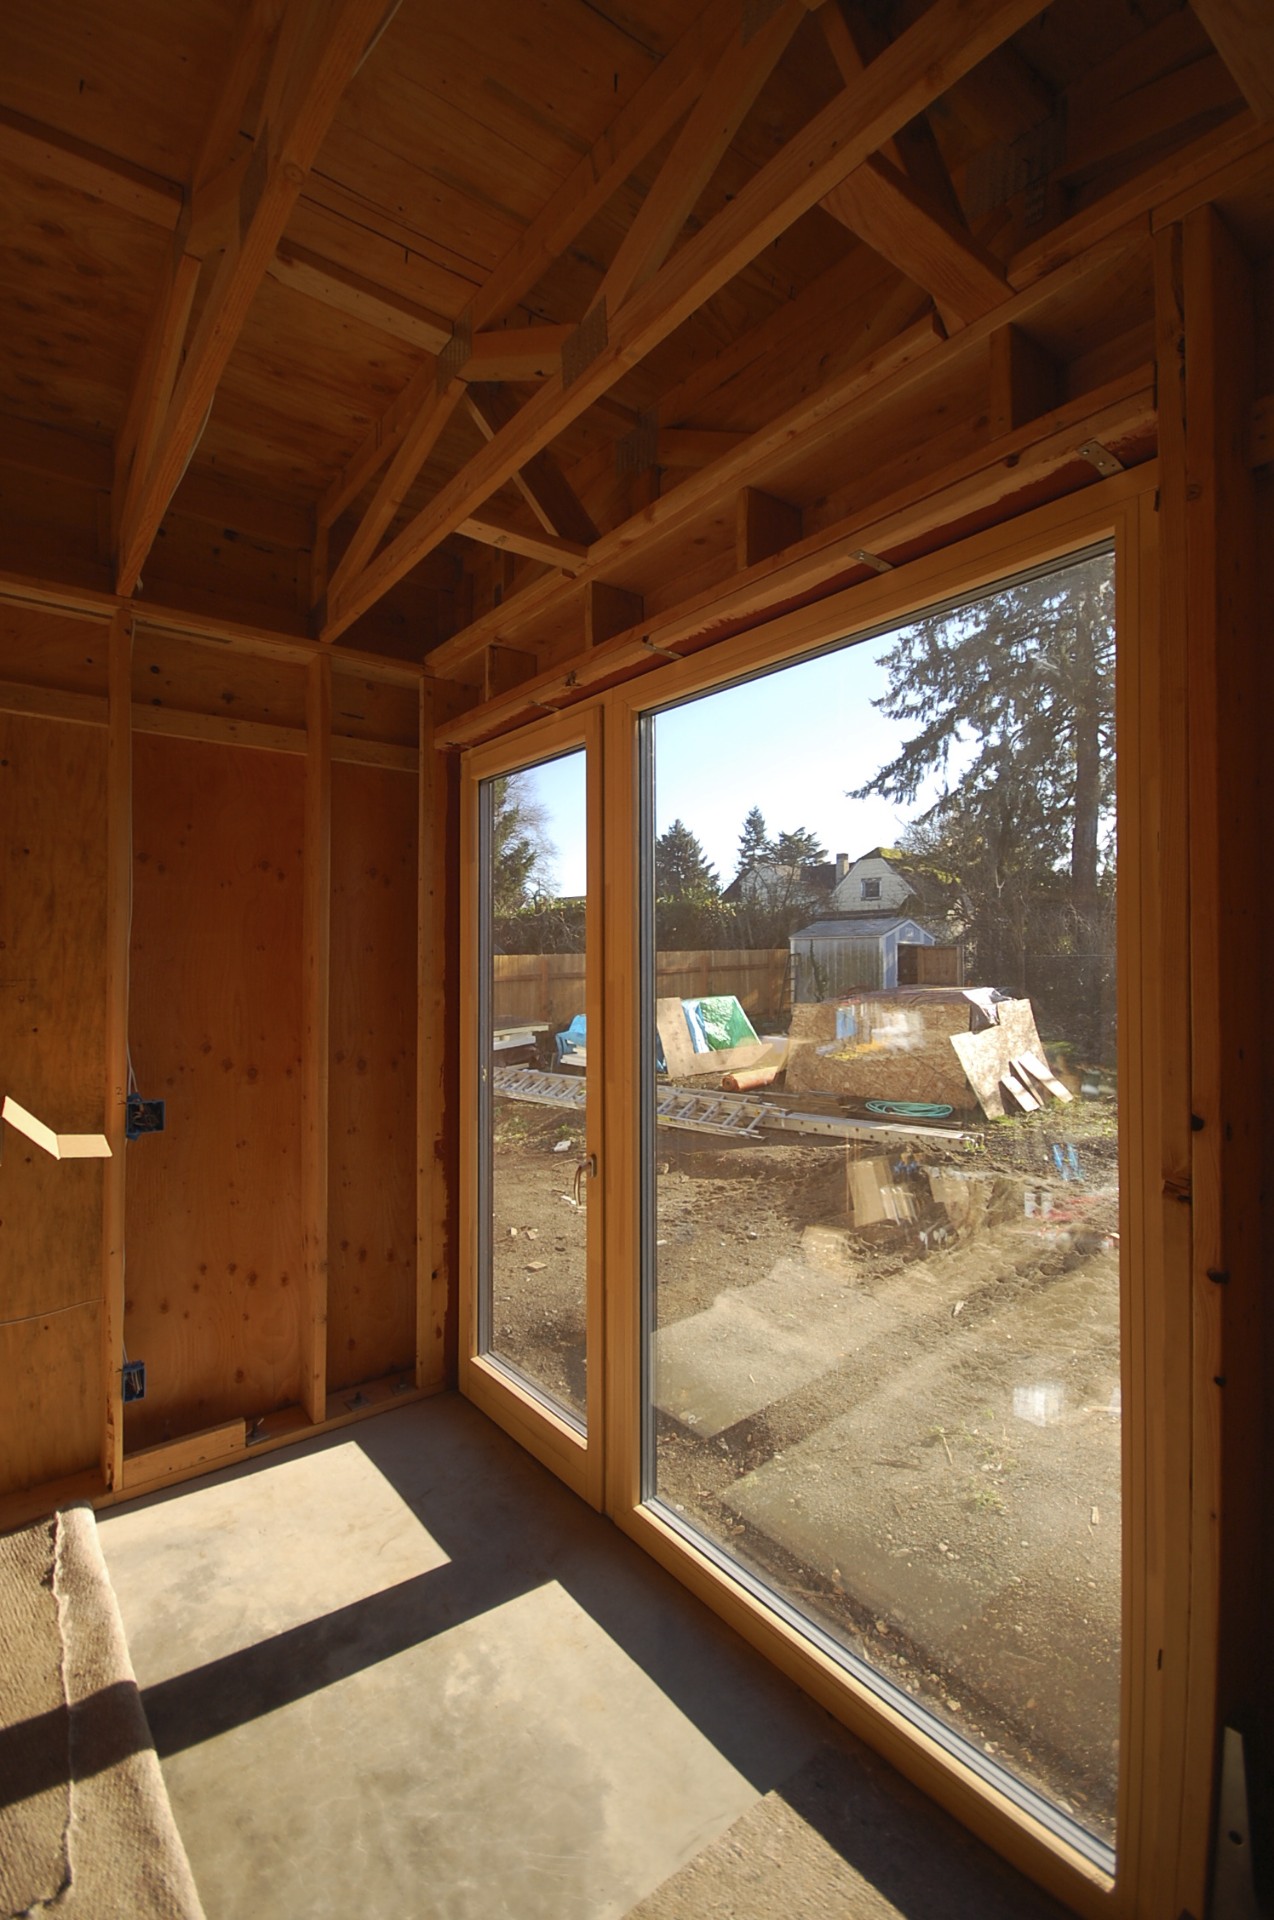
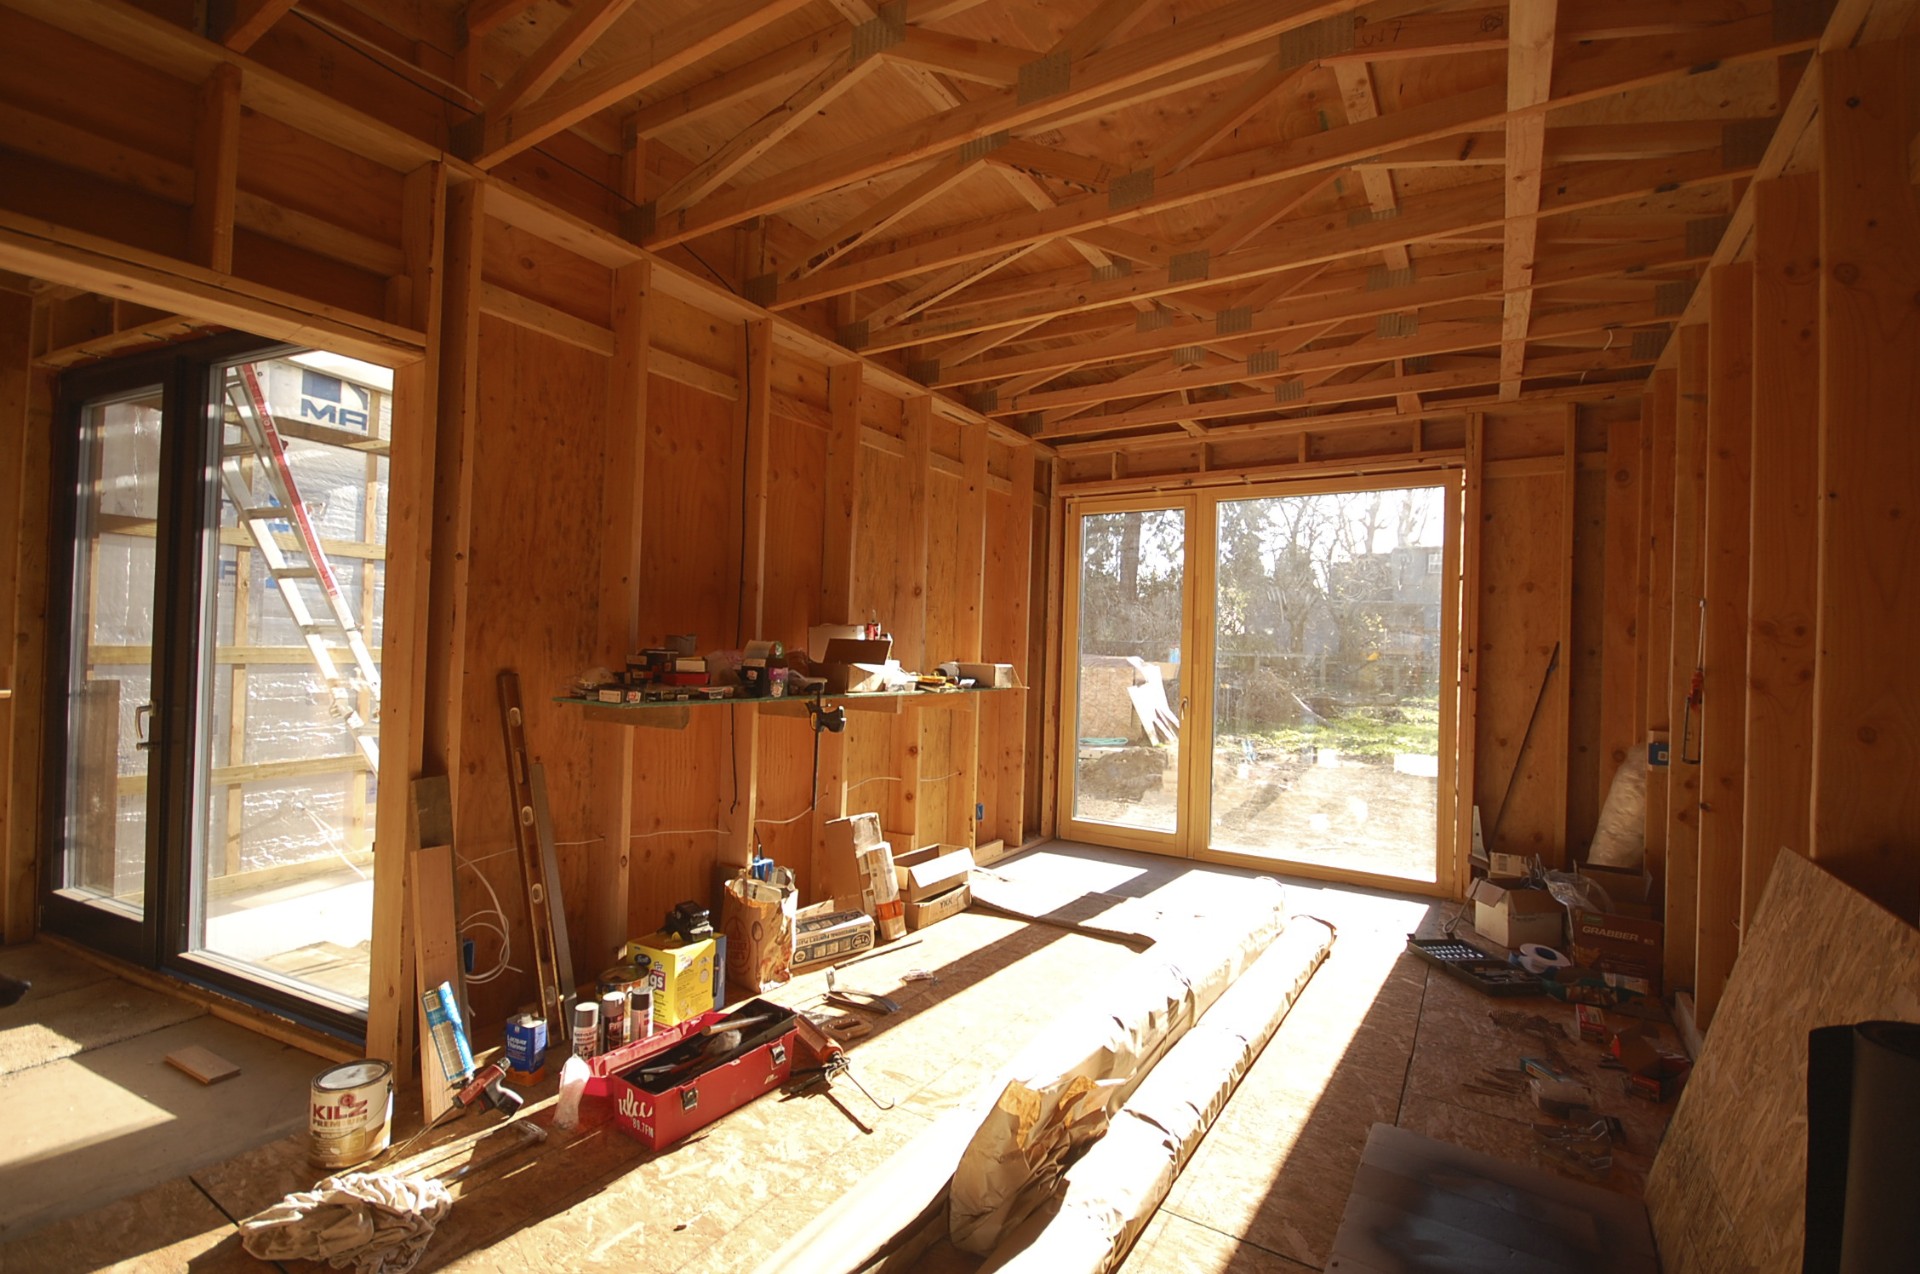
waiting for guffman (or looking through windows - part 8)
when we began this process, we only had a few rules. one of them was real wood high performance windows. at the conception of this project, we were thinking about making a pretty good house. Super insulated, airtight, with triple glazed windows and a heat recovery ventilator, but not necessarily passivhaus. since we ruled out plastic or fiberglass, US built windows were at the top of the list. once we decided to build to passivhaus, it quickly became clear that we had to look overseas.
our initial pricing was from optiwin, internorn, and pazen. optiwin was very appealing aesthetically but super expensive. internorn provided fantastic pricing, but there was no rep in the US meaning distant communications and pretty much zero support. pazen offers a slightly different product with a fiberglass exterior cladding and more minimal frame profiles, but they only offered a stainless steel clad door. because we had lots of doors, the price jump was huge and they were way out of our budget.
about the same time, our local loewen rep started offering unilux. we visited another local passivhaus project to see them installed, and we were impressed. the pricing was strong, and we felt most comfortable having a rep locally, although they only had a limited understanding of passivhaus. we thought we'd made up our mind, until we stumbled onto zola windows. nearly identical to the german and austrian made passivhaus windows, zola windows are manufactured in poland and offered at a much more competitive price point. we worked through all the options, input the data into PHPP, and scrutinized the sample window section that we got our hands on. it seemed like a good balance between quality, aesthetics, and price point. decision made.
one of the biggest challenges of using european windows is the long lead time (for our order the lead time was estimated at 12-16 weeks). we worked hard to have our window order ready to go by the time we were breaking ground. once we placed the order, the race was on to make sure the house was ready when the windows finally arrived. 18 WEEKS LATER they finally arrived. when we finally opened the container door to check them out, 2 of the biggest units had broken free from their braces and had fallen over at somepoint during shipping. while nothing was catastrophic, there were issues both functional and aesthetic.
fast forward 6 weeks. zola has been super responsive and we're confident that in the end everything will be as good as new. the windows and doors are installed and are beautiful. the house is dry, the first blower door test went well (.44ach at 50pa), and we are steadily moving toward insulation and sheetrock.
here's a quick look at some of the process. first, prepping the rough openings:

step 1 - use pink prosoco joint and seam filler at corners and joints of rough opening.


step 2 - use red prosoco fast flash to coat rough opening and extend approx. 6" out onto sheathing.


to apply these prosoco products, simply lay down a bead from a caulking gun and spread with a cheap plastic spreader. the result is a waterproof, airtight, and vapor permeable flashing without the usual complications of peel and stick flashings. of course no through wall metal flashings on a passivhaus.


next, windows arrive and are unloaded.

not what you want to see when you open the door of the container. i think they forgot to do the ACTUAL bracing at the factory.

some of these units are HEAVY! thank to Doug Marshak and his Awesome Framing Crew for doing the very heavy lifting.

small tilt/turn unit for the kitchen.

Doug and Jesus installing the small window in the 2 story living room.

the big units waiting to be installed.

after a few nervous hours, the biggest unit finally goes in. thanks to Graeme Thomson for the smart hoisting method.

the large fixed unit installed above the lift/slide door.

front door with translucent glass and large window to the street.

breezeway with tilt/turn terrace door and fixed sidelite.

studio with tilt/turn door and fixed sidelite.


check back soon for more as we try to catch up with construction: HRV rough-in, steel stair installation, flashing the windows, installing the exterior insulation, and rainscreen furring.
air sealing
air tight per passivhaus = .60 ach at 50pa. if you don't know the terms or numbers, just know that this is extremely air tight. achieving this requires care and attention to detail, both in the design approach and in the execution.


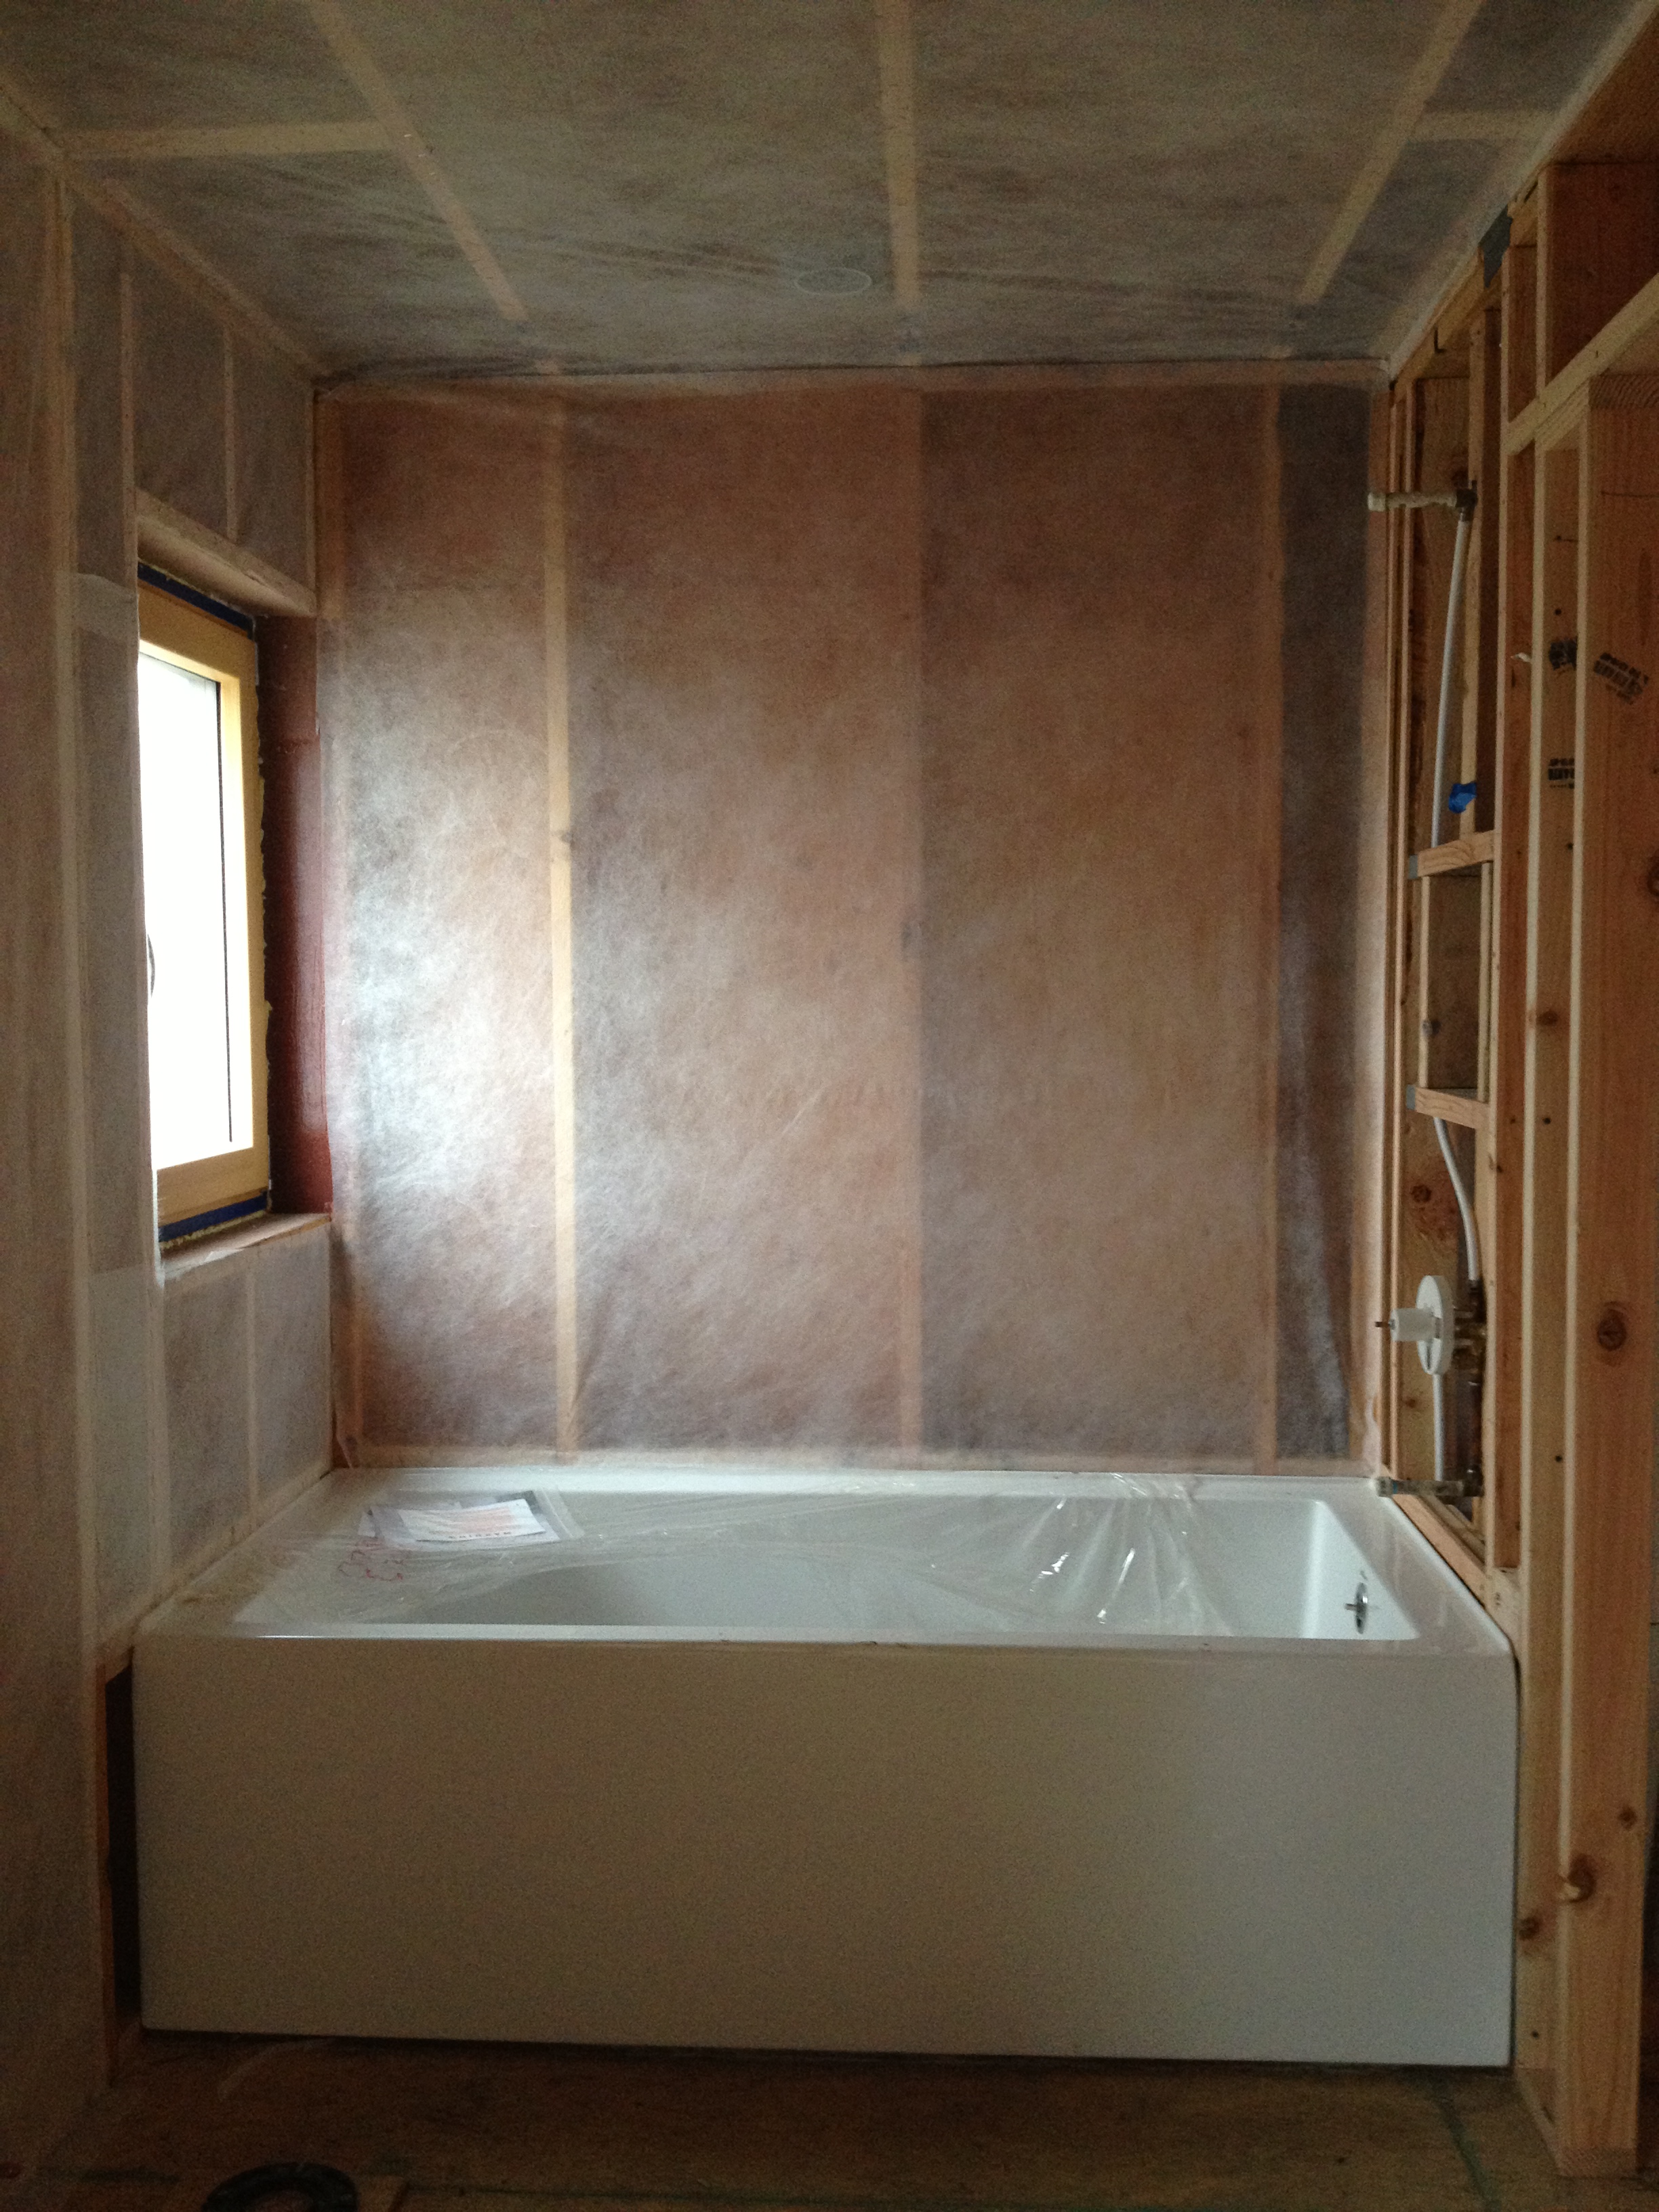
our air barrier strategy is simple - use the exterior plywood roof and wall sheathing as the continuous air barrier. all seams, corners, and joints in the plywood are taped with SIGA wigluv tape.


the sill plate is taped to the concrete foundation (our 2x8 sill is cantilevered beyond the foundation). the concrete is first primed with SIGA dockskin primer to ensure adhesion. carefully apply tape. the result is an air tight joint. simple.


the plywood air barrier runs up the wall and over the roof. the joint is taped and then the parapet is framed on top. after seeing some tears in the tape we got nervous and taped the parapet too.

all roof and wall penetrations are sealed. we used SIGA wigluv for these too.

the tapes are super sticky, very flexible and easy to use. the paper backing is recyclable, which is good because there is a lot.

it's not inexpensive though, and we used far more than we originally thought. air sealing takes time too. it's worth it though.
SIGA tapes are available through small planet workshop.
another great exterior air sealing product is prosoco joint and seam filler (used at rough openings in combination with prosoco fast flash). more on that in the next post.
.44 ach
first blower door test = .44 ach at 50 pa


yeah!
been busy building.
need to catch you up on all the progress - very soon.
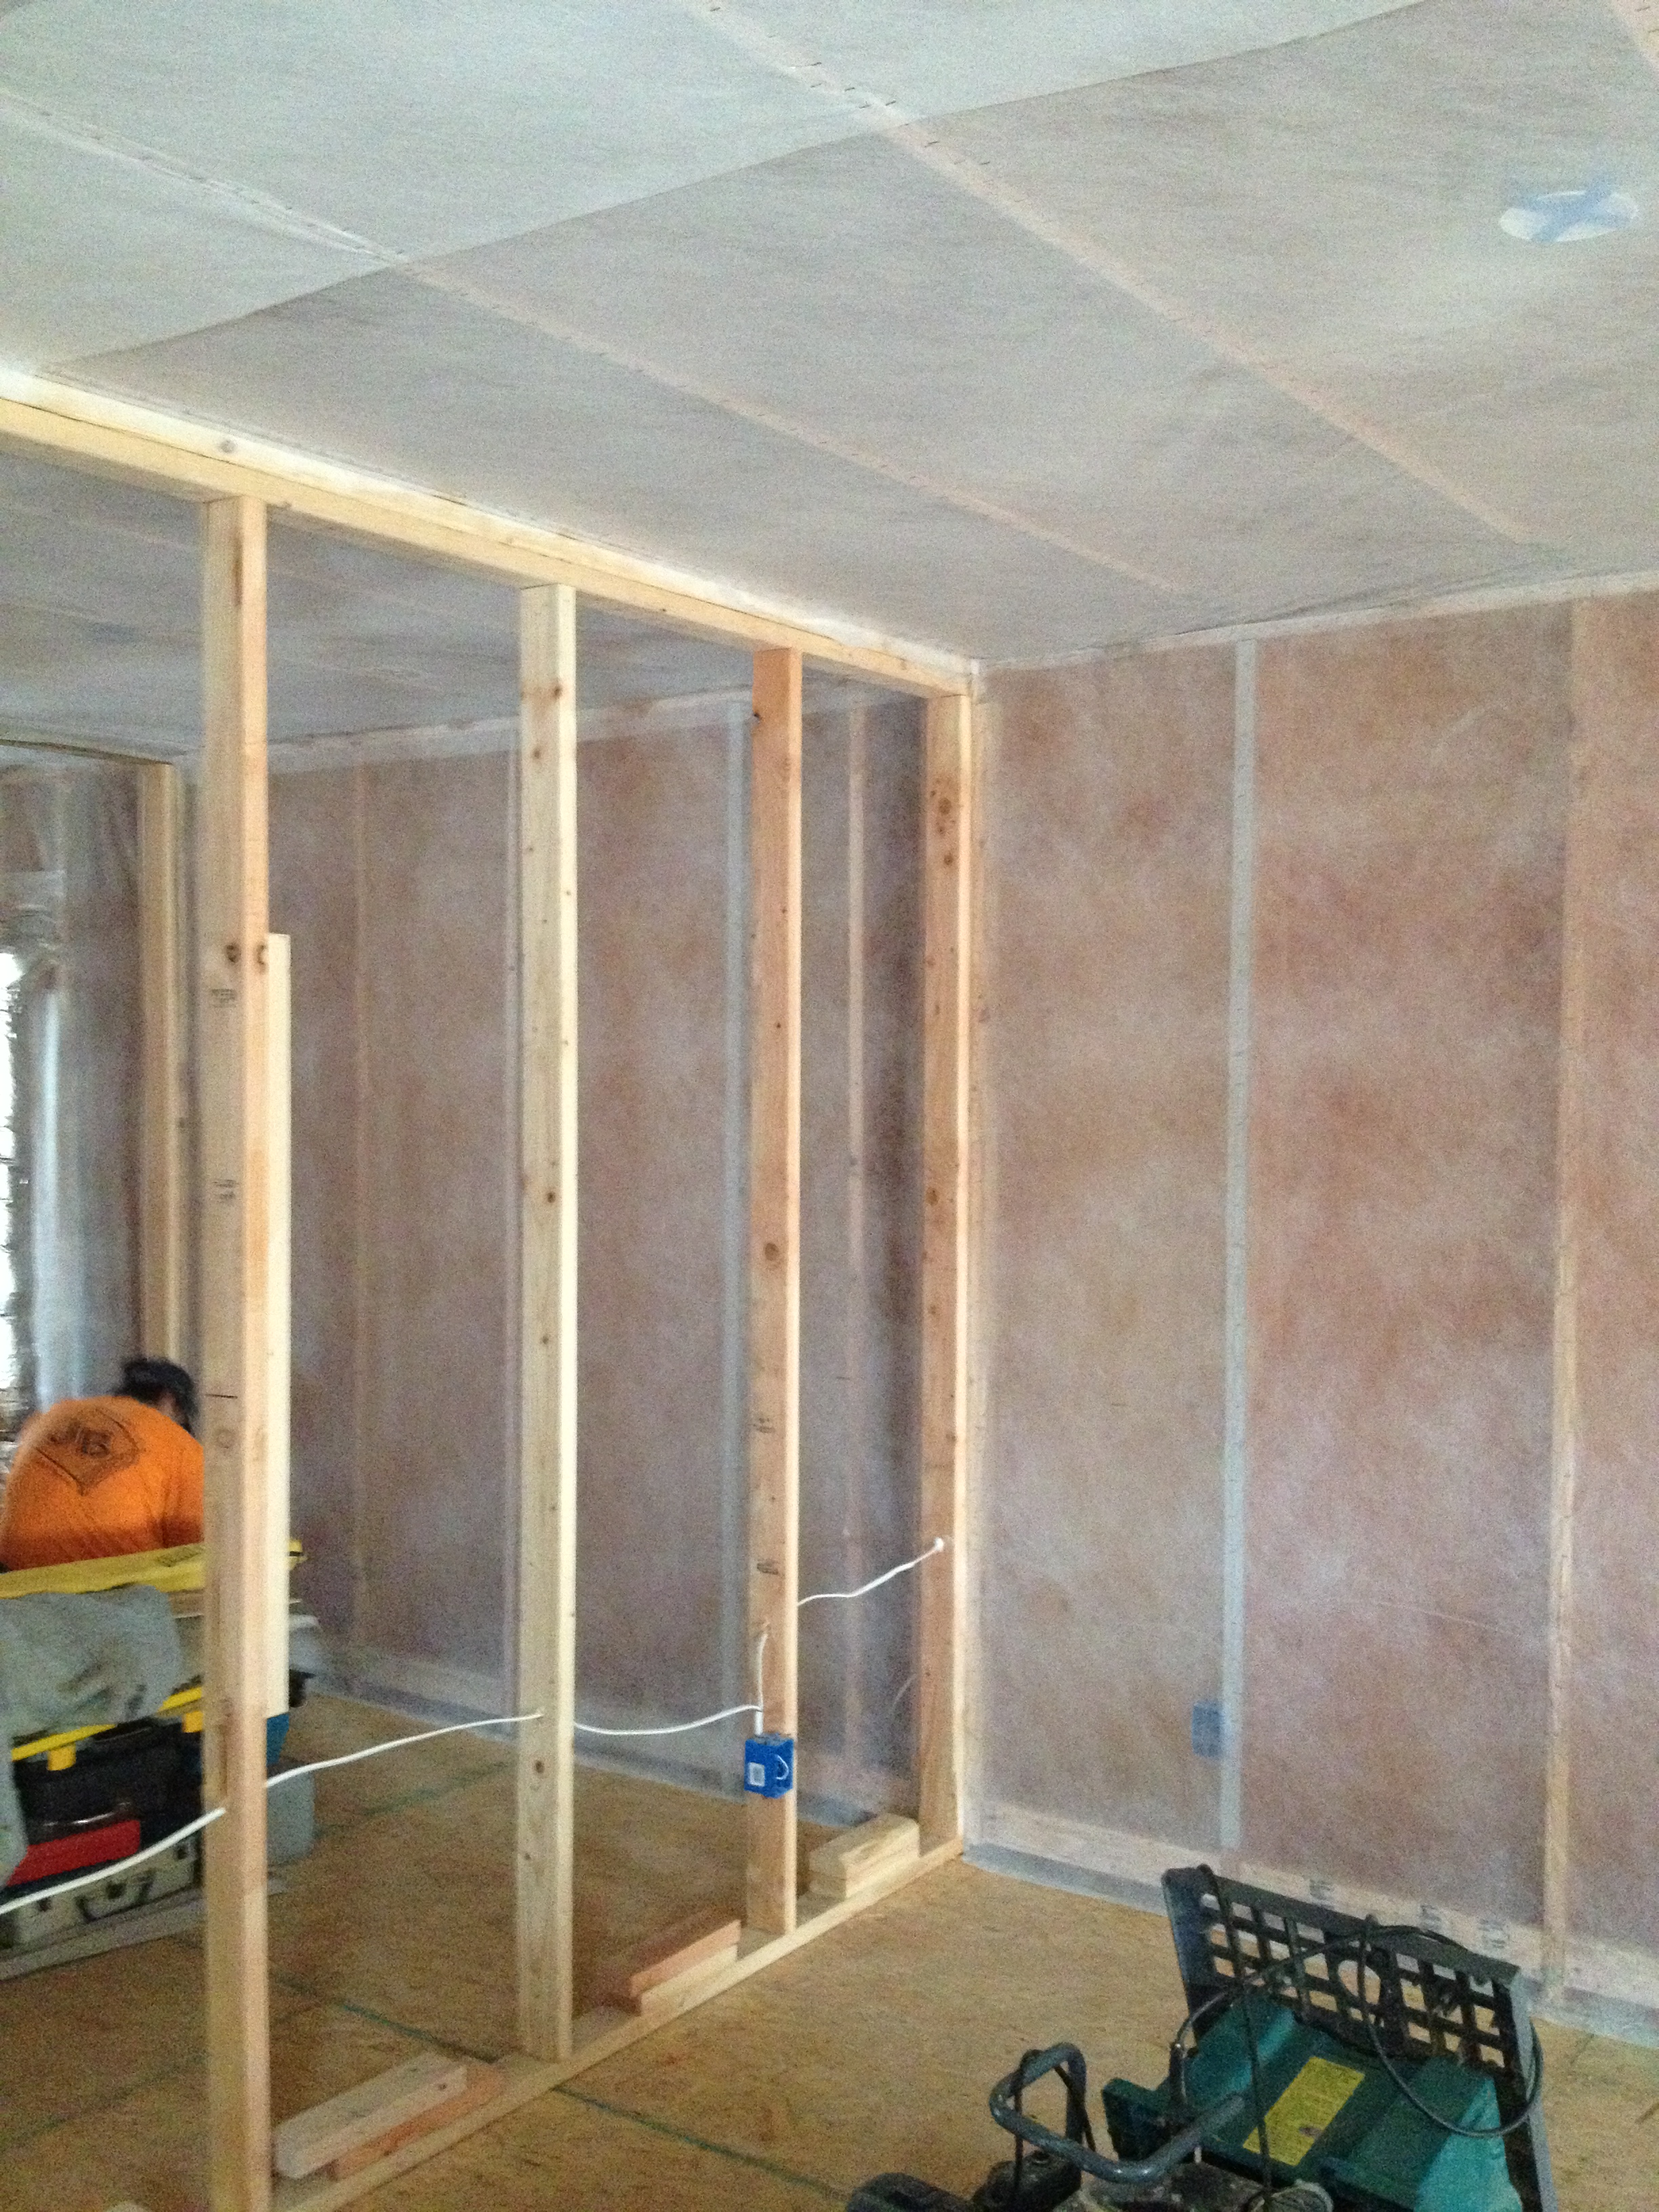
framing for efficiency
framing has been moving along at skidmore passivhaus since we placed our slab on grade. the house is quickly taking shape thanks to dam framers (doug marshak and crew).


there are a few things that make the framing on this house just a little different from the typical house:
- untreated bottom plates on 30lb building paper
- 2x8 wall studs at 24" o.c. (roof trusses align)
- balloon framed 2 story walls
- upper floor hung from ledgers
- single top plates that interlock at the splices
- open corners with minimal blocking
- open web trusses with sloped top and level bottom
- header free openings (except for the living room doors)
- long walls on plywood module
All of this results in more space for insulation!
Plus there's less wood used and less material cost.


Some of the many next steps include:
- taping the plywood with SIGA to create the air barrier
- installing the single ply membrane roof
- prepping the rough openings with Prosoco Fast Flash
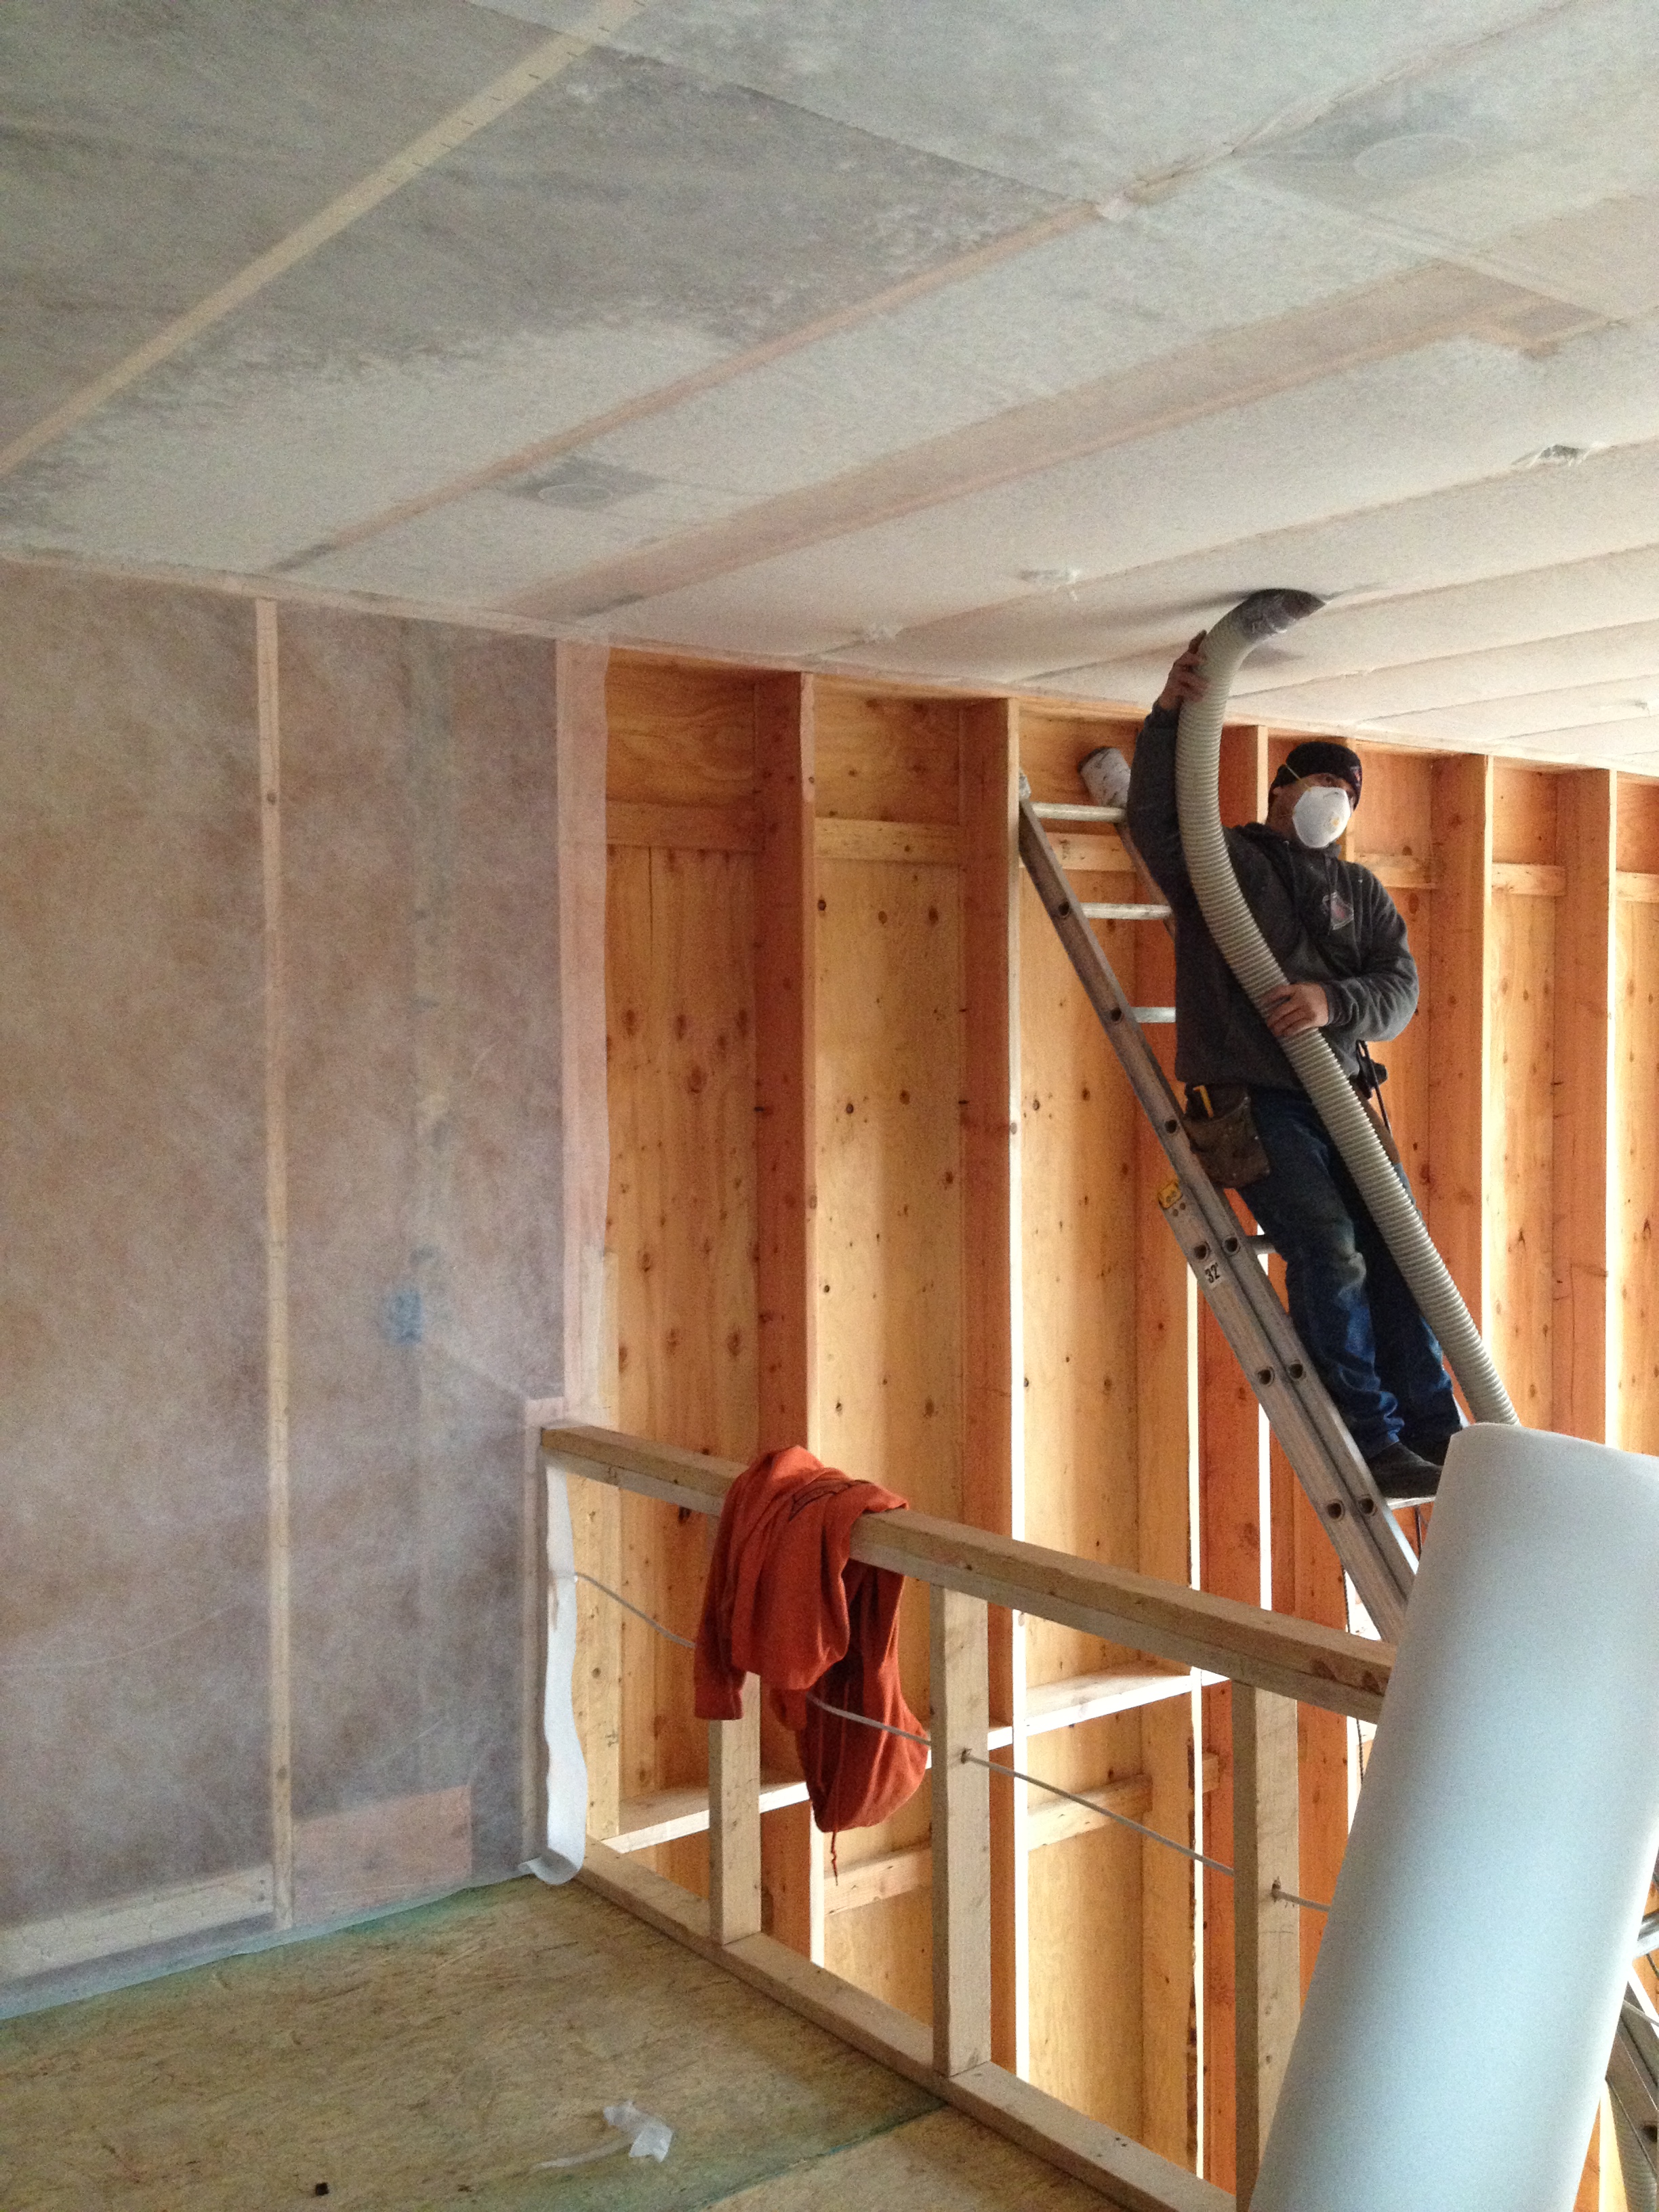
- roughing in plumbing, HRV, and electrical
Check back soon for updates.
notes on placing an exposed slab on grade
Here are some quick notes on our Exposed Slab on Grade (placed on top of continuous 15mil vapor retarder and 4" of eps insulation): Placing concrete on a continuous vapor retarder definitely ups the degree of difficulty when it comes to finishing and curing the slab. Water in the slab can only move out the top, meaning the slab can dry unevenly, crack, and even curl. To compensate we are trying a wet "flood" cure.
We decided to use fiber mesh reinforcing and eliminate the steel reinforcing altogether from slab. Apparently the fiber can make finishing trickier, but it typically results in strong slab with less cracking and for a bit less cost.
The type and location of joints is always a question - we even considered for awhile not using them and letting the slab crack more randomly (it will crack). In the end we decided to use a tooled joint (in this case made with a custom tool from another project) and to place them strategically under walls so they are barely visible. Tooled joints can be made almost immediately before cracking can happen whereas sawcuts have to wait until slab is firm enough to handle the saw, and potentially after random cracks have already occurred. Saw cuts also have a risk of spalling, but when they are executed properly they certainly look best.
After knocking around options for curing the slab, we decided to go old school and use a wet flood method. The idea is to cure the slab slowly and evenly by keeping it wet and cool, allowing it to gain as much strength as possible before subjecting it to the stresses that occur when it dries out. The slab edge formwork was already above the top of the slab, so it was relatively easy to keep the slab underwater. It uses a fair amount of water as there are minor breaches in the perimeter formwork dam, but it eliminates the use of expensive chemical curing compounds.
So far we have kept the slab wet for 5 days (flooded most of the time) and we're still babysitting it. It's time to get set up for the last small concrete pour (a plinth for the stair which doubles as a landing), so the wet curing will come to an end. Only time will tell what the result will be, and we'll never know if our methods were better or worse.


beach house
we recently made a visit to the coast to have a look at the oceanside beach house.


designed in 2010, the owners have been completing the house in their spare time.
testing
 last week i successfully passed part 1 of the Certified Passive House Consultant exam, and in the next few weeks i'll be wrapping up the take home design portion. with a little luck in the new year i will be a Certified Passive House Consultant!
construction update
work is progressing on the council crest residence in southwest portland. see last month's post titled the process of (de)construction for a first look at the project. here's a quick look at roughly one month's worth of progress:

glimpses of the composition taking shape

view from the park

upper roof deck getting ready for tapered insulation

interior framing begins

gutter framing with insulation / protection board progressing

demo time


new life in store for some tired old buildings.
stay tuned.
a break from the rain
yesterday we took advantage of the recent stretch of dry weather to visit our project under construction at the coast.

the exterior siding is installed and awaits a few final details and paint. the body and trim will be painted a dark warm grey and should recede nicely into the landscape.

the open stair is flooded with south light and draws you up from the entry into the main volume of the house.


the spectacular view to the west required a nice long deck to take it all in after a hard day of playing on the beach (insert drink in hand).


the tiny east elevation.

the cozy bedroom tucked into the east end.

the future 3-star ping pong room on the lower level.

a small taste of the main living room - more on this space later.

the bathroom with soaking tub and skylight above.

the west elevation in its partially finished state.

the north entry elevation from the road.
for more on the construction process so far, see the previous posts here, here, and here.
for more on the design, see the previous posts here and here.