
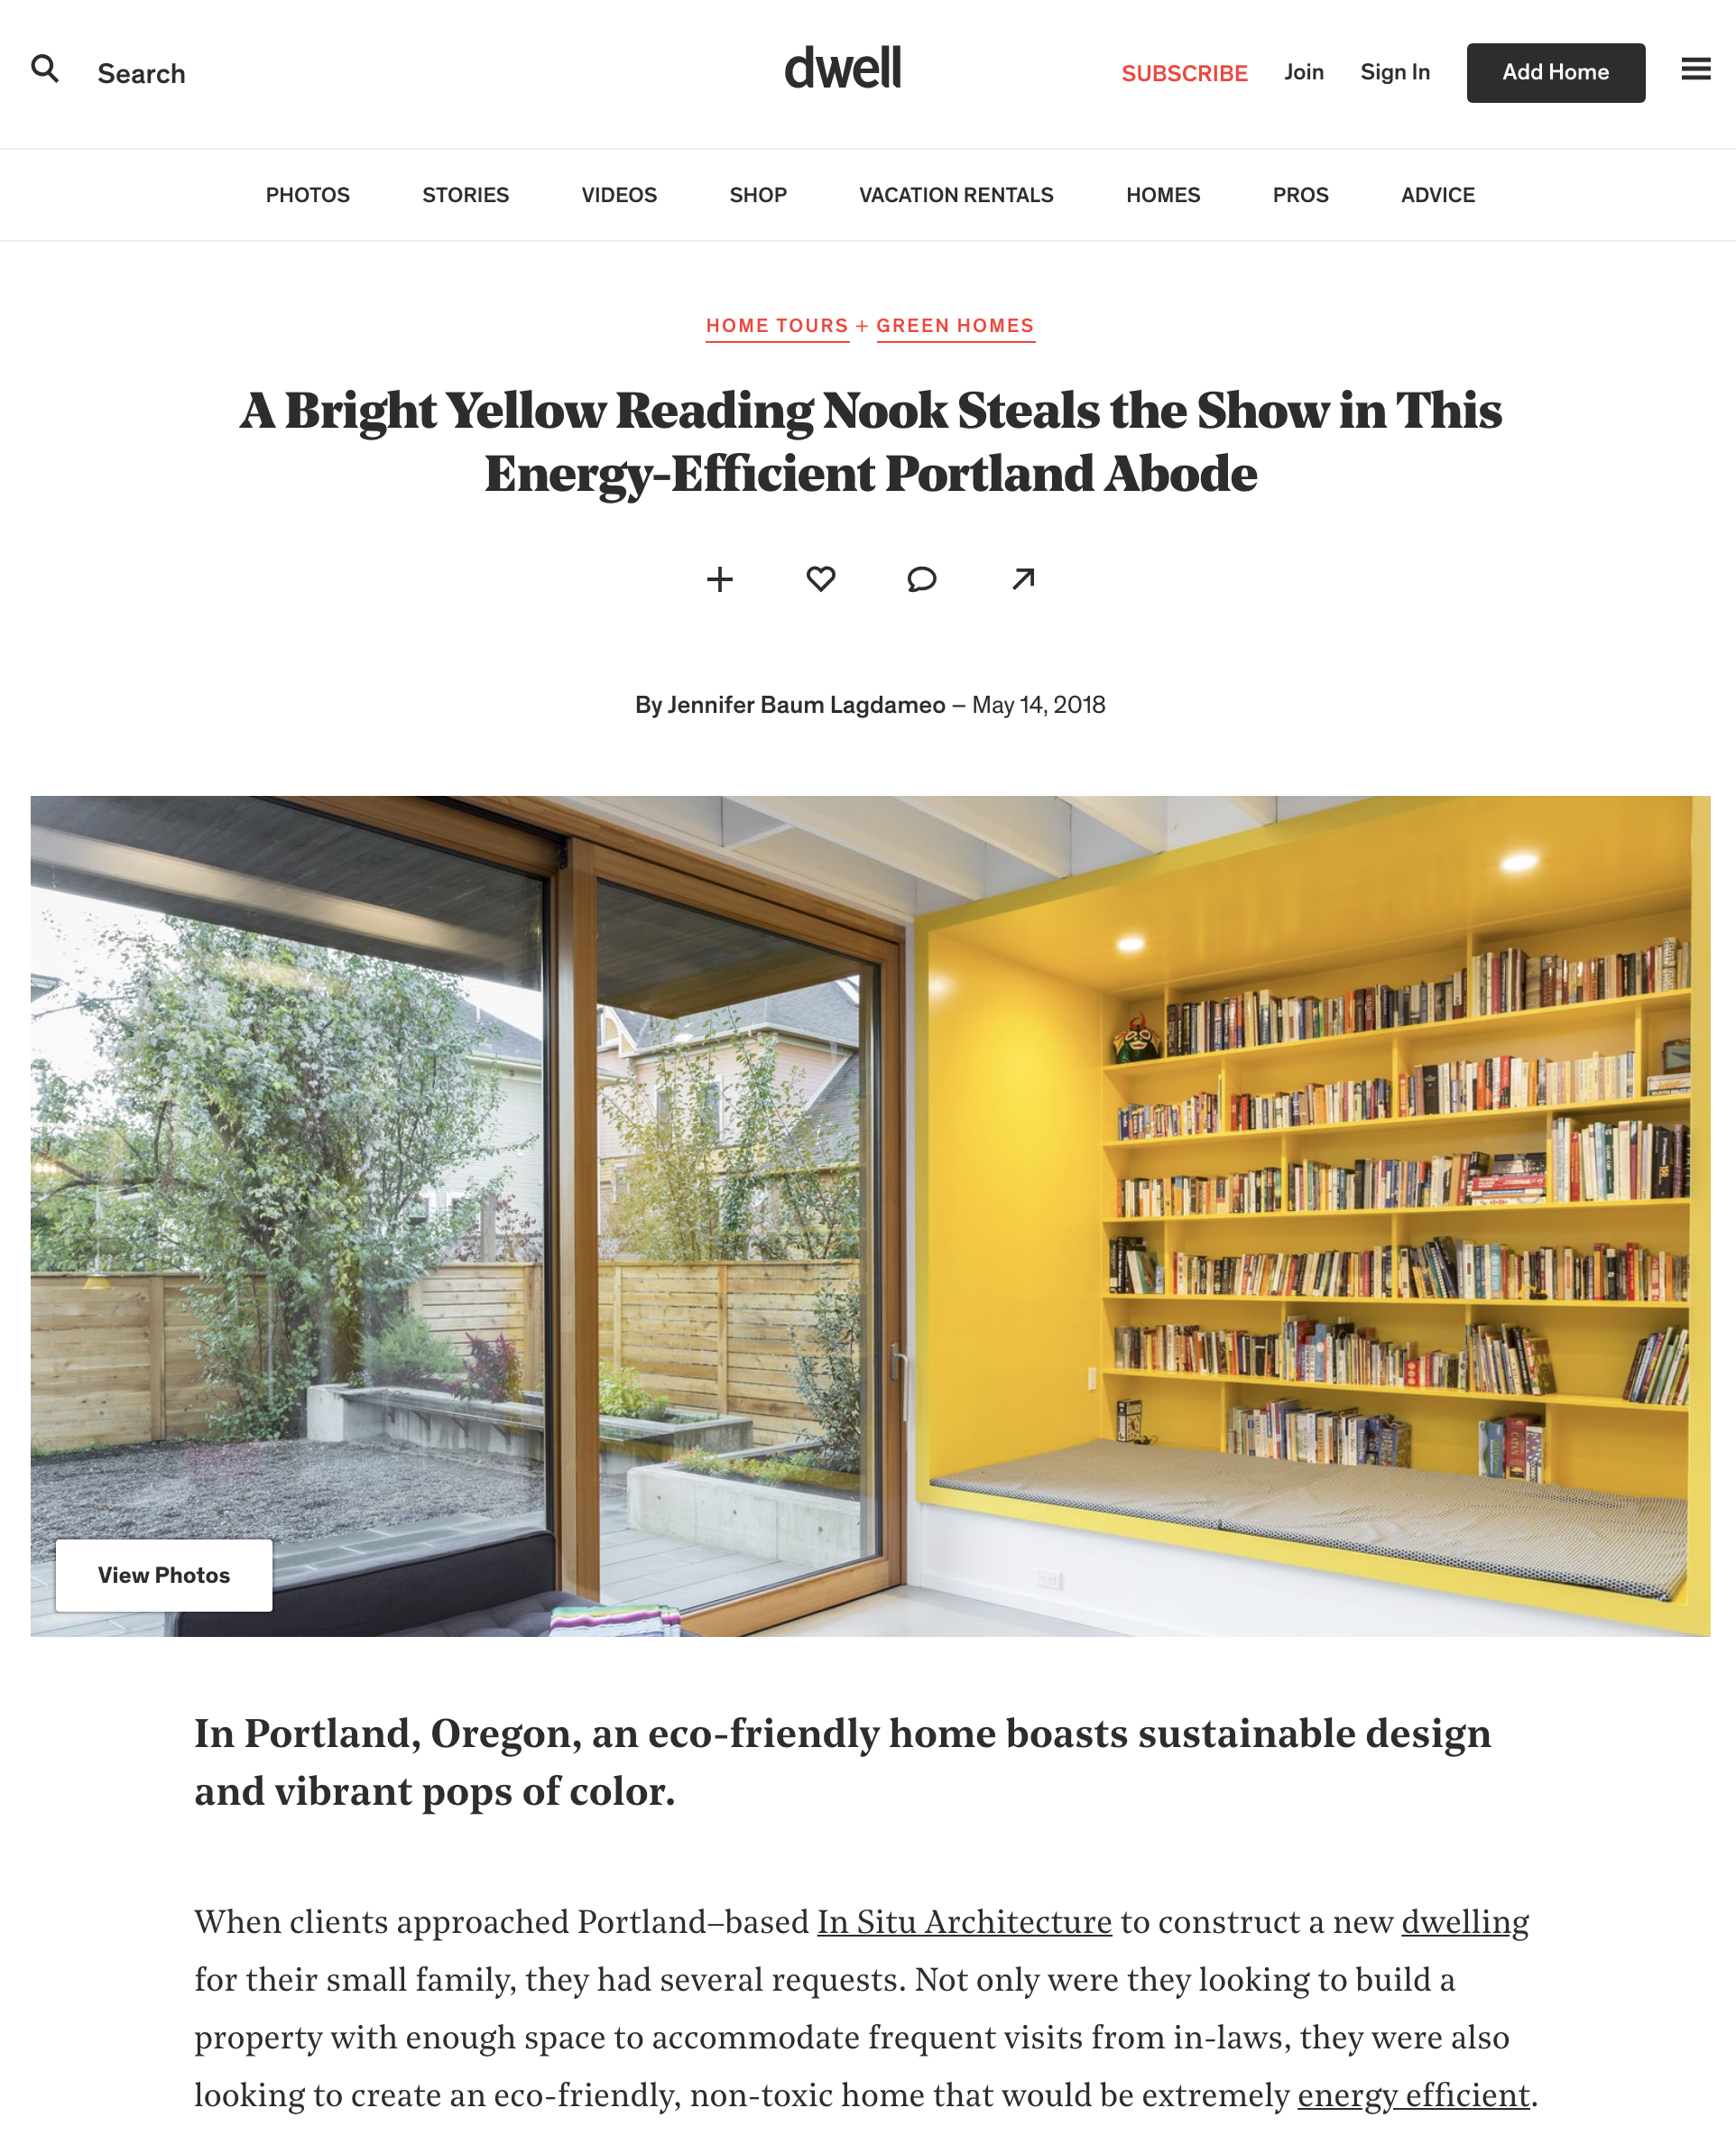
18th Ave House is featured on Dwell. Check it out here.
10 Mistakes When Designing an Energy Efficient Home
While they may be designed with the best of intentions, most so called energy efficient homes (and buildings of all types) designed and built today make many of the same mistakes:
1. Focusing on Technology First
The simplest, most reliable, and most effective approach to energy efficiency is to focus first on the building envelope. This means starting not with a more efficient furnace or water heater, or the addition of a photovoltaic solar array, but instead focusing on airtightness, minimizing thermal bridging, and providing thick continuous insulation. Not only will you save energy and lower your utility bills, if done correctly you will be more comfortable and your building will be more durable. Once you've made a great building envelope and significantly reduced your energy loads, technology can then be used on a more limited basis to complement your design.

2. Focusing on Insulation before (or without) Air Sealing
Probably the single most effective strategy to achieving energy efficiency is to provide exceptional airtightness. An airtight building minimizes energy losses (when heating or cooling), ensures even stable temperatures throughout a building, and prevents moisture laden air from entering the building assembly. Exceptional airtightness starts with good design, and relies on proper execution of that design in the field. A suitable ventilation strategy goes hand in hand with an airtight building. Fresh air should come from an intentional controlled source (filtered fresh air rather than leaks in the building envelope) and the temperature be moderated; usually achieved by the use of a Heat Recovery Ventilator.

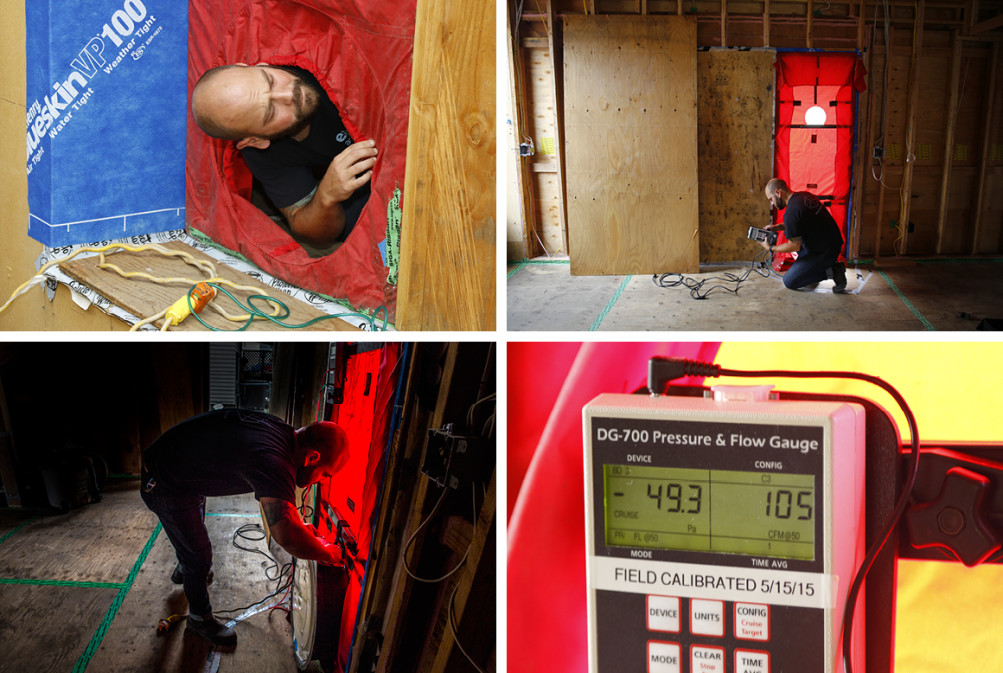
3. Failing to do a Blower Door Test
This simple inexpensive test is the only way to determine the airtightness of a building. A blower door is essentially a fan that is used to pressurize and depressurize a building to determine where there are leaks and how big. Unfortunately very few buildings use a blower door test during construction.

4. Ignoring Solar Orientation
While good design must respond to the immediate context, it's also important to recognize and respond appropriately to solar orientation. If done correctly, the sun can be used effectively to help heat our buildings for free (assuming the climate and building type desires heating) without contributing to overheating. Effective design means appropriately sizing glass area for different orientations and providing the right type of shading.
5. Failing to do a Shading Study
Most sites are shaded at certain times of the year and day by buildings and trees. It's important to correctly identify this information to predict the effect of shading on the building. There are simple tools and software to provide this information.

6. Specifying the Wrong Type of Glass
Windows (and doors) are one of the most important components of a building. They provide views, daylight, ventilation, and have a huge impact on the experience of a place. The selection of windows and glass can be complicated and overwhelming, and selecting the wrong glass can have huge consequences. The right windows and glass can mean exceptional comfort and performance, and can make a building sing.

7. Ignoring Material Sourcing and Impact
In the quest to make an energy efficient building, it's important to have a complete understanding about the source and impact of our material selections. Many so called high efficiency materials actually have a much larger negative impact on the environment than the benefit they provide.
8. Not Setting Proper Goals
Without setting proper goals at the outset, it can be easy to compromise when facing a challenge during the process (there are many). While rating systems and certifications aren't always perfect, they can help to appropriately guide a project in the face of adversity.
9. Failing to do an Energy Model
Without a real energy model, it's all just guesswork. The best way to understand the effect of design decisions is to have an energy model as part of the design process. Effectively used an energy model can be another tool used as part of the design process.

10. Forgetting about the Architecture
It could be argued that a beautiful architectural space that is thermally uncomfortable and not energy efficient does not make great Architecture. Likewise, the focus can't be on energy efficiency alone. The challenge is to create beautiful spaces that are thermally comfortable and energy efficient - less than that can no longer be acceptable.

keep it simple
POLITICO has published an article by Sara Solovitch on the status of passivhaus in Portland, and some of the disagreements between Passive House Institute US (PHIUS) and Passive House Institute (PHI).
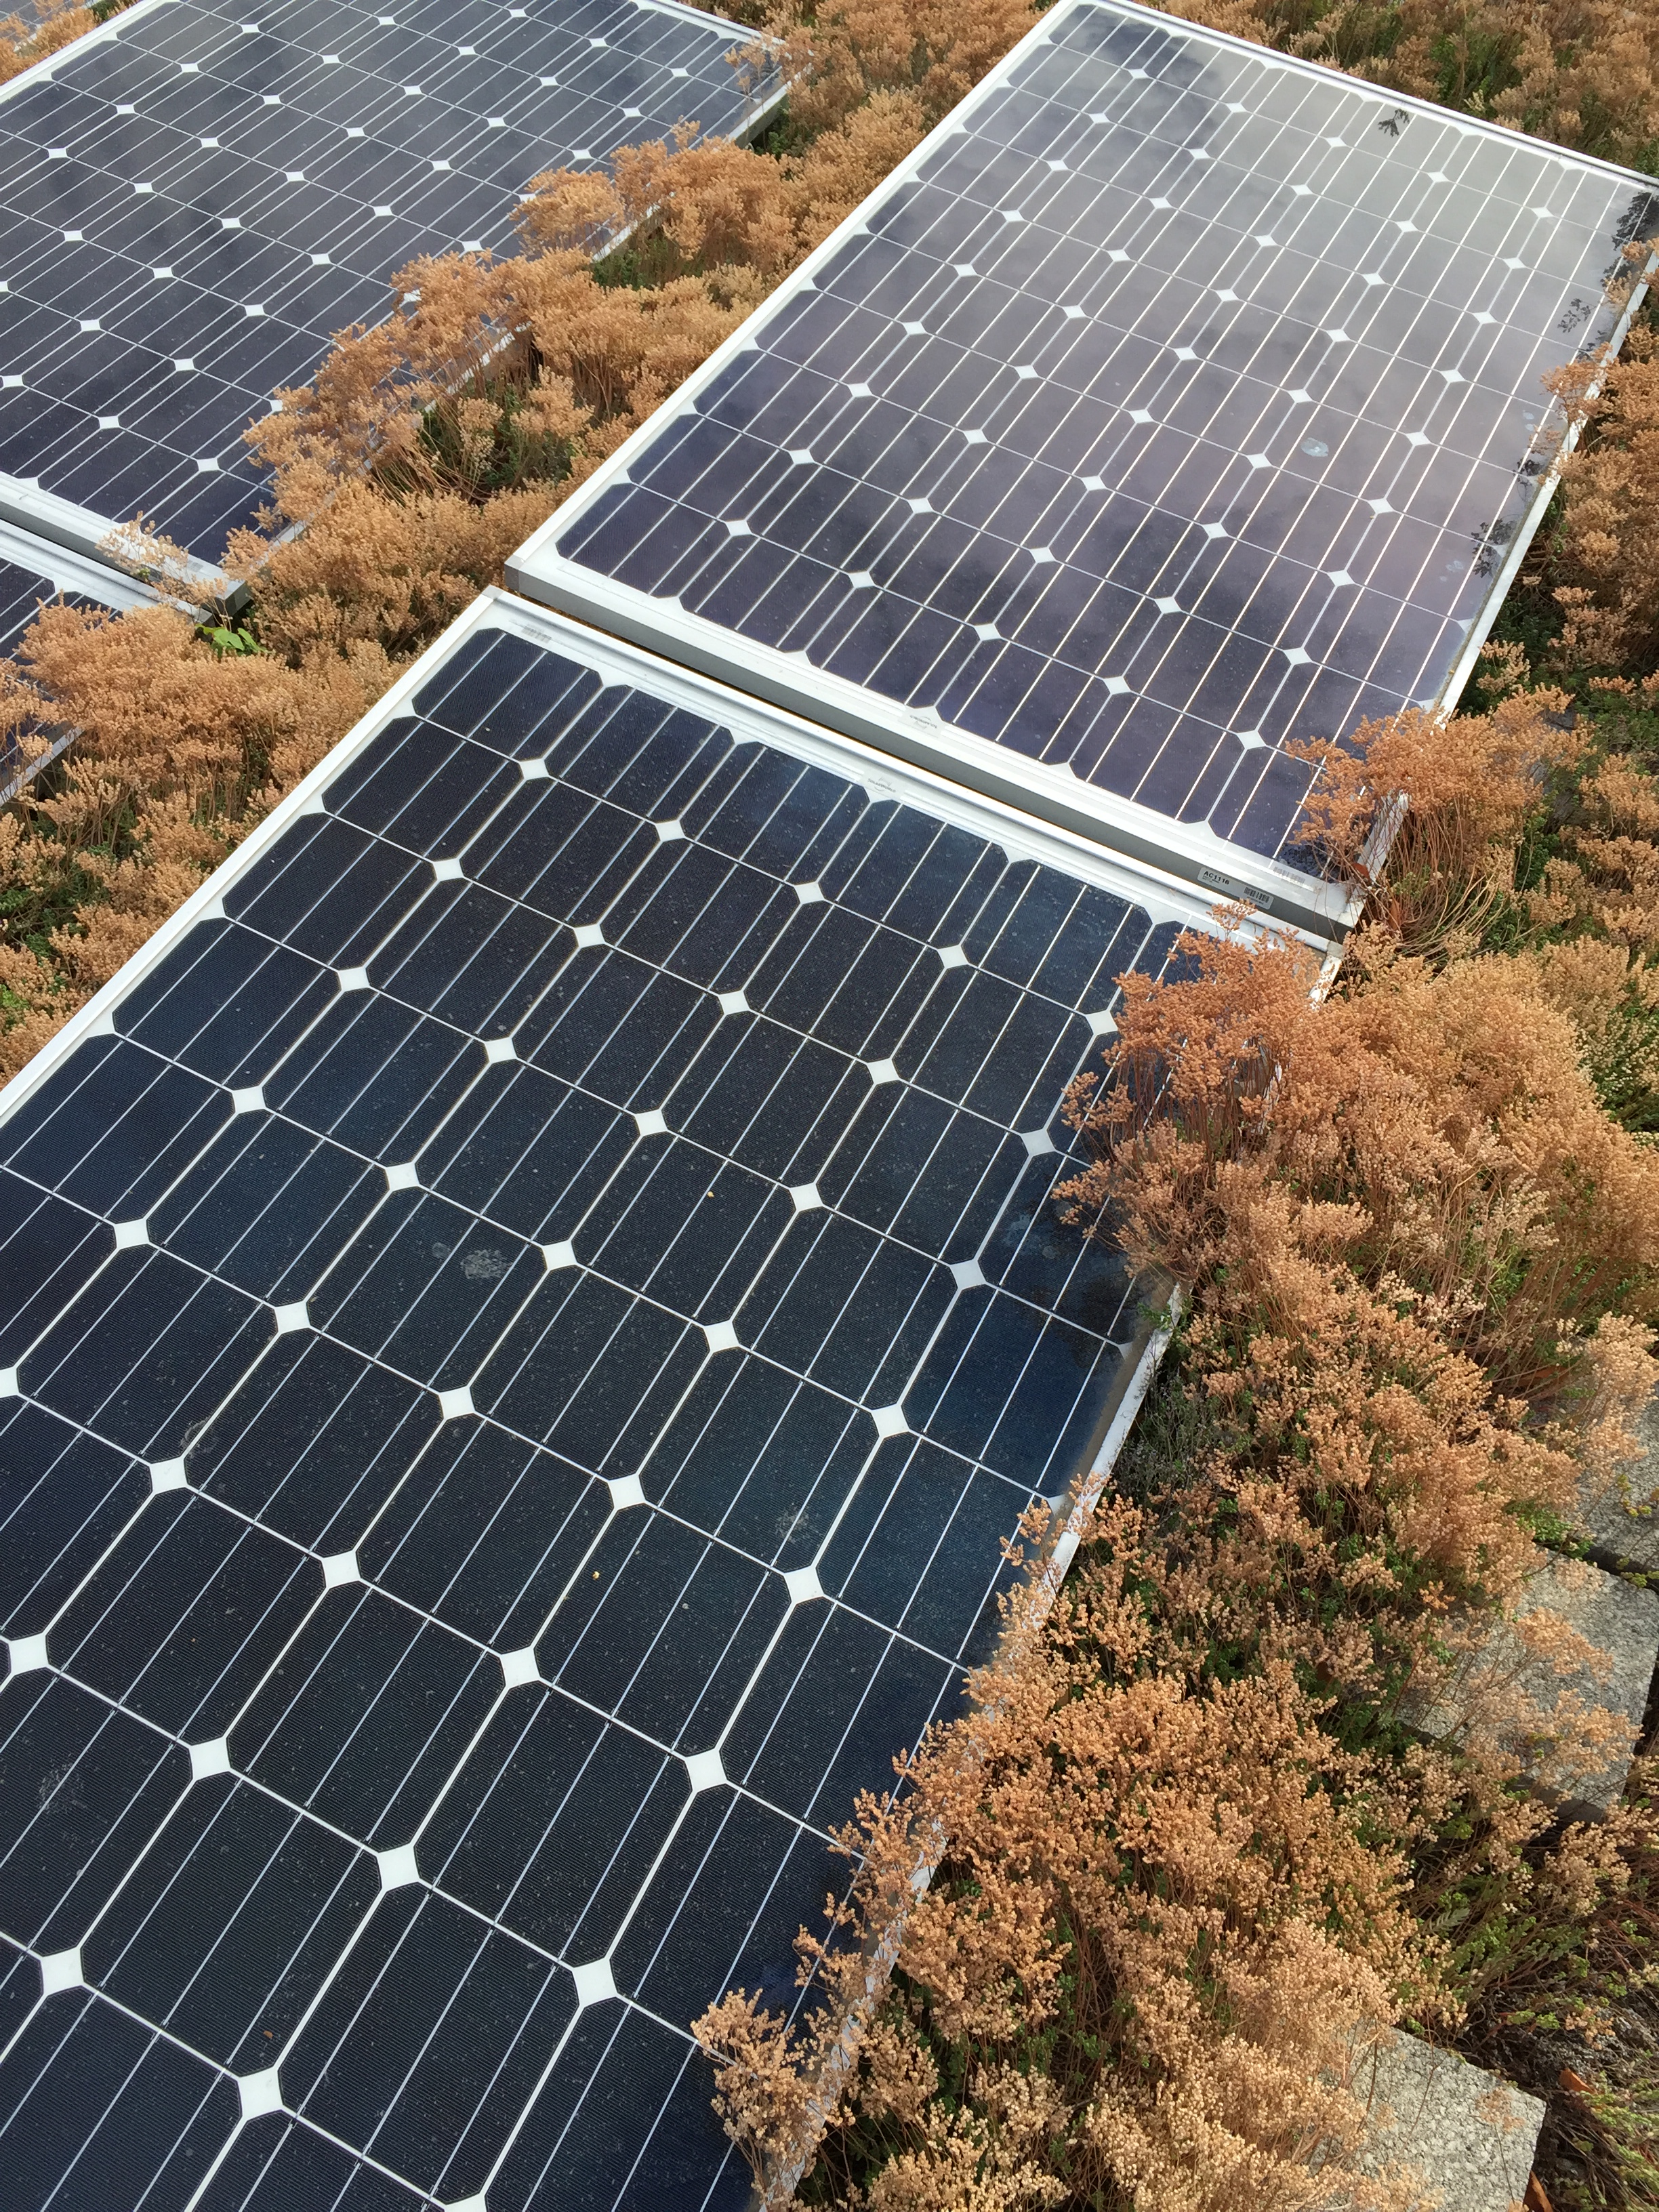
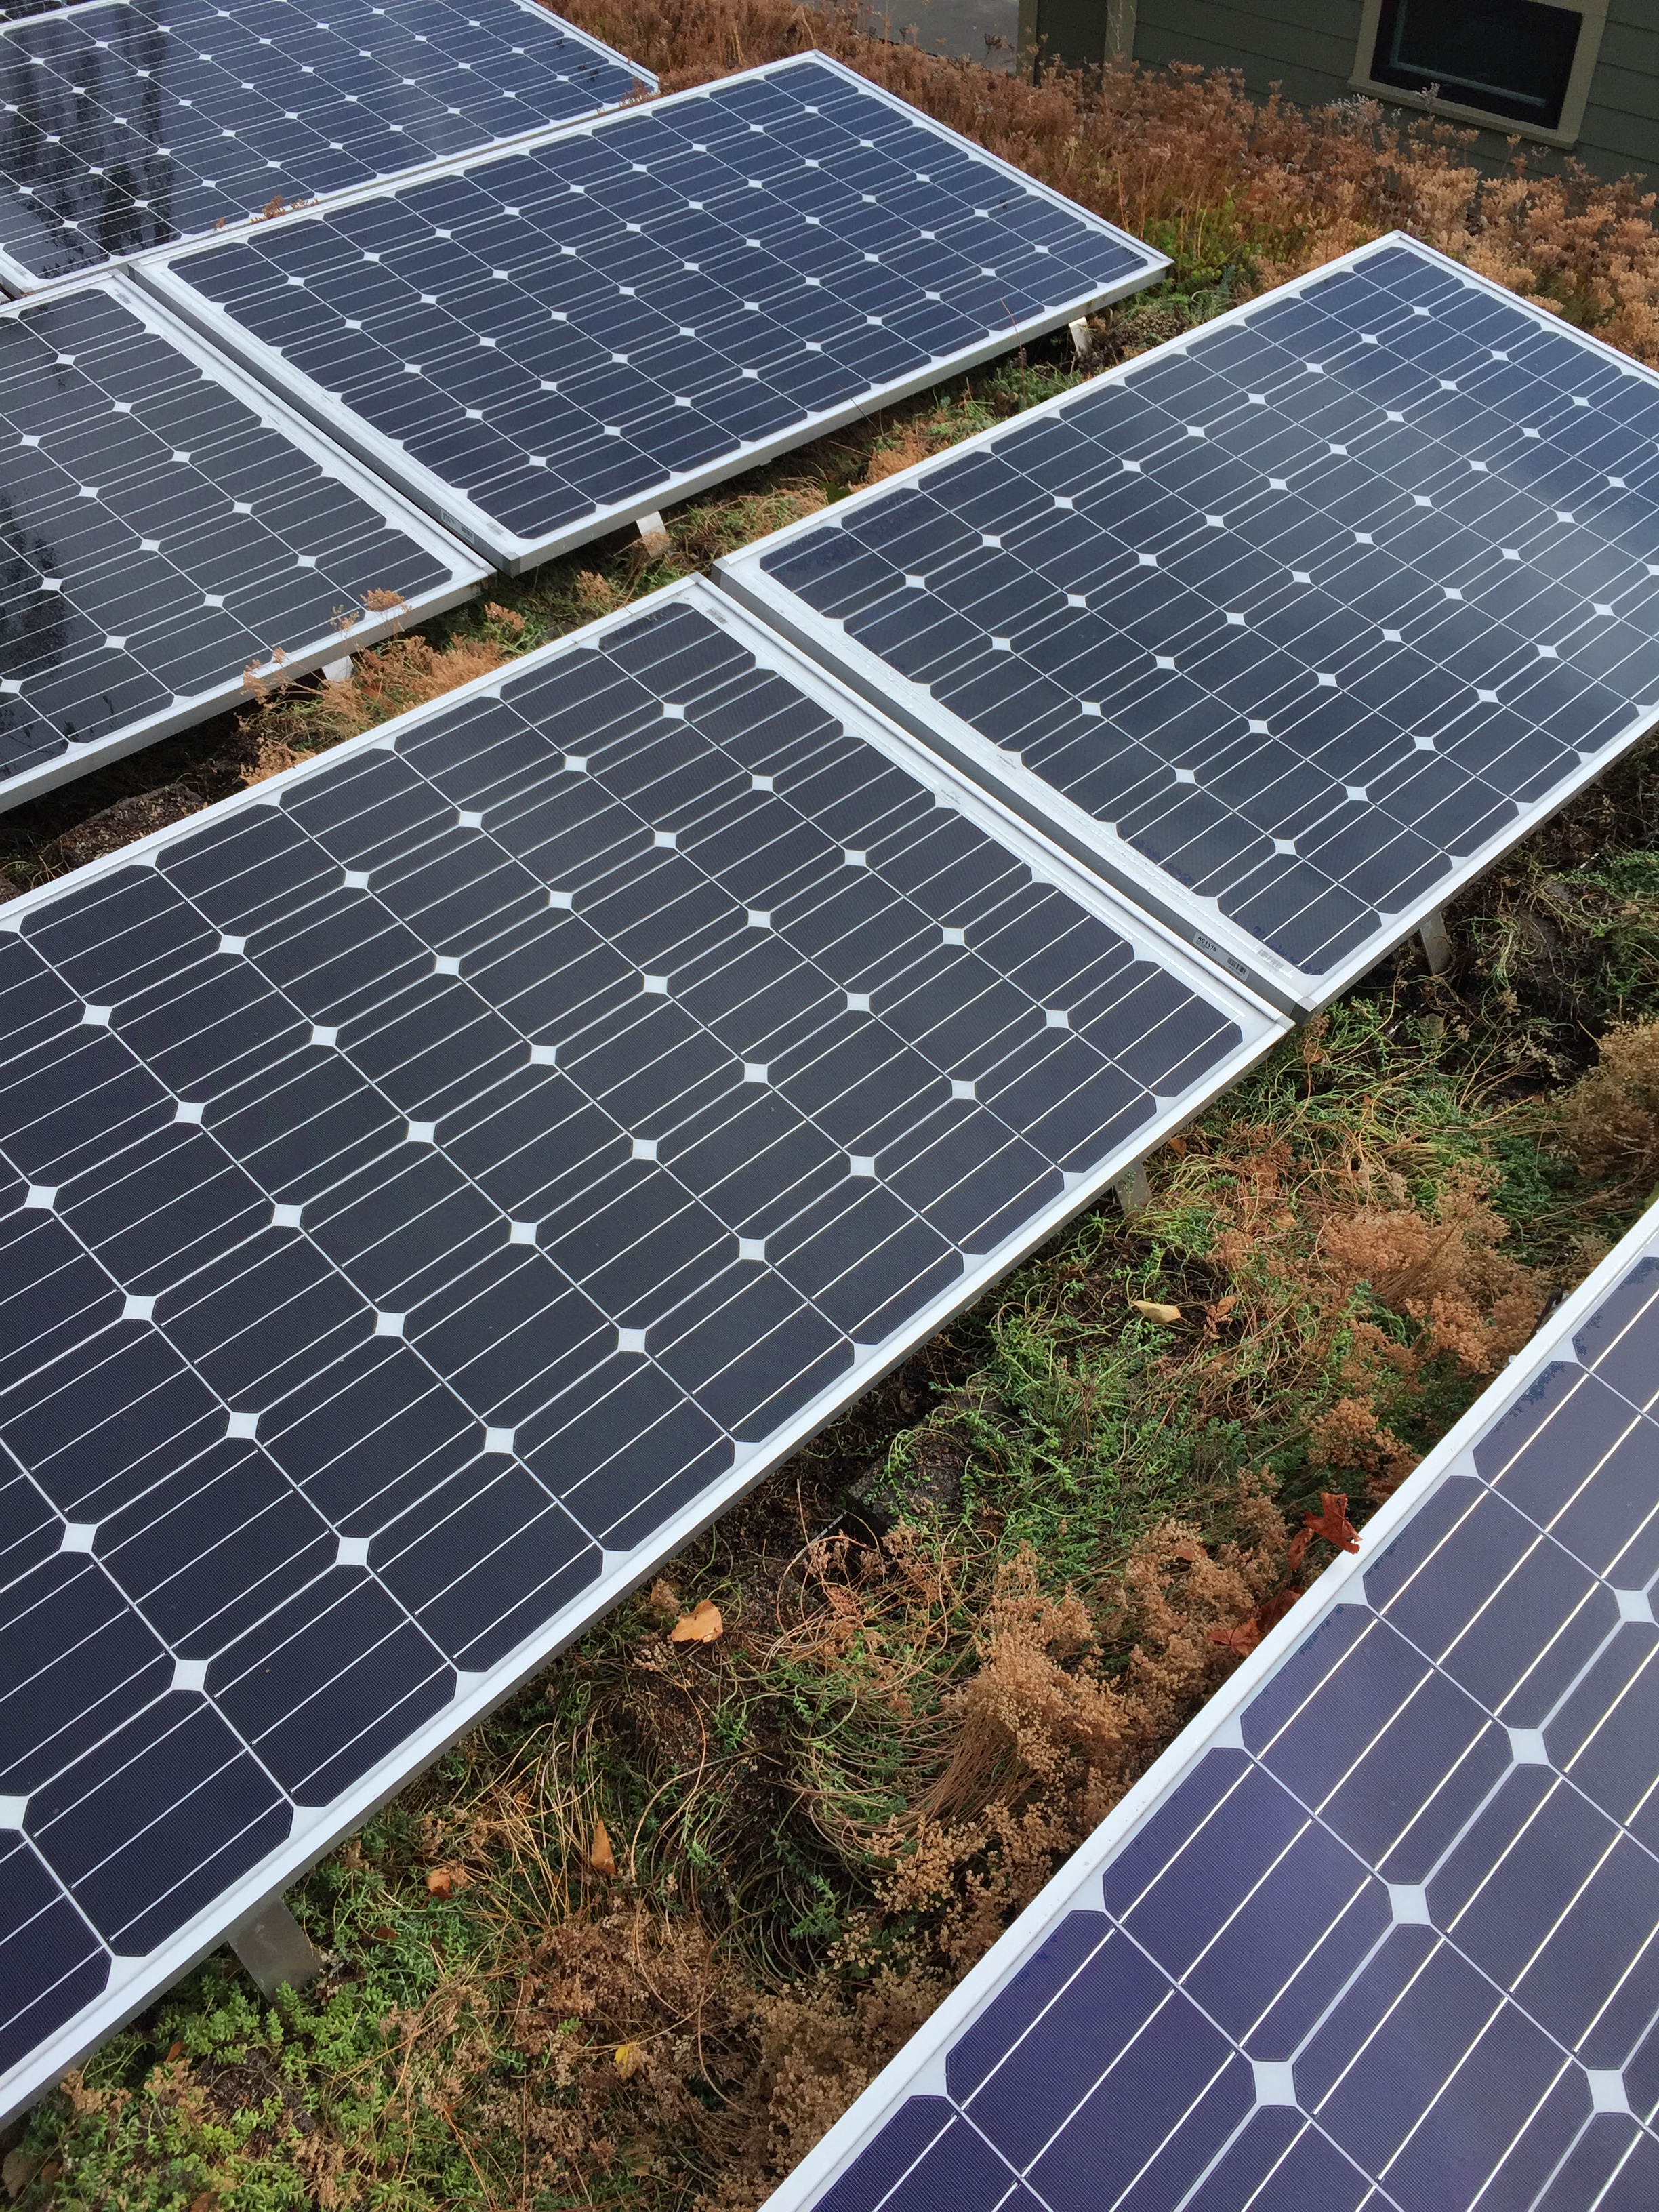
clean energy
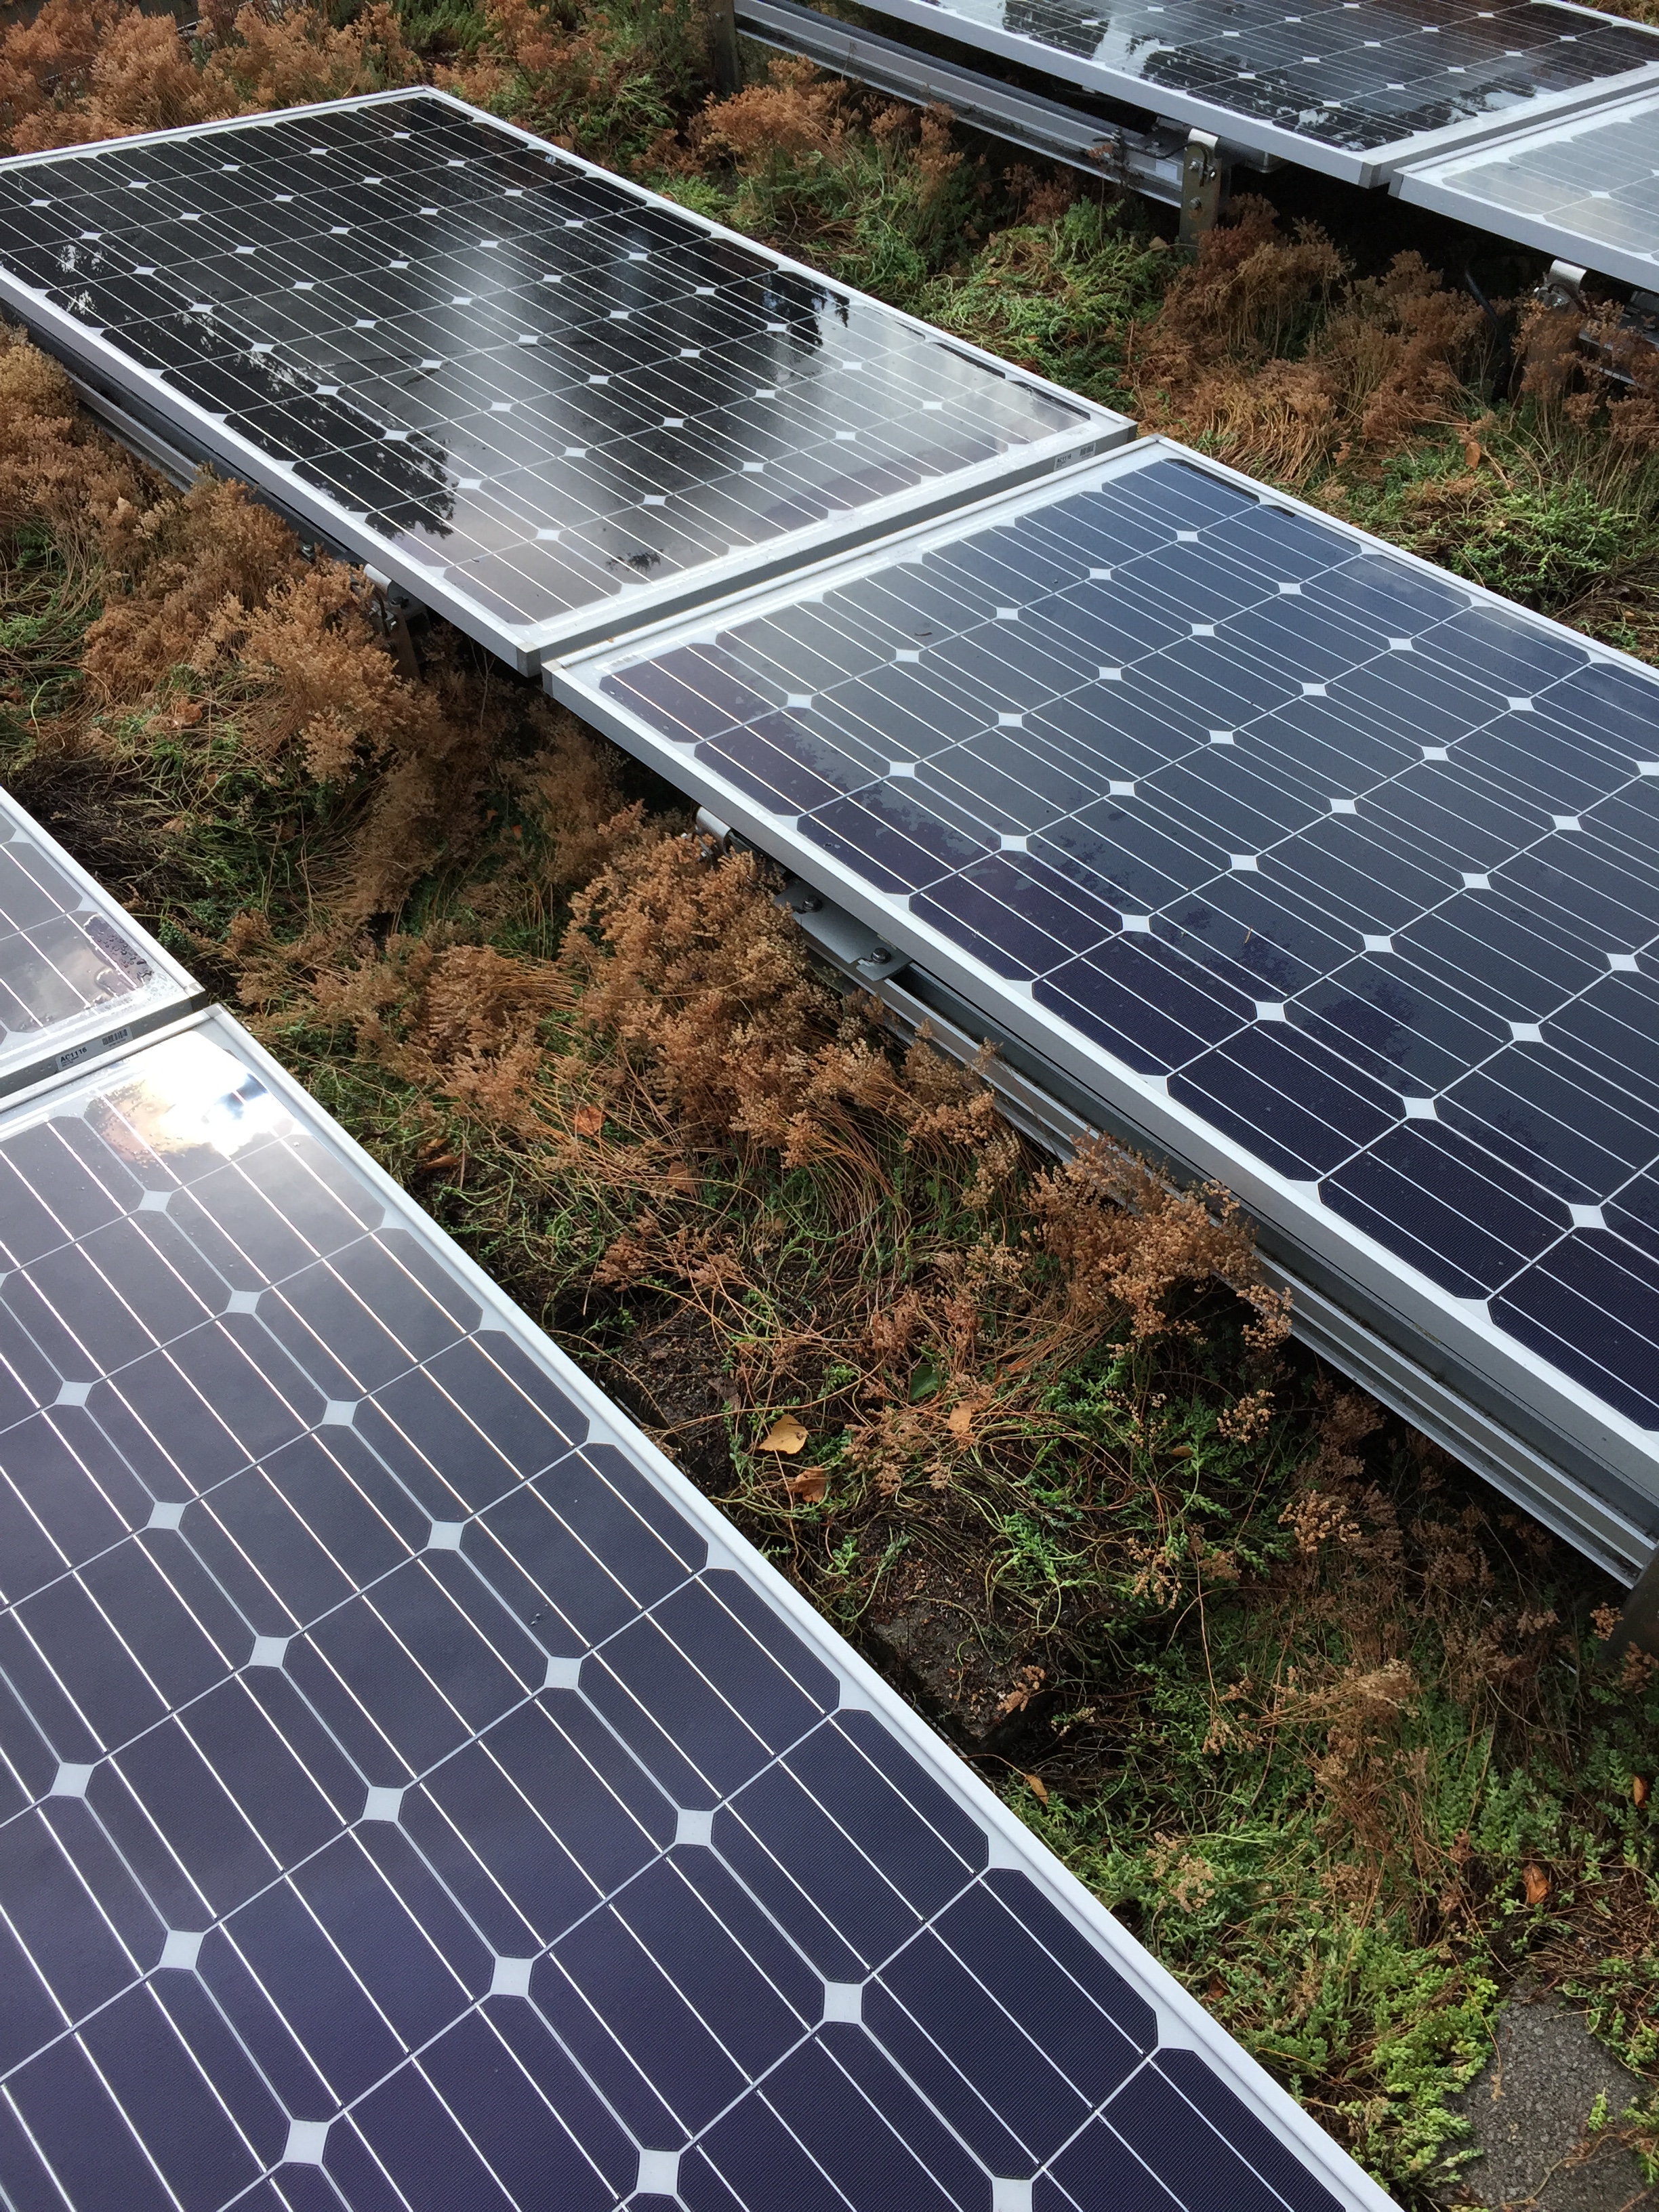
i received an email a couple of weeks ago alerting us that our PV array was generating less energy than typical, and that the system should be inspected. this is one of the benefits of leasing a PV system. after a quick climb to the upper roof the problem was obvious - the sedum from the green roof had grown up and over the base of most of the panels. while in hindsight it may have been better to mount the panels higher above the roof, in less than 30 minutes the sedum was cleared off and away from the panels and they were washed clean. later this fall i will prune back the sedum and again check in on the array.

is it working?
after more than 2 years living in skidmore passivhaus, i'm frequently asked is it working? let's take a look at the numbers from the last year:
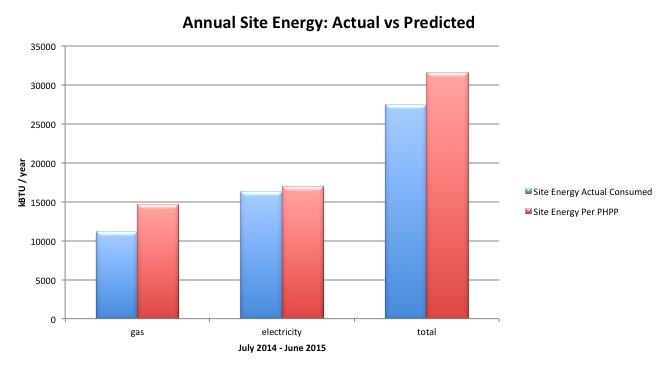
it's interesting to compare our actual annual consumption to the predicted consumption per the PHPP model. this project was modeled in PHPP 2007, and there has been some criticism in the passive house community suggesting that the German default values for electrical consumption built into PHPP are far too low for the US culture. (PHIUS has gone so far as to radically change the default values for electrical consumption). given the data on our project, i'm not so sure there is a problem.
occupant behavior of course plays a significant role in energy consumption, and there are a number of conditions to note for this building. PHPP assumes 4 occupants for a house of this size, when in reality there are only 2 of us (plus 1 dog and 2 cats) which should result in lower overall energy consumption. with fewer occupants, there will be lower internal gains which presumably would increase slightly the heating demand and heat load. Because we both work from home much of the week with computers and other devices running all day, it could be assumed that while there are only 2 of us, our consumption includes both home and work and would therefore be higher. I also should note (somewhat sheepishly) that we have 3 cables boxes that stay on all the time, including one DVR, which draw a steady amount of electricity and generate some heat. This is all somewhat anecdotal, but it shows the inherent complexity in accurately predicting energy consumption.
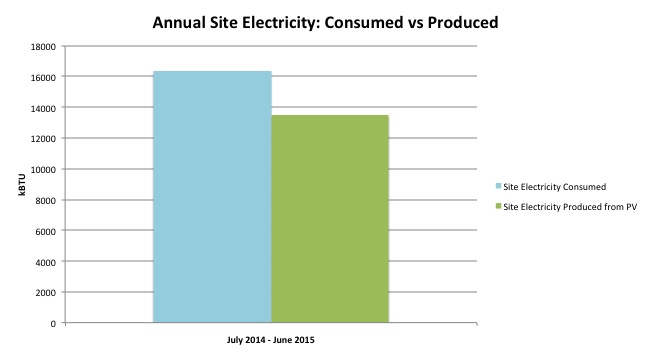
an annual summary of our site electricity consumption and site energy production (from our roof mounted 4.32 kW array) shows that we generated 82% of the electricity we consumed.
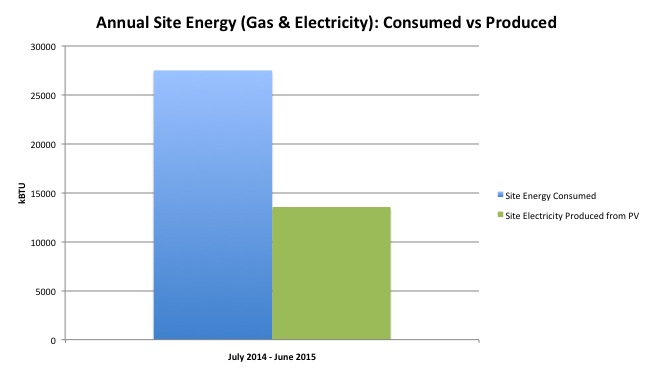
an annual summary of our site energy consumption (gas and electric) and site energy production shows that we generated 49% of the total energy we consumed.
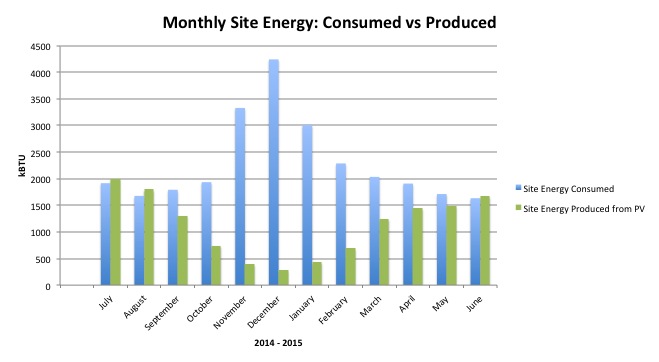
a monthly summary of our site energy consumption (gas and electric) and site energy production (from our roof mounted 4.32 kW array) shows the large deficit during the winter months as expected. more efficient equipment for our space heat and hot water would certainly help to offset some of this deficit. while a larger PV array would get us closer to net zero on an annual basis, it wouldn't solve this deficit and demonstrates one of the problems with an approach that focuses solely on annual net zero energy. elrond burrell has written an excellent blog post covering this topic.
a monthly summary of our annual gas and electric bills demonstrates our consistently low monthly utility costs. our average monthly cost for both gas and electricity over the last year was $36.53.

note that for most of the year we pay our electricity provider the minimum monthly charge even though we are generating more electricity than we are using. our only gas appliance is our hot water heater, and a significant portion of our small monthly gas bill is for fees and taxes regardless of our consumption. if we were to change our gas water heater to electric even without a change in energy consumption, our monthly utility cost would be even lower by eliminating the minimum gas charges.
aside from reducing our CO2 emissions and our consistently tiny utility bills, we're staying extremely comfortable year round - warm in the winter while barely using our heating system, and cool in the summer without any air conditioning. so the answer is unequivocally yes, it is definitely working.
wall street journal
 skidmore passivhaus was recently featured in the wall street journal.
houzz
skidmore passivhaus was recently featured on houzz. check it out:
[houzz=http://www.houzz.com/ideabooks/29431116/list/houzz-tour-passive-house-principles-active-benefits-in-portland w=380]
passivhaus heating
really this post should be titled: "selecting a heating system for a small passivhaus in portland oregon"

with an extremely low heating load, a passivhaus makes most typical residential heating systems unnecessary and unsuitable in terms of size and cost (this includes gas forced air furnace, ground source heat pump, and hydronic radiant heating). for skidmore passivhaus (1965 sf house /1680 sf treated floor area), the peak heating load per PHPP was estimated to be 5,657 btu/hr (at a design temperature of 32deg F). as an example, a small wood stove might produce about 20-30,000 btu/hr when running hot, far too much from a single point source in a passivhaus. in addition, providing fresh air for combustion and sealing all the penetrations creates complications, plus we frequently have no burn restrictions during our coldest winter days. a very small gas furnace still produces about 30,000 btu/hr, and delivers warm air at a higher velocity than is really comfortable. both systems could easily overheat a small passivhaus and each have their pros and cons. while gas here is still cheap and the electric grid nationwide is pretty dirty, most of our electricity in the northwest is generated by hydro and is clean and generally considered renewable.
so for our small passivhaus in portland, we considered the following all electric options:
Electric Resistance Heating
Pros
- very low first cost and simple to install (under $1k installed)
- easy to zone and control individually
- no maintenance
- silent (radiant or convection type)
- ok aesthetic (not great though)
Cons
- inefficient compared to heat pump (COP 1)
- difficult to meet PH with all electric energy sources
- not great aesthetic

Ductless Mini Split Heat Pump
Pros
- high efficiency (COP 3:1 or greater)
- ability to provide cooling
- variety of sizes starting at around 9000 btu/hr
Cons
- higher first cost (roughly $4k - $5k installed for 1 head with 1 outdoor unit)
- requires open plan / poor distribution to closed rooms
- difficult to zone (add roughly $2k for additional head)
- fairly unpleasing aesthetic (add $500 for slightly better looking floor mounted head)
- often requires some electric resistance heating as supplement
- ability to provide cooling means increased energy consumption (if cooling used)


Ducted Mini Split Heat Pump
Pros
- high efficiency (slightly less than ductless mini split)
- ability to provide cooling
- pleasing aesthetic / discreet (concealed ductwork)
- good distribution (ductwork required)
- variety of sizes starting at around 9000 btu/hr
Cons
- higher first cost (roughly $7k installed)
- requires space to locate concealed unit and run ductwork
- ability to provide cooling means increased energy consumption (if cooling used)

Heating Skidmore Passivhaus
at skidmore passivhaus we elected to use electric resistance wall mounted heaters. in our climate mechanical cooling seems like an unnecessary and wasteful luxury, and we frankly did not want it at all. instead we opted for operable exterior shades on the large south facing windows to significantly reduce summer heat gain. combined with well placed operable windows + doors and a nice amount of exposed thermal mass, the house stays extremely comfortable even during the hottest days of the summer.

although the improved efficiency of a heat pump was (and still is) extremely appealing, we struggled with the significant additional cost, the appearance of the ductless heads, and the difficulty in zoning. for the money saved installing the electric resistance heaters (we spent under $1k total) we were able to install a decent sized roof mounted solar PV array. had we not built to passivhaus, we would not have considered this approach.

we installed a total of 4 individual convection heaters made by Convectair ranging from 1250 watts - 1750 watts each. these convection heaters don't have a fan so they are completely silent. while there is an option to connect the heaters and control them from a single programmable thermostat, we opted to keep them individually controlled for maximum flexibility. without the programmable thermostat we have to adjust each heater daily, but this has simply become part of our routine and works for us because of our unpredictable schedules.

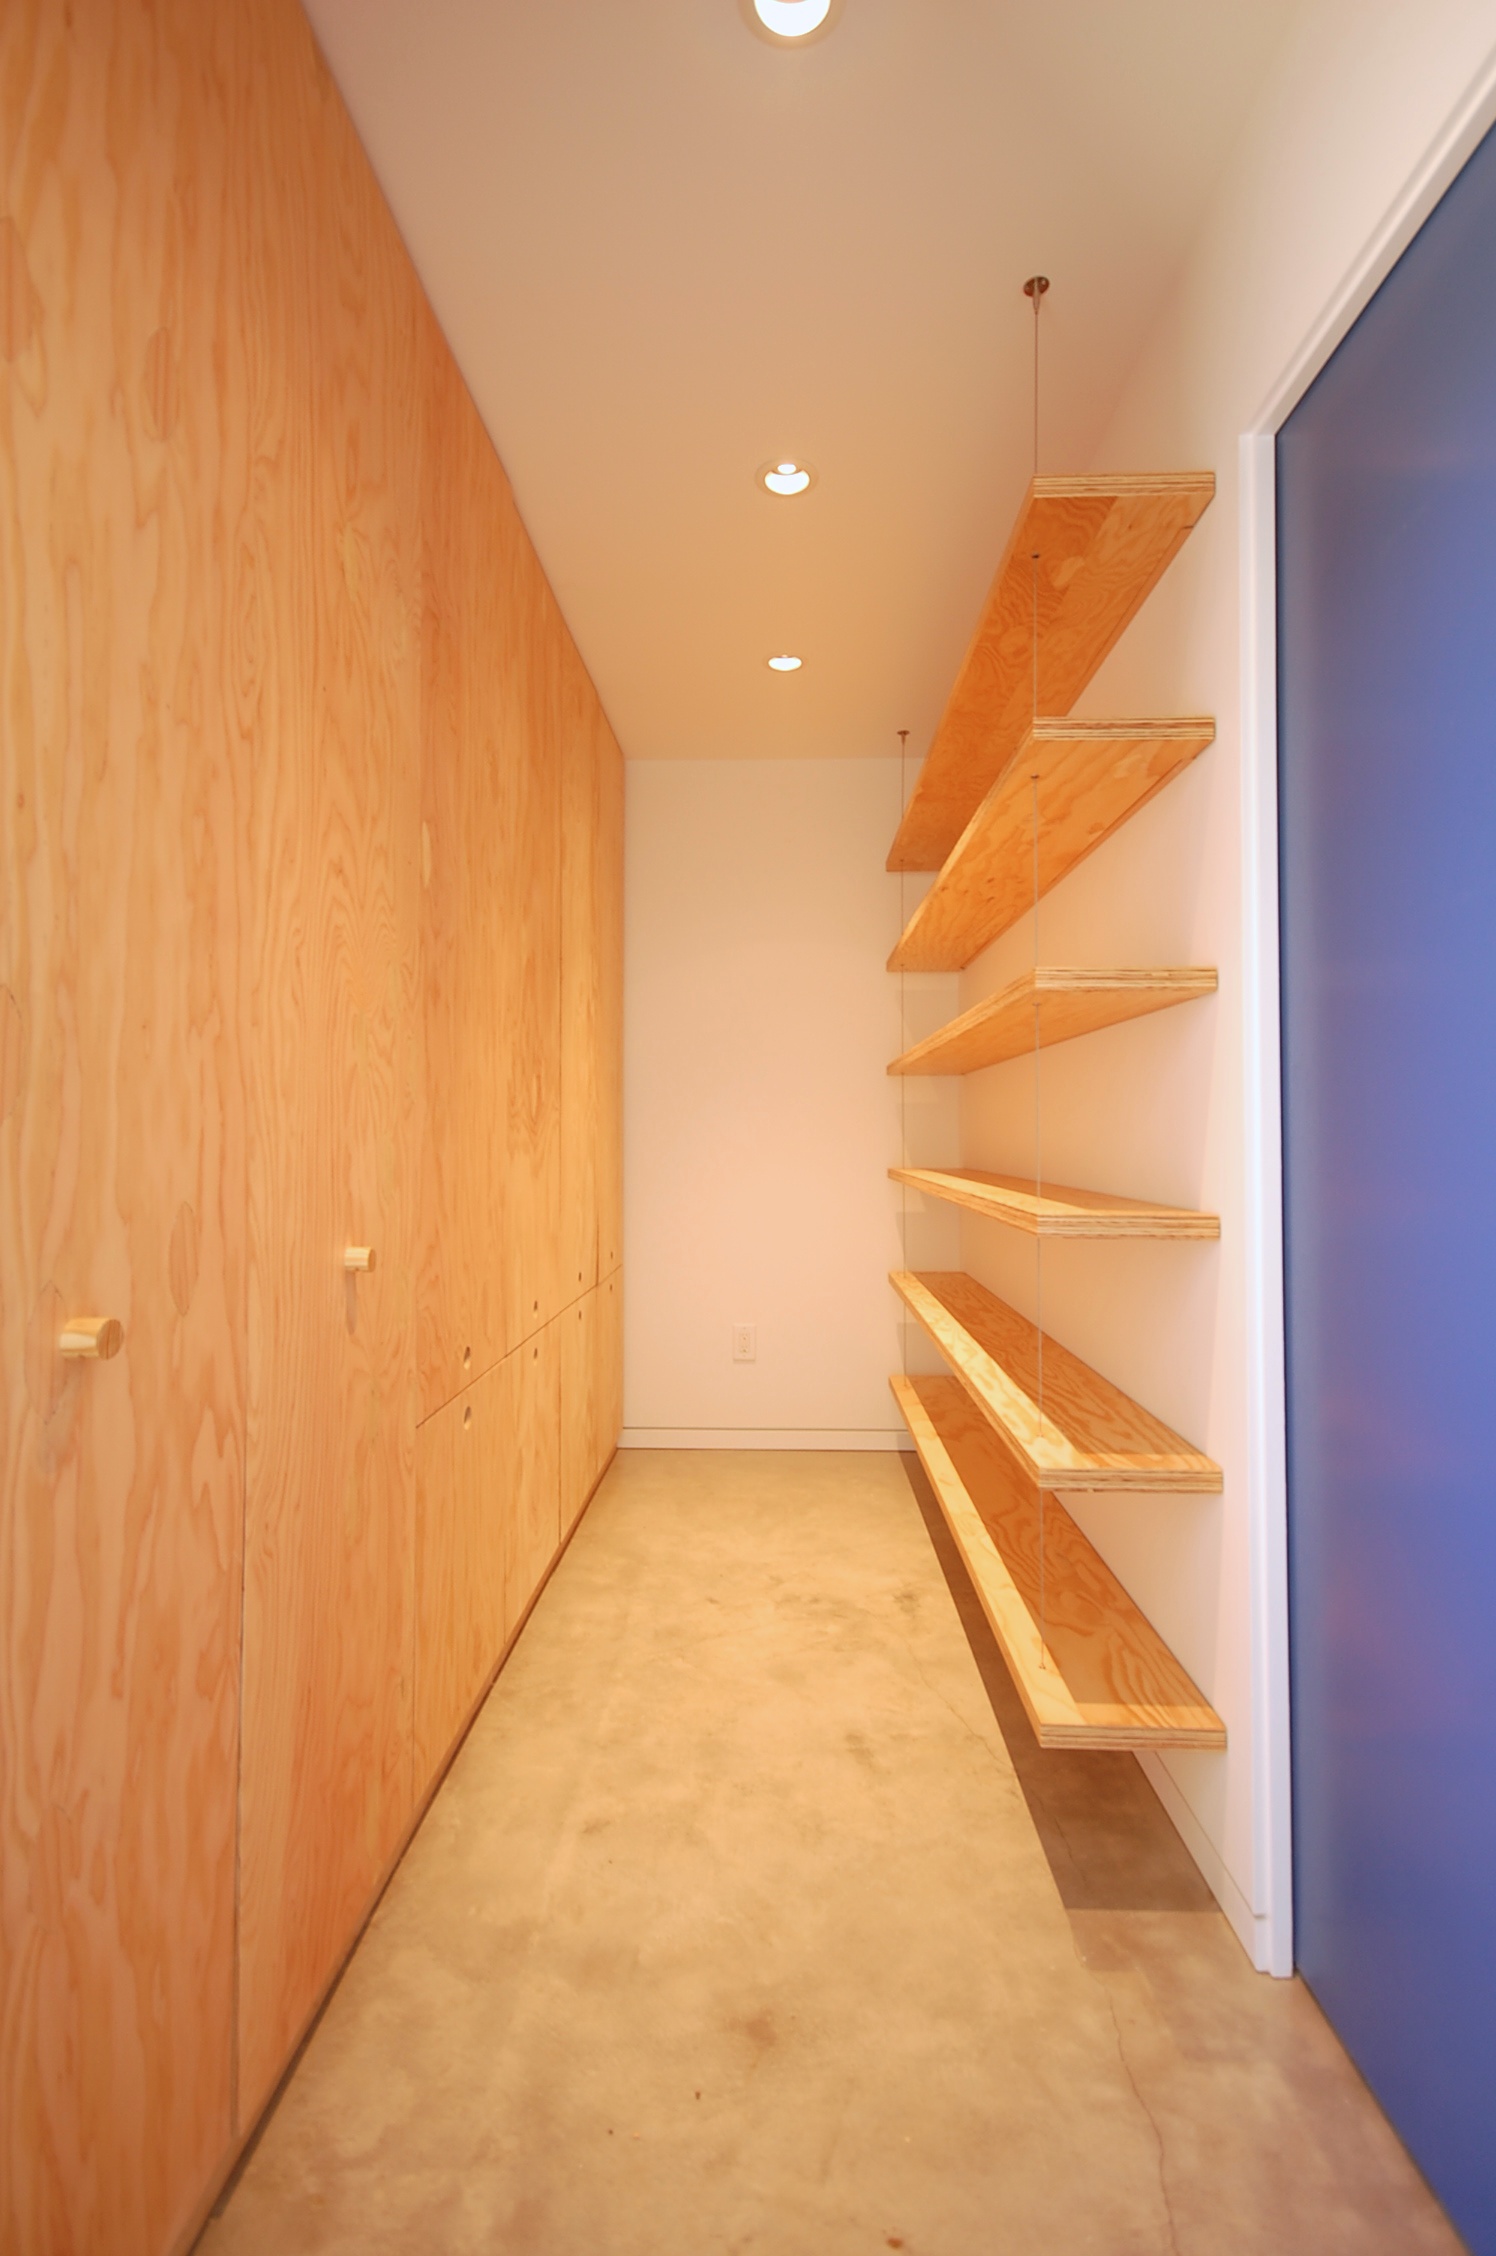
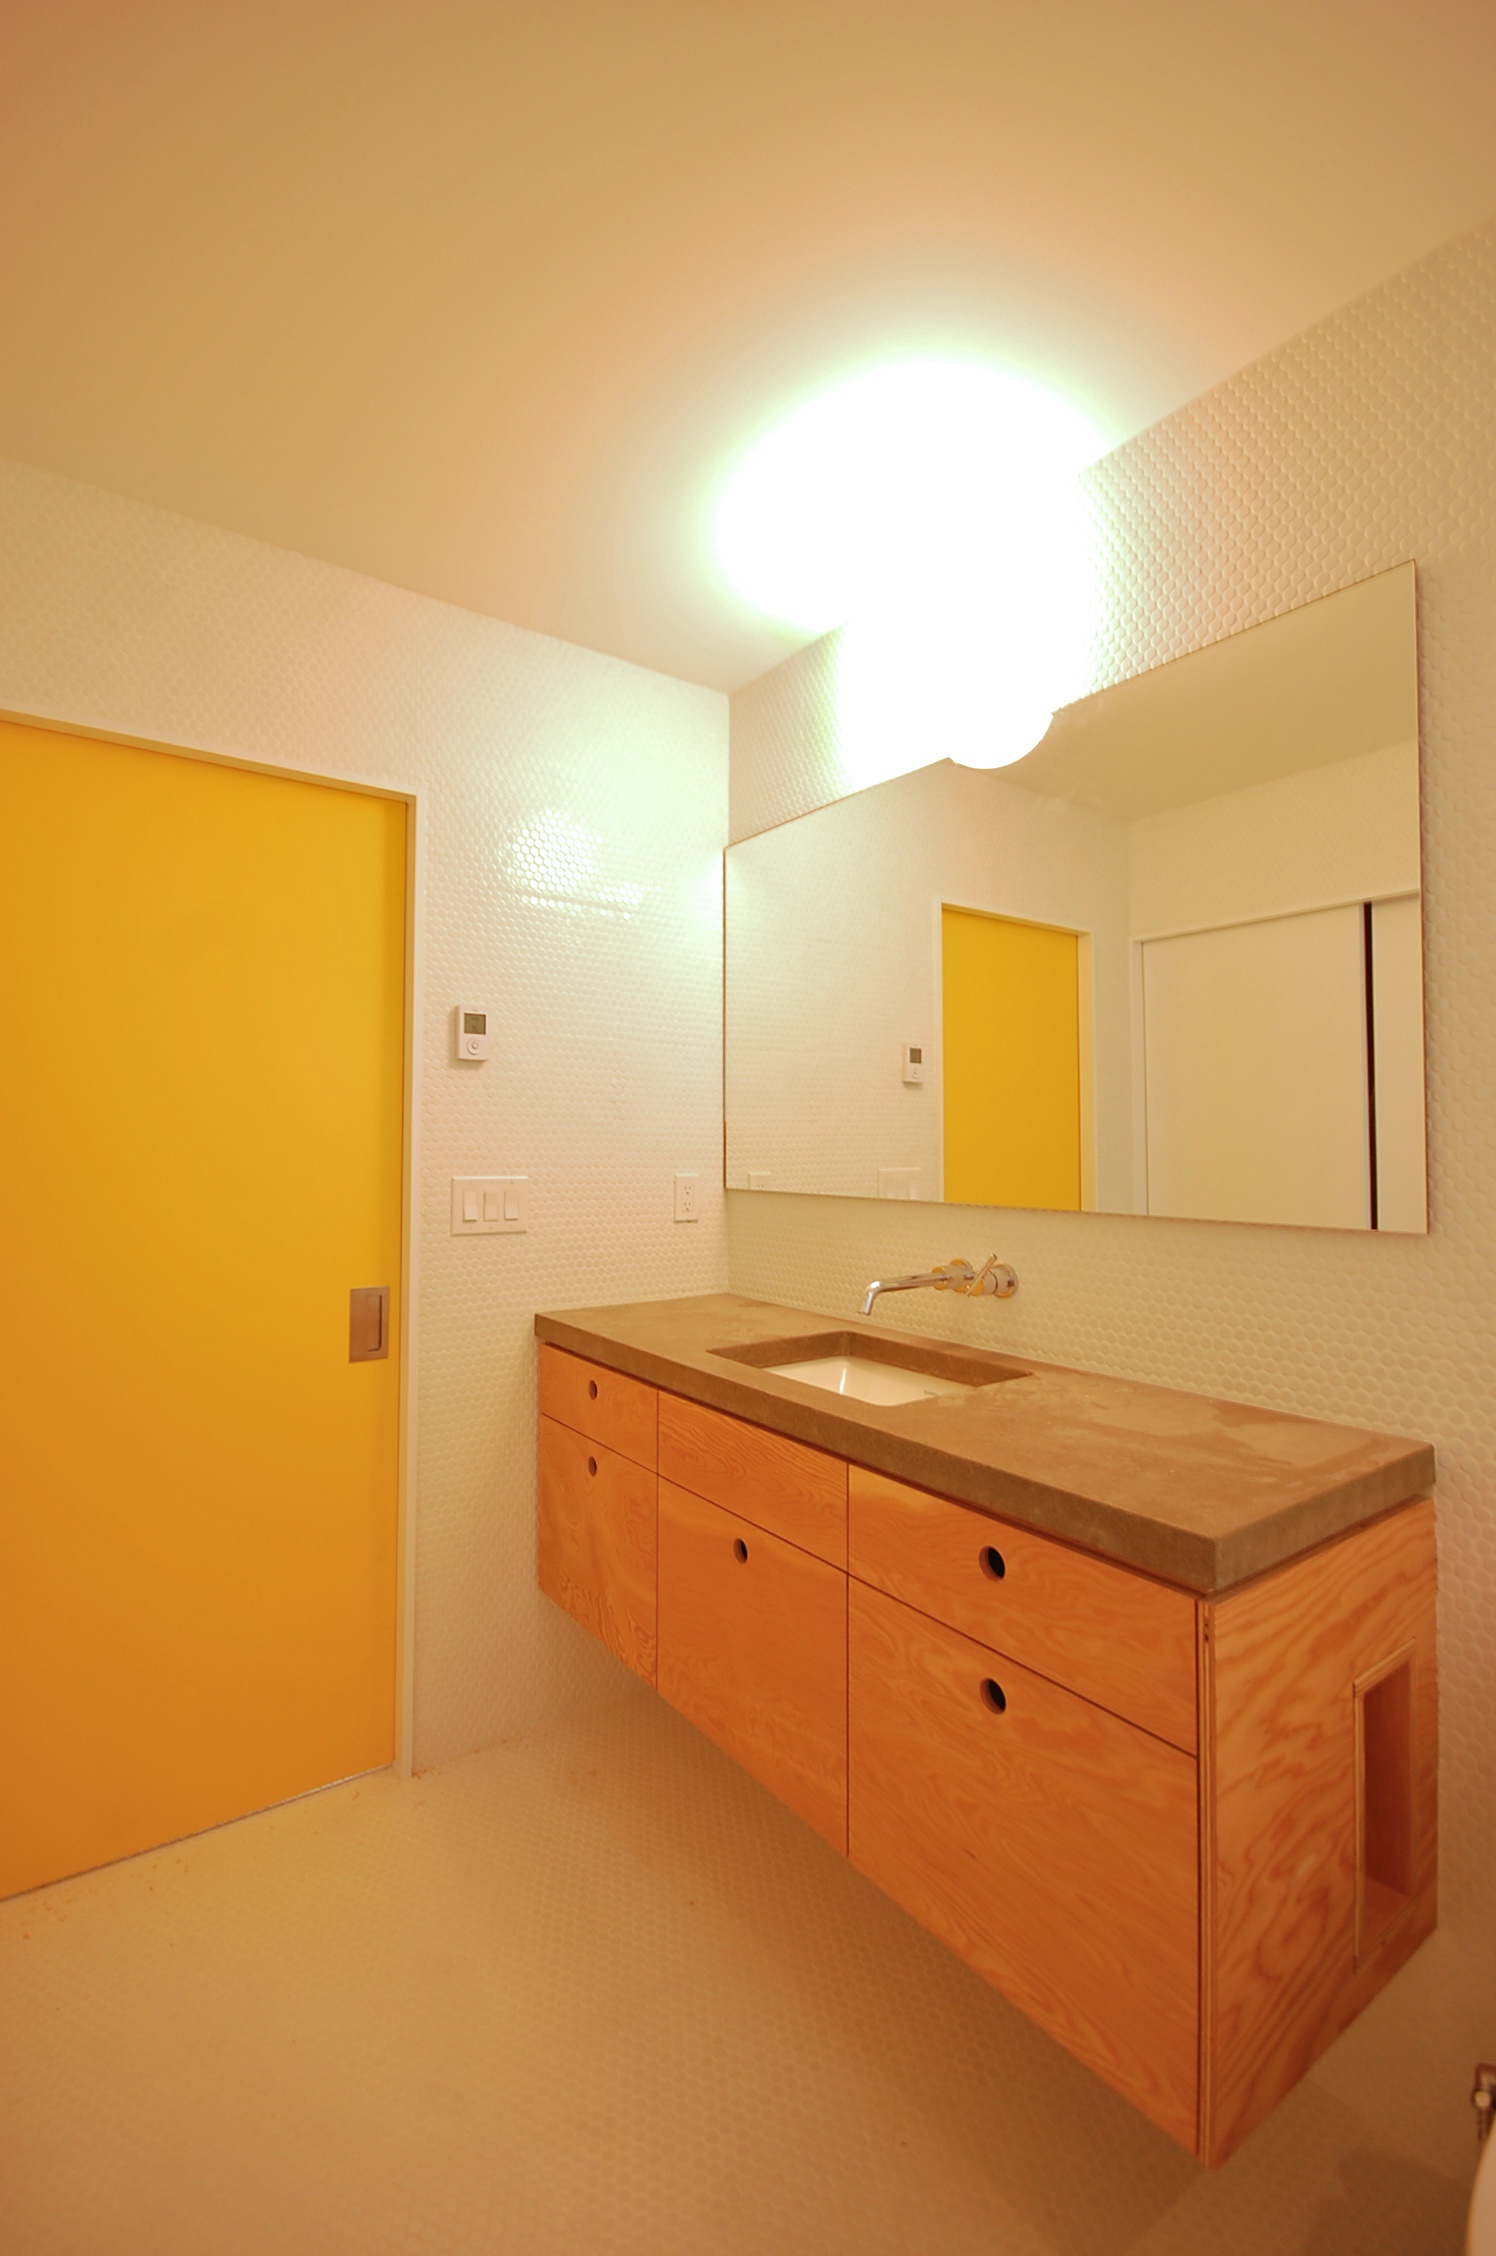
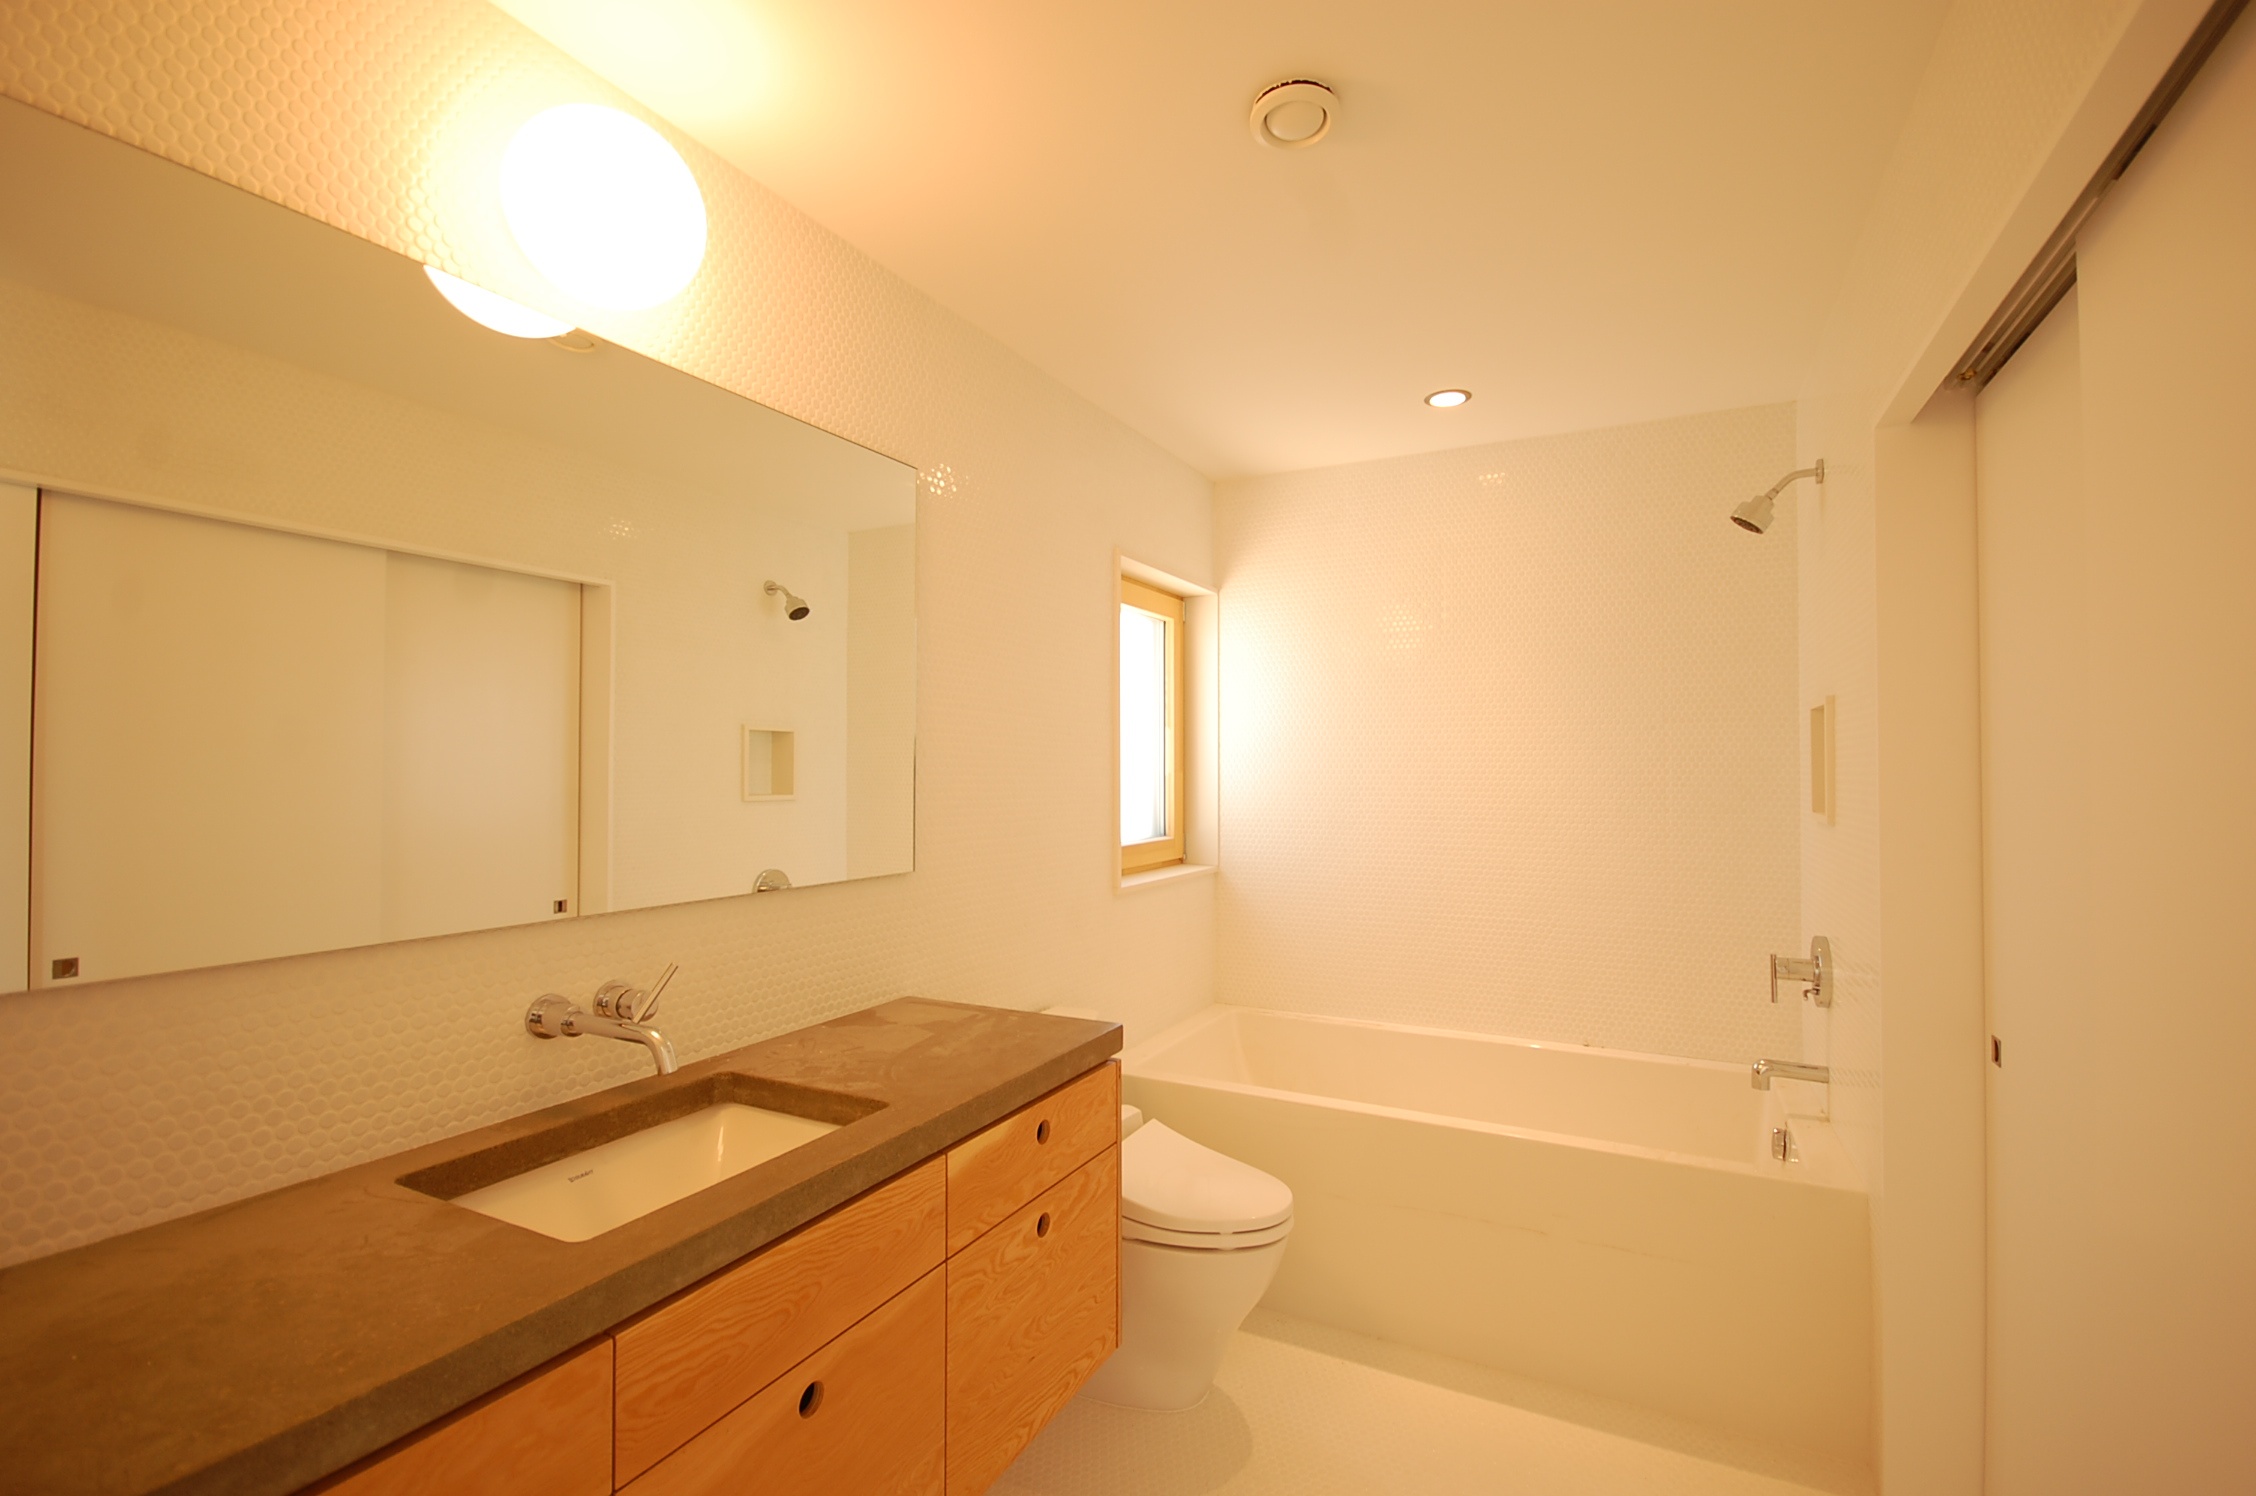
because the plan is organized essentially as a one bedroom house with a separate wing with individual work spaces, an electric heater in each work space allows for simple control as separate zones. the open living room has one heater, while the remaining heater is in the master bedroom upstairs. because the house is so tight and well insulated, a number of rooms don't have any heating source yet remain perfectly comfortable including the pantry, 'breezeway', main floor bathroom, and upstairs walk in closet. the kitchen, entry, and dining room are open to the living room and served by the living room heater. the master bathroom has only an electric radiant mat under the tile floor.

our total system approaches 20,000 btu/hr (5750 watts x 3.413 btu/hr/watt), but it is distributed throughout the house and we rarely have all of the units running at the same time. after our first winter, the house stayed extremely comfortable as expected with only a few degrees variation between the warmest and coolest rooms. during our record cold weather this winter (almost 3 weeks with lows dipping into the teens and cloudy snowy skies for much of it) the living room heater struggled a bit to raise the temperature very quickly when setback at night. in hindsight that heater was probably undersized considering that it serves a huge portion of the house - the 2 story living room (with large areas of glass and lots of mass), dining room, kitchen, entry, breezeway, and pantry. we are considering adding a small additional heater to the living room area just for those extreme cases.

while many may question our decision to use electric resistance heat and a PV array, for our super low load passivhaus and particular situation it seemed to make sense. overall we are pleased with the system although it is definitely not sophisticated, super efficient, nor great looking. while we don't have individual data loggers installed yet to track electricity used for heating specifically and to monitor indoor temp and humidity, we will be posting general information about our overall energy consumption this summer documenting our first year of living in the house. hopefully we will begin logging data for year two.

we'd love to hear your thoughts, suggestions, corrections, etc. as we continue to ponder appropriate systems for some of our new projects currently in design.
smart and simple
brian libby of portland architecture writes about his visit to the skidmore passivhaus: www.portlandarchitecture.com
more news coming soon!
skidmore passivhaus
there's quite a bit of excitement in the air surrounding our skidmore passivhaus. in addition to officially receiving passivhaus certification (PHIUS +), the house was awarded an earth advantage platinum rating and energy star northwest certified. back in early october the house was featured on the aia portland's design matters tour of exceptional homes, and was the only passivhaus on the tour.
a few weeks ago a 4.32kW PV system was installed on the upper roof which is expected to help the house approach net zero energy use.
inhabitat just featured the house on their website, and portland monthly magazine was on site this week to photograph the house for an upcoming issue.
we're also excited to present a handful of new photos completed by local architectural photographer jeremy bittermann.


drop us a line if you have questions, want to learn more, or just to say something nice.
you can also follow us on twitter @insituarch
check back for more updates soon.
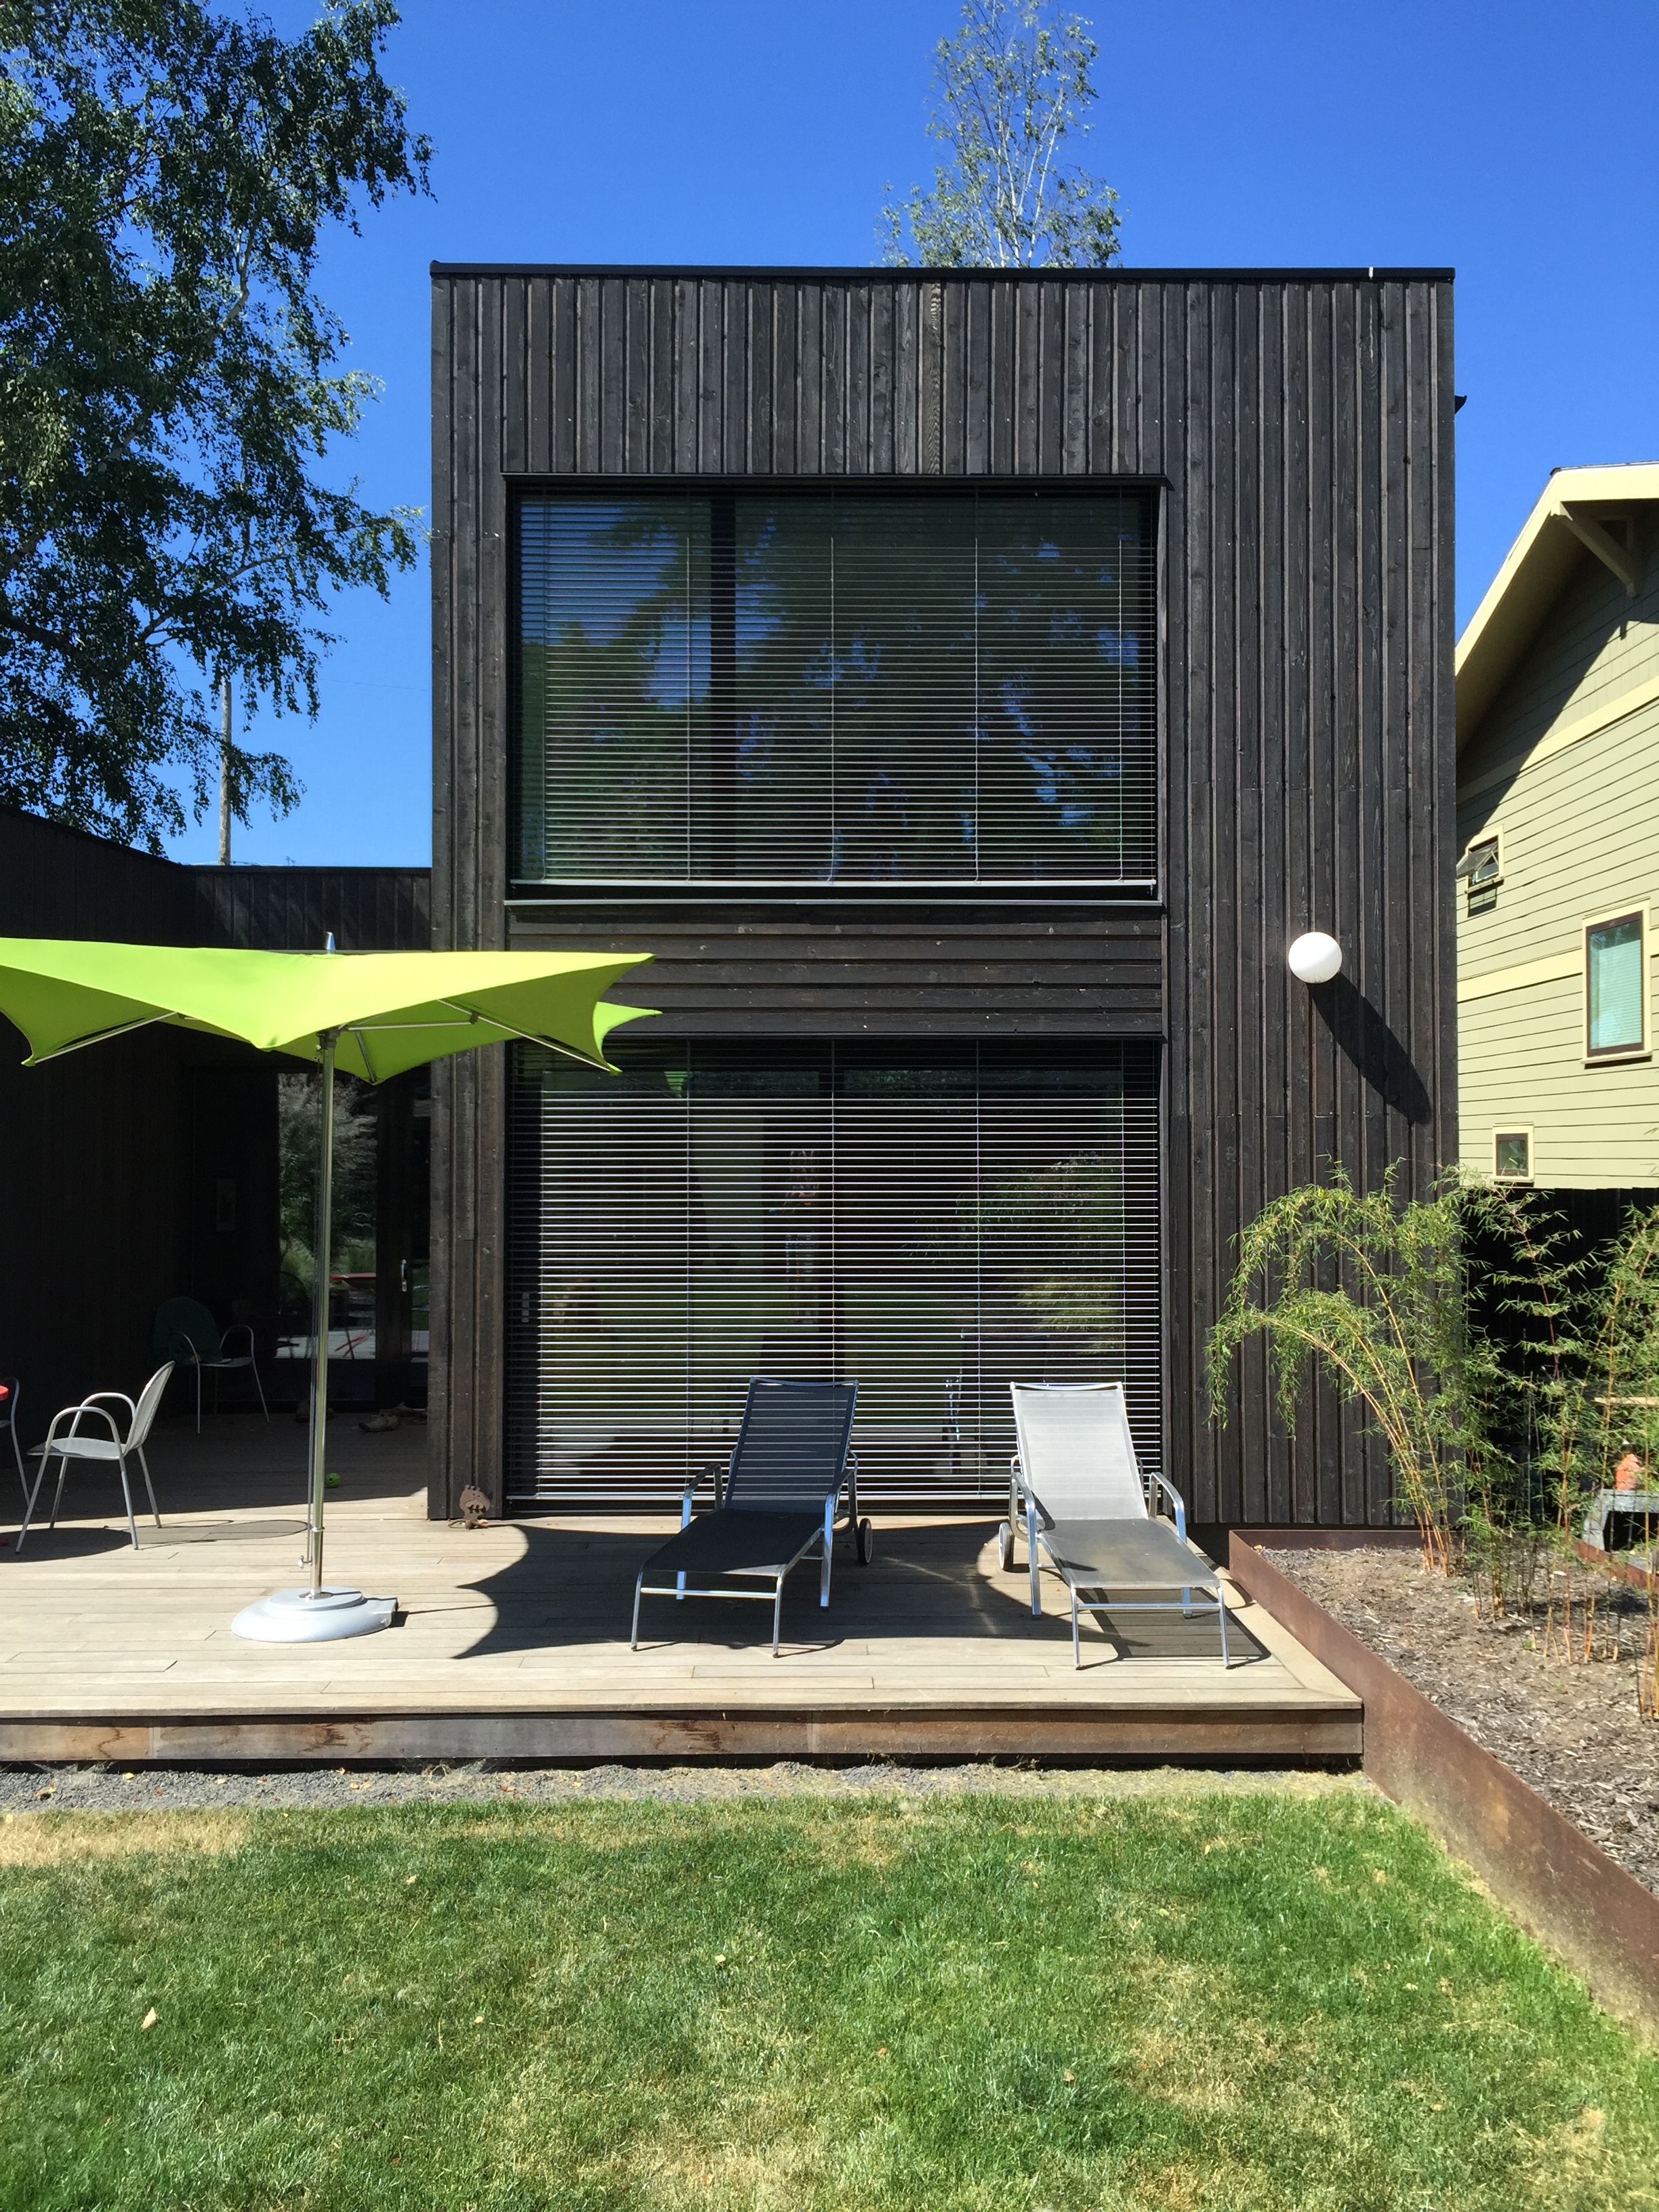
cool green
more we now have a little patch of green lawn and some rusty planters to go with our deck. summer is here.
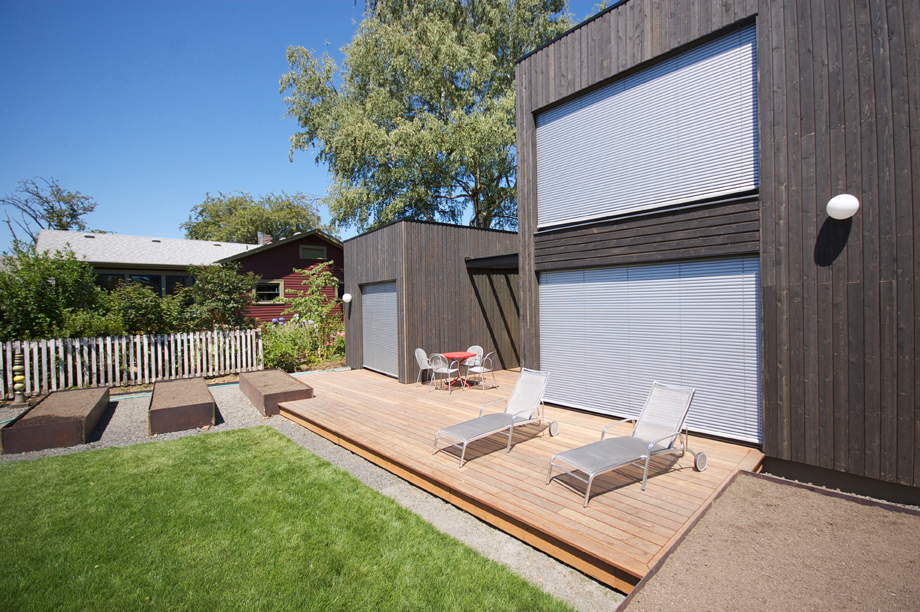
with the amount of high shgc glass on our south facade, it would be easy to overheat without proper shading.
on the hottest days, we simply close our exterior shades to block unwanted solar radiation before it hits the glass. the ability to fully control the shades means we can optimize the amount of gain or shade we are getting depending on the daily conditions.
the shades can be tilted to allow views out while still blocking the sun. the cost of the shades was offset by the elimination of cooling equipment and the cost of the energy to operate it.

the exterior shades combined with the exceptional insulation and thermal mass has kept our house exceptionally cool and comfortable without any air conditioning.
more detail to follow. check back soon.
.32ach
we recently performed our final air-tightness test at skidmore passivhaus with a result of .32ach at 50pa. we are extremely pleased that our clear air-barrier strategy and diligent execution paid off.
here's a snapshot of our final phpp #'s:

there is no doubt that achieving passive house, particularly in our climate, is fairly easily achievable. it does require smart design, careful planning, a contractor that understands and pays attention, and a healthy dose of persistence. if you are ready to build one for yourself, drop us a line at info@insituarchitecture.net.
more pictures and info coming soon.
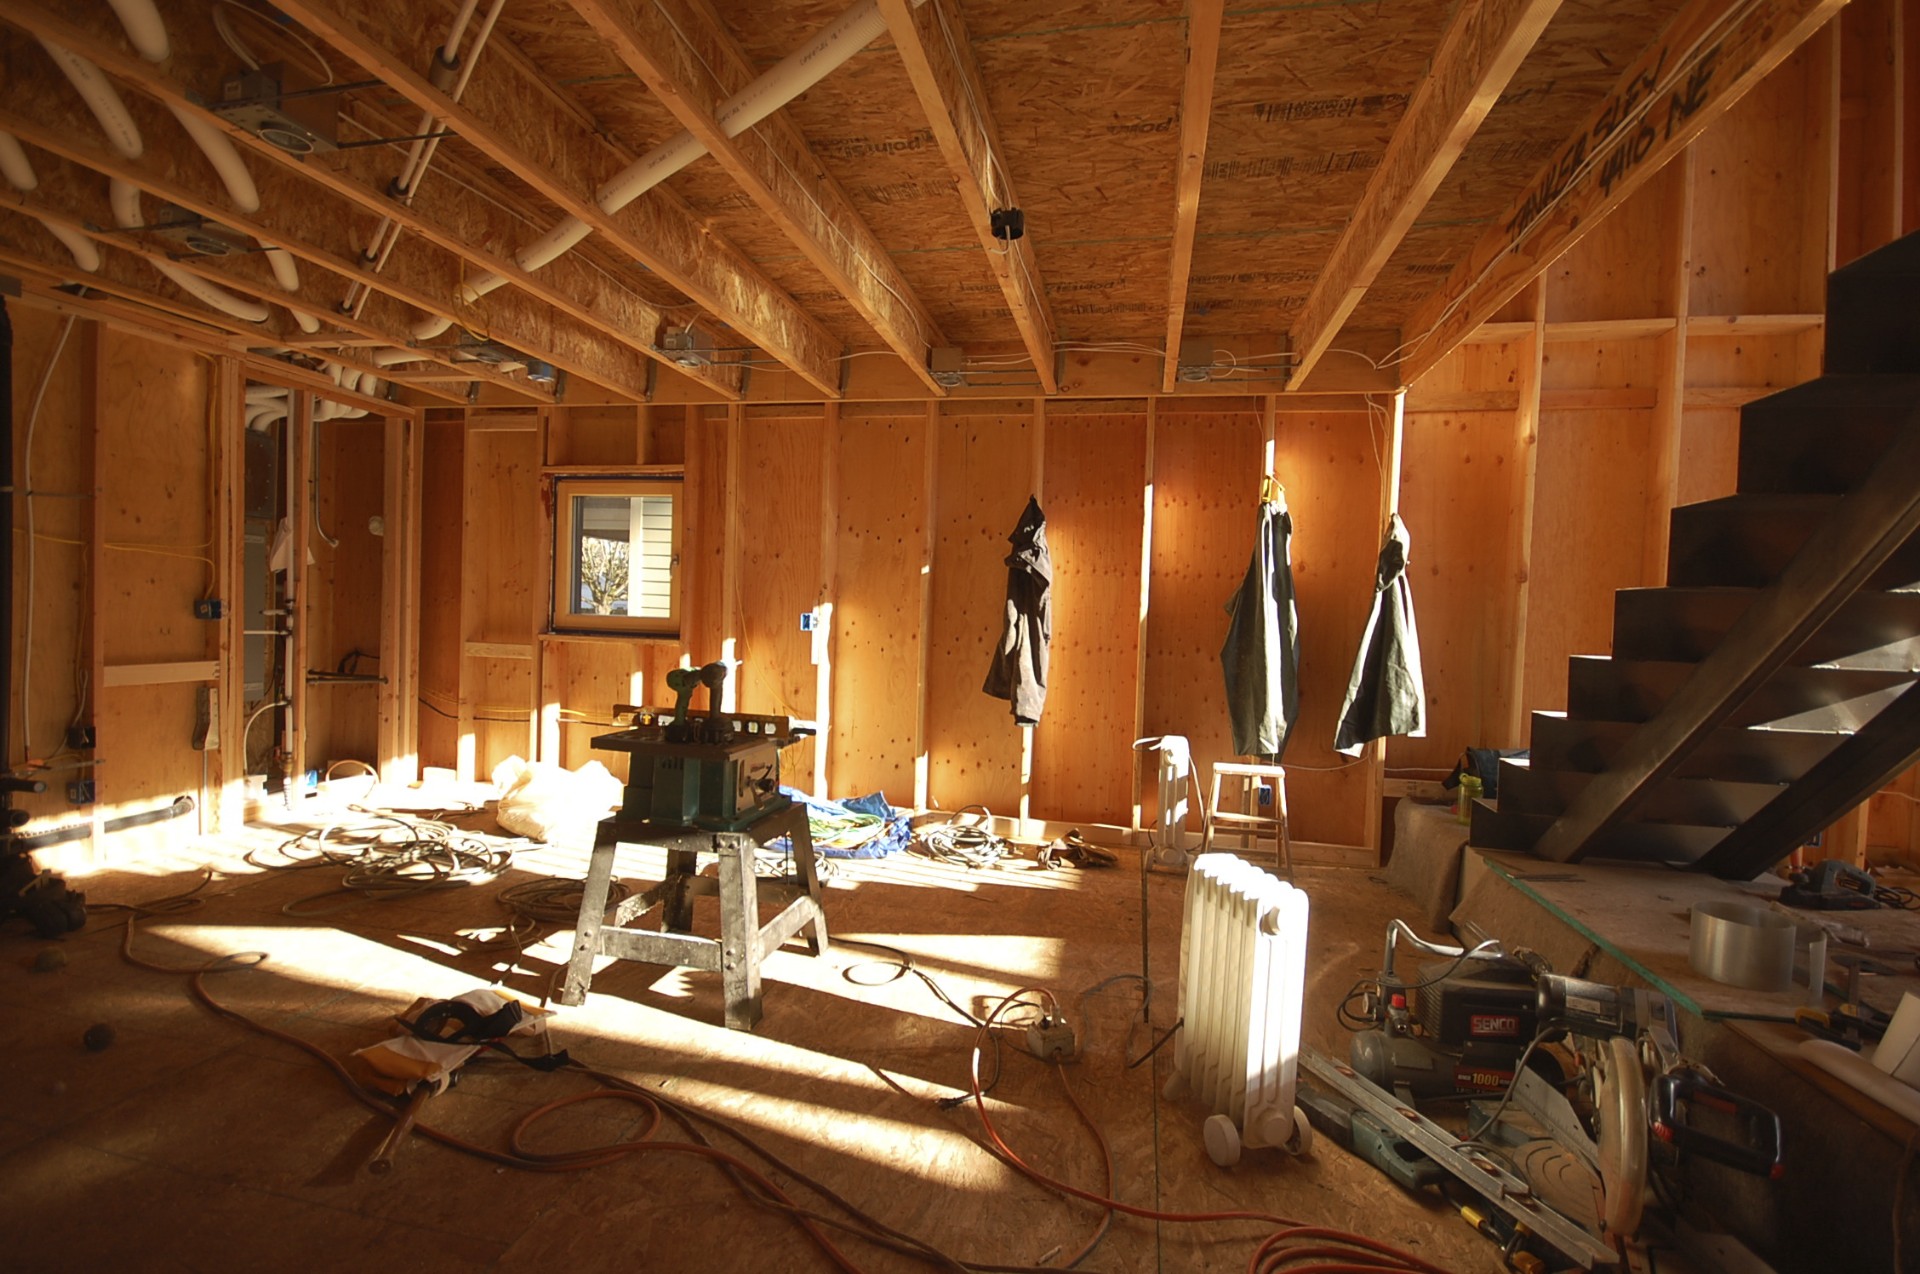
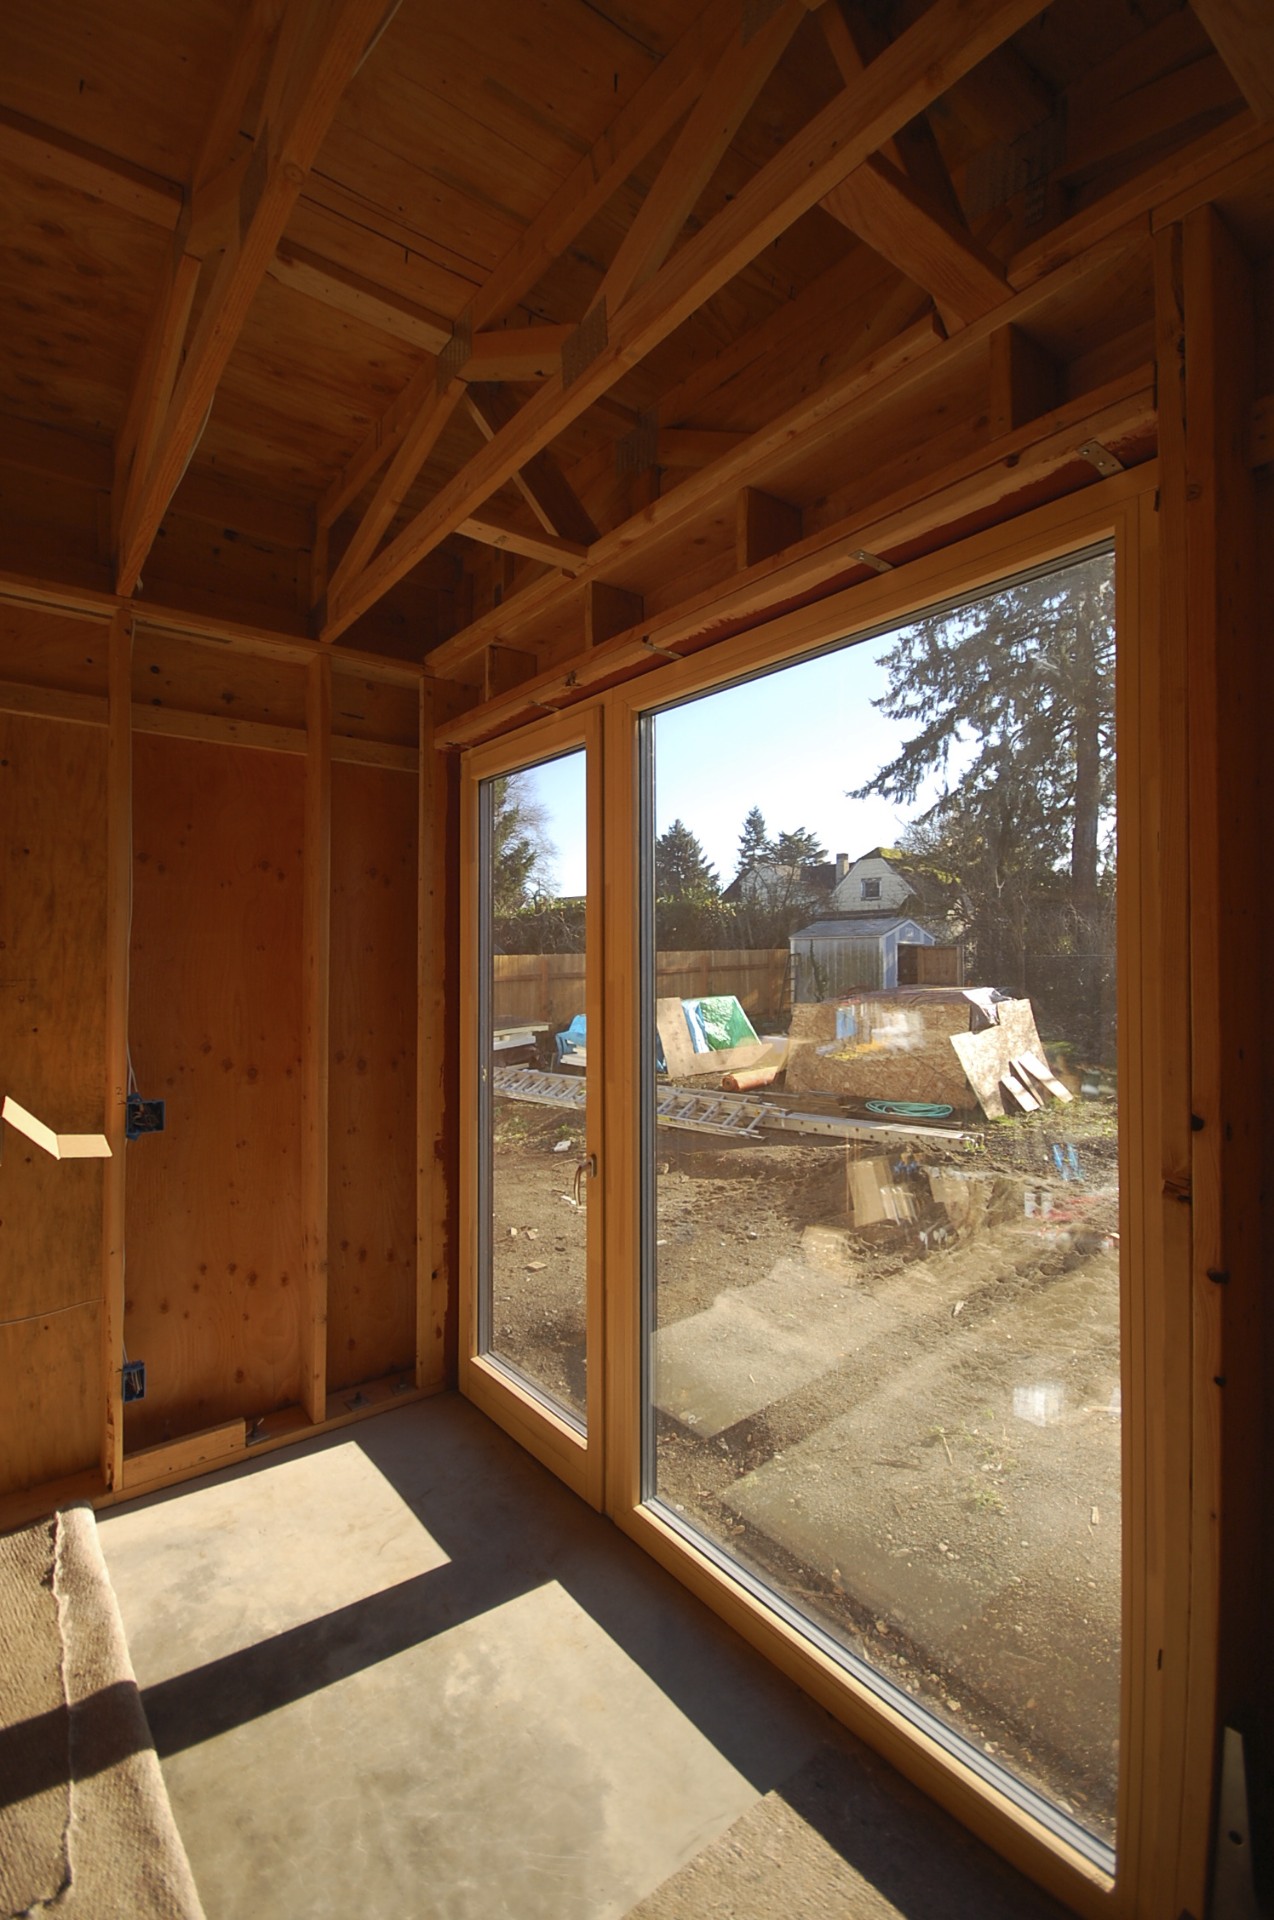
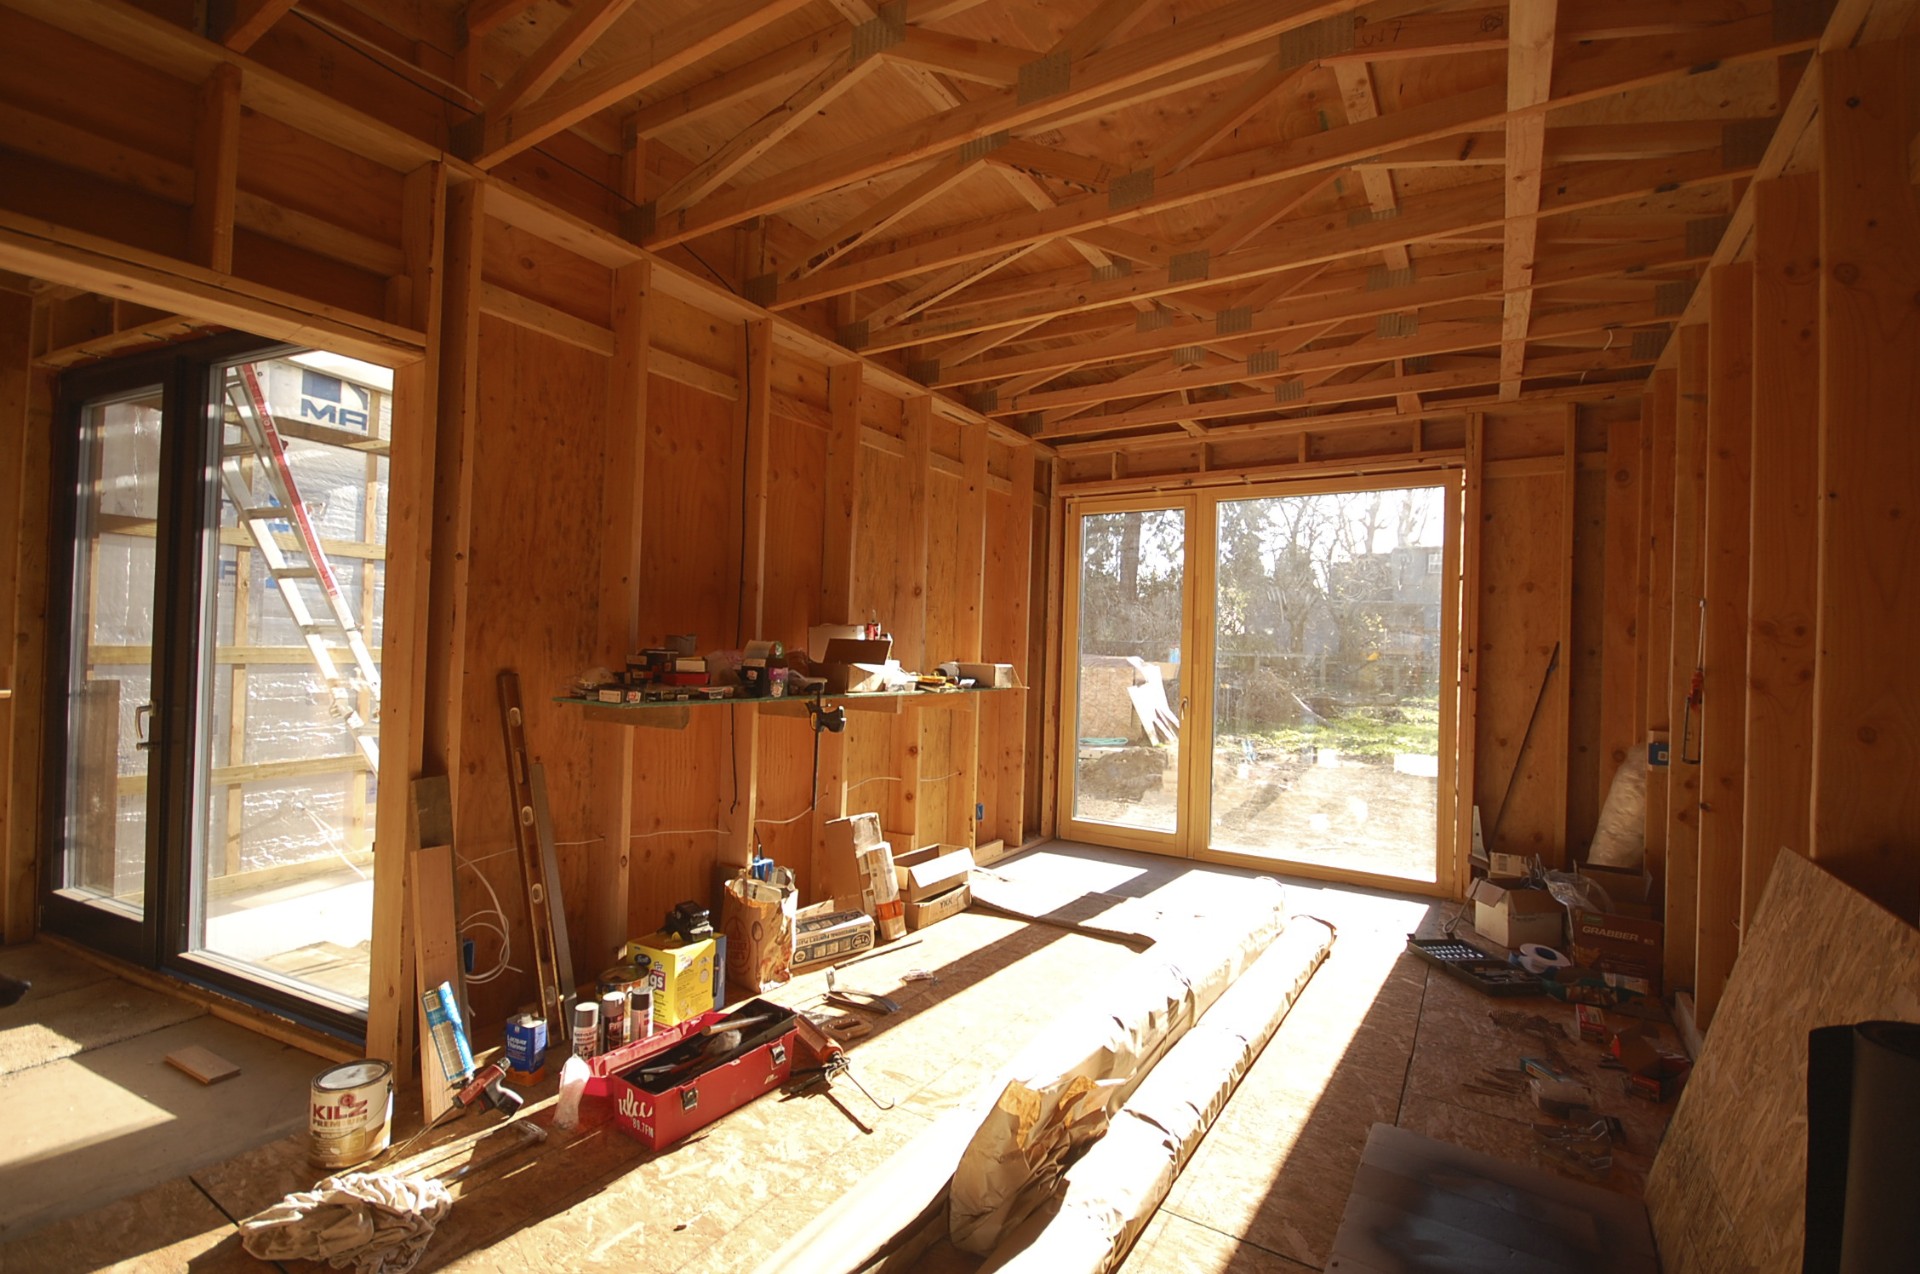
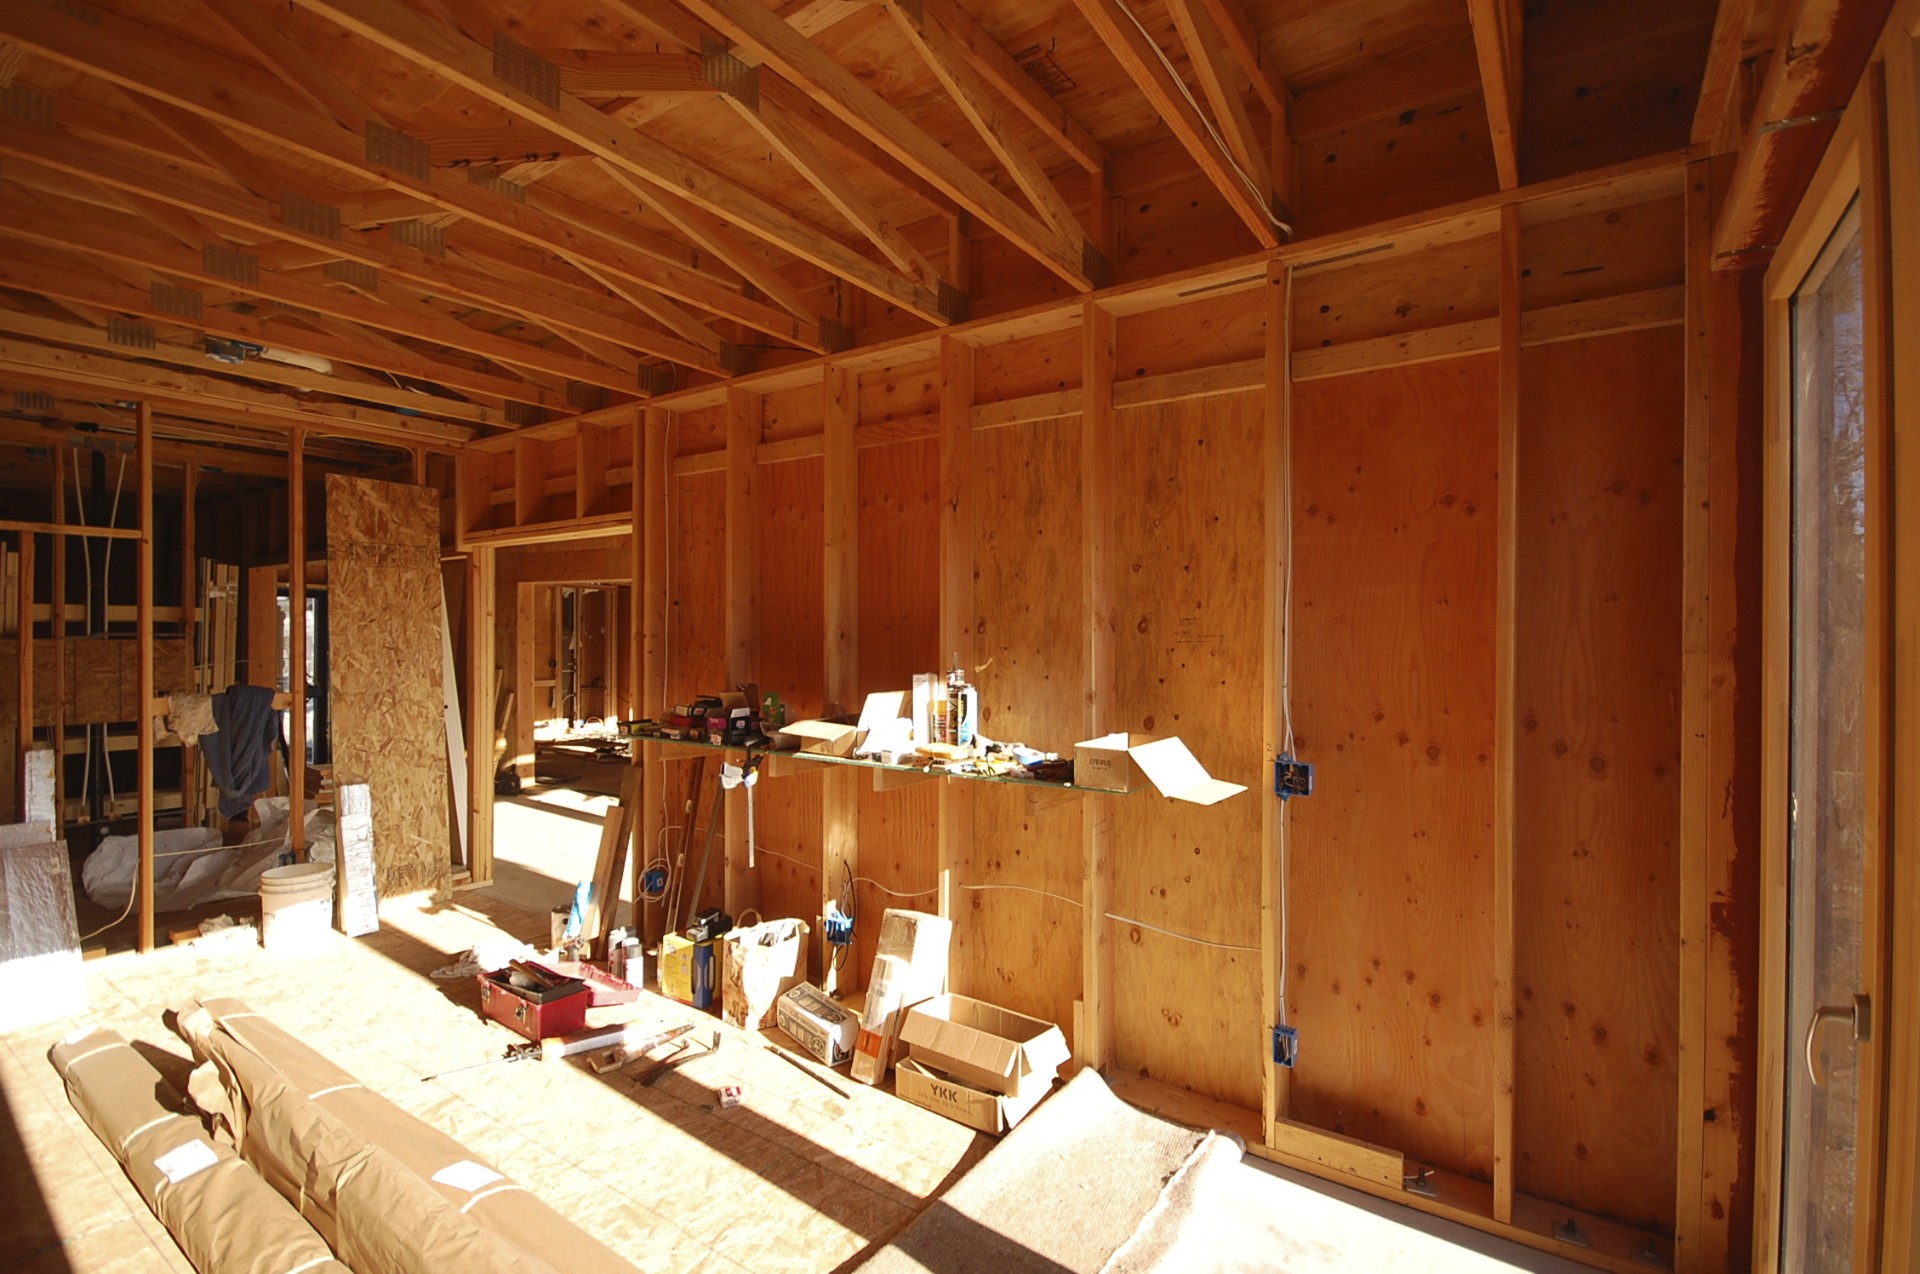
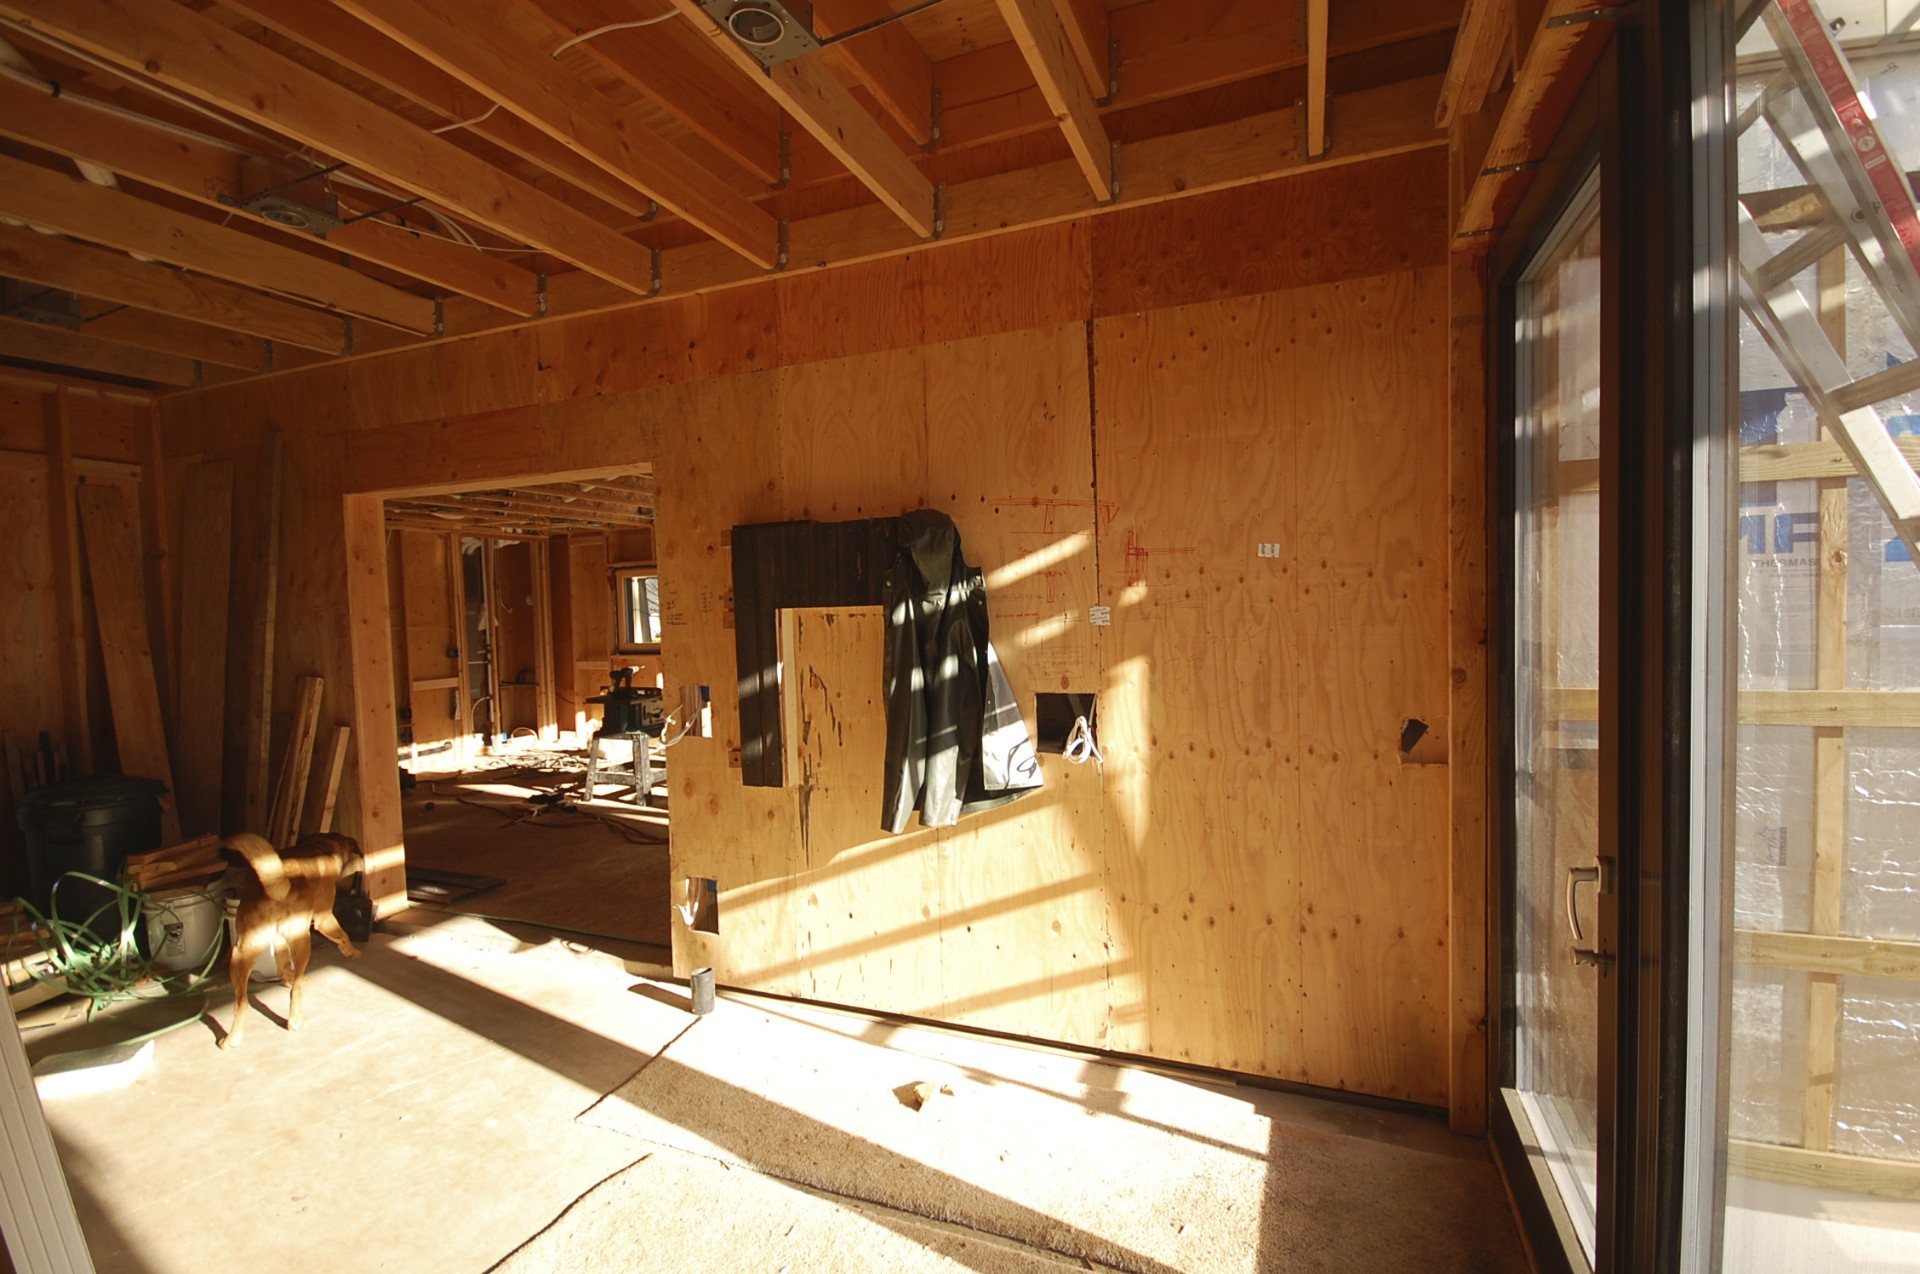
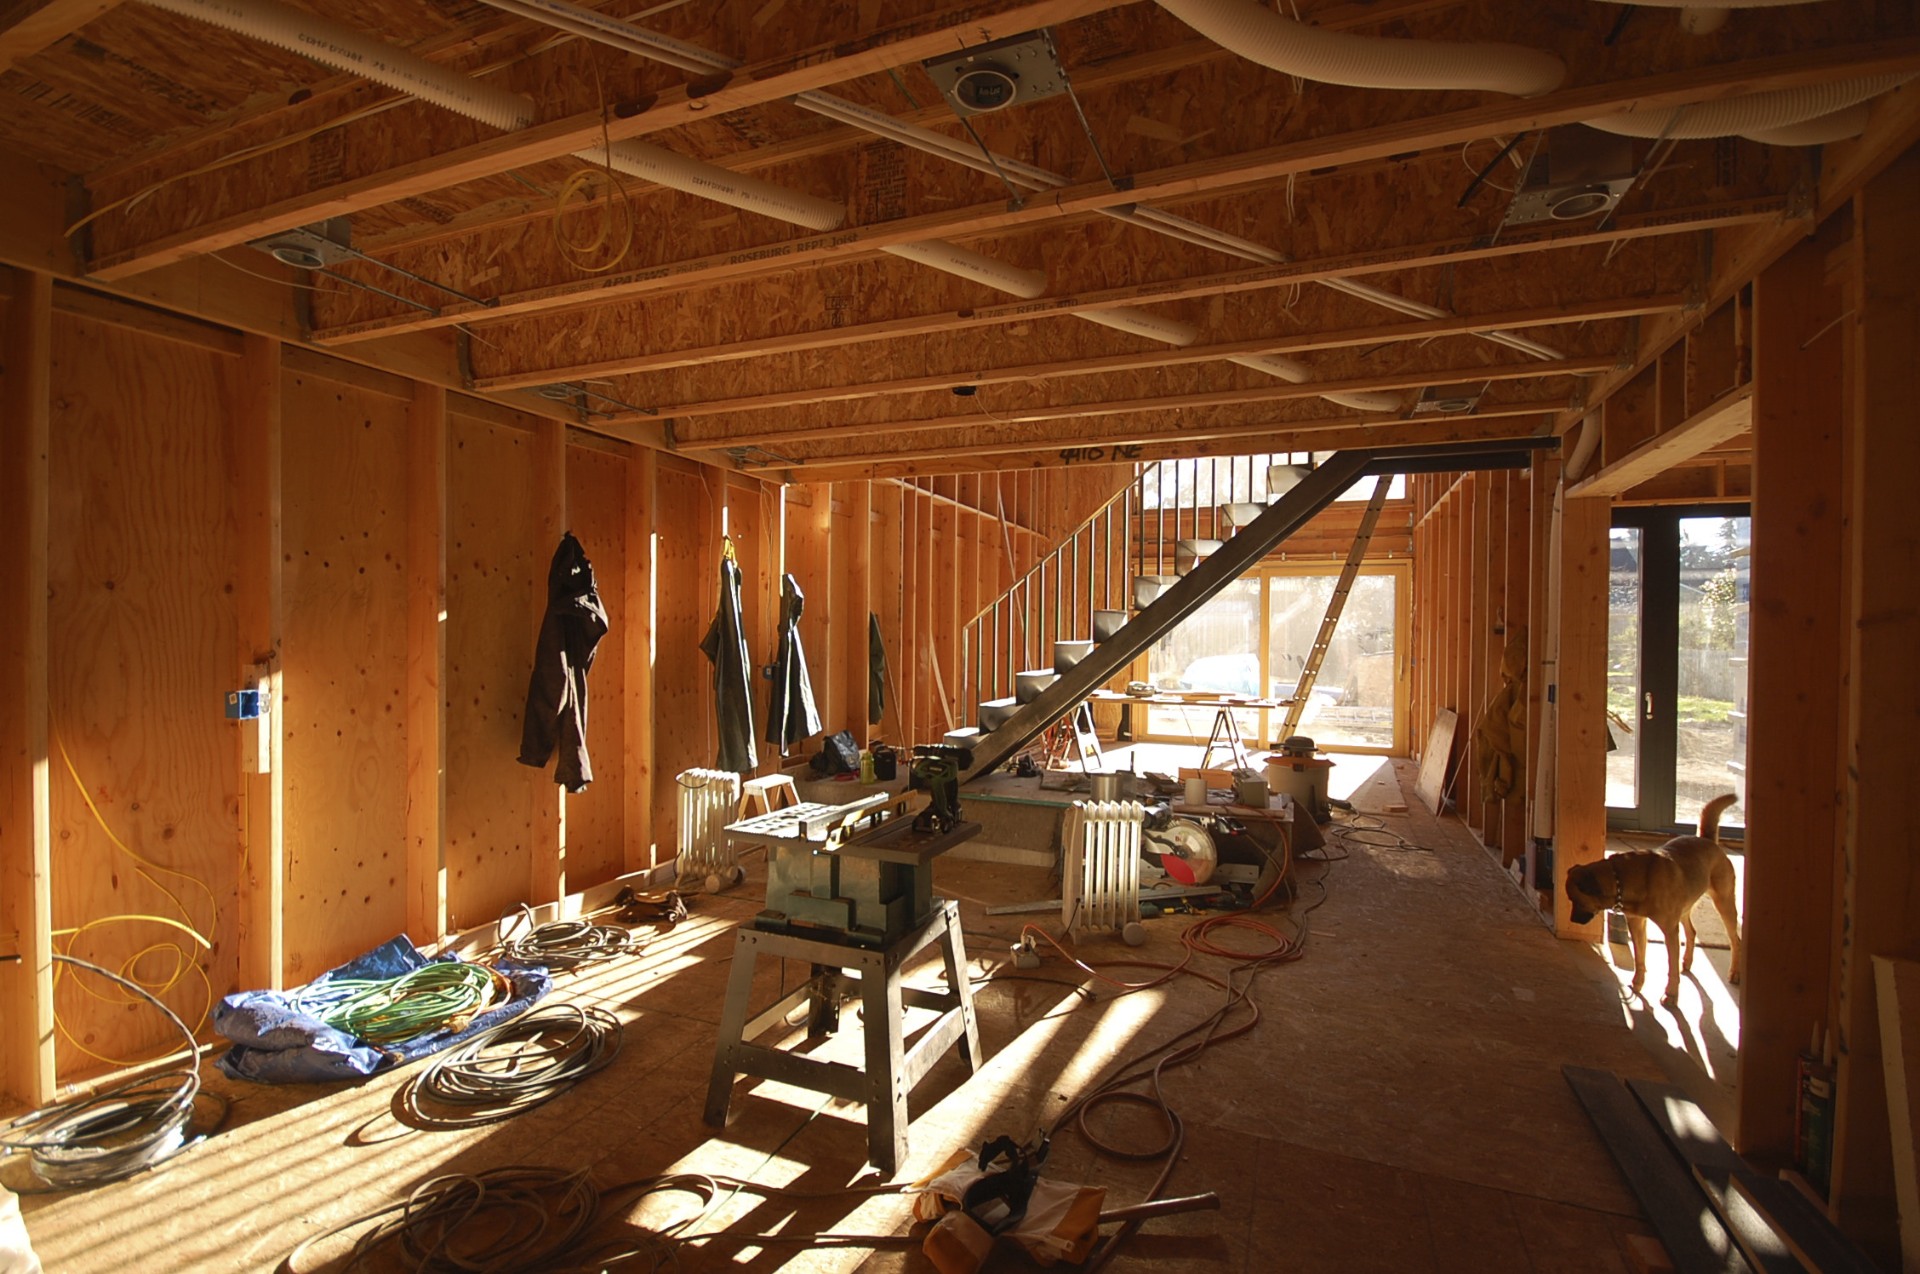
nearing completion
after almost a year of construction we are excited to say skidmore passivhaus is nearing completion. it's come a long ways since this. here are a few recent shots of the interiors coming together.


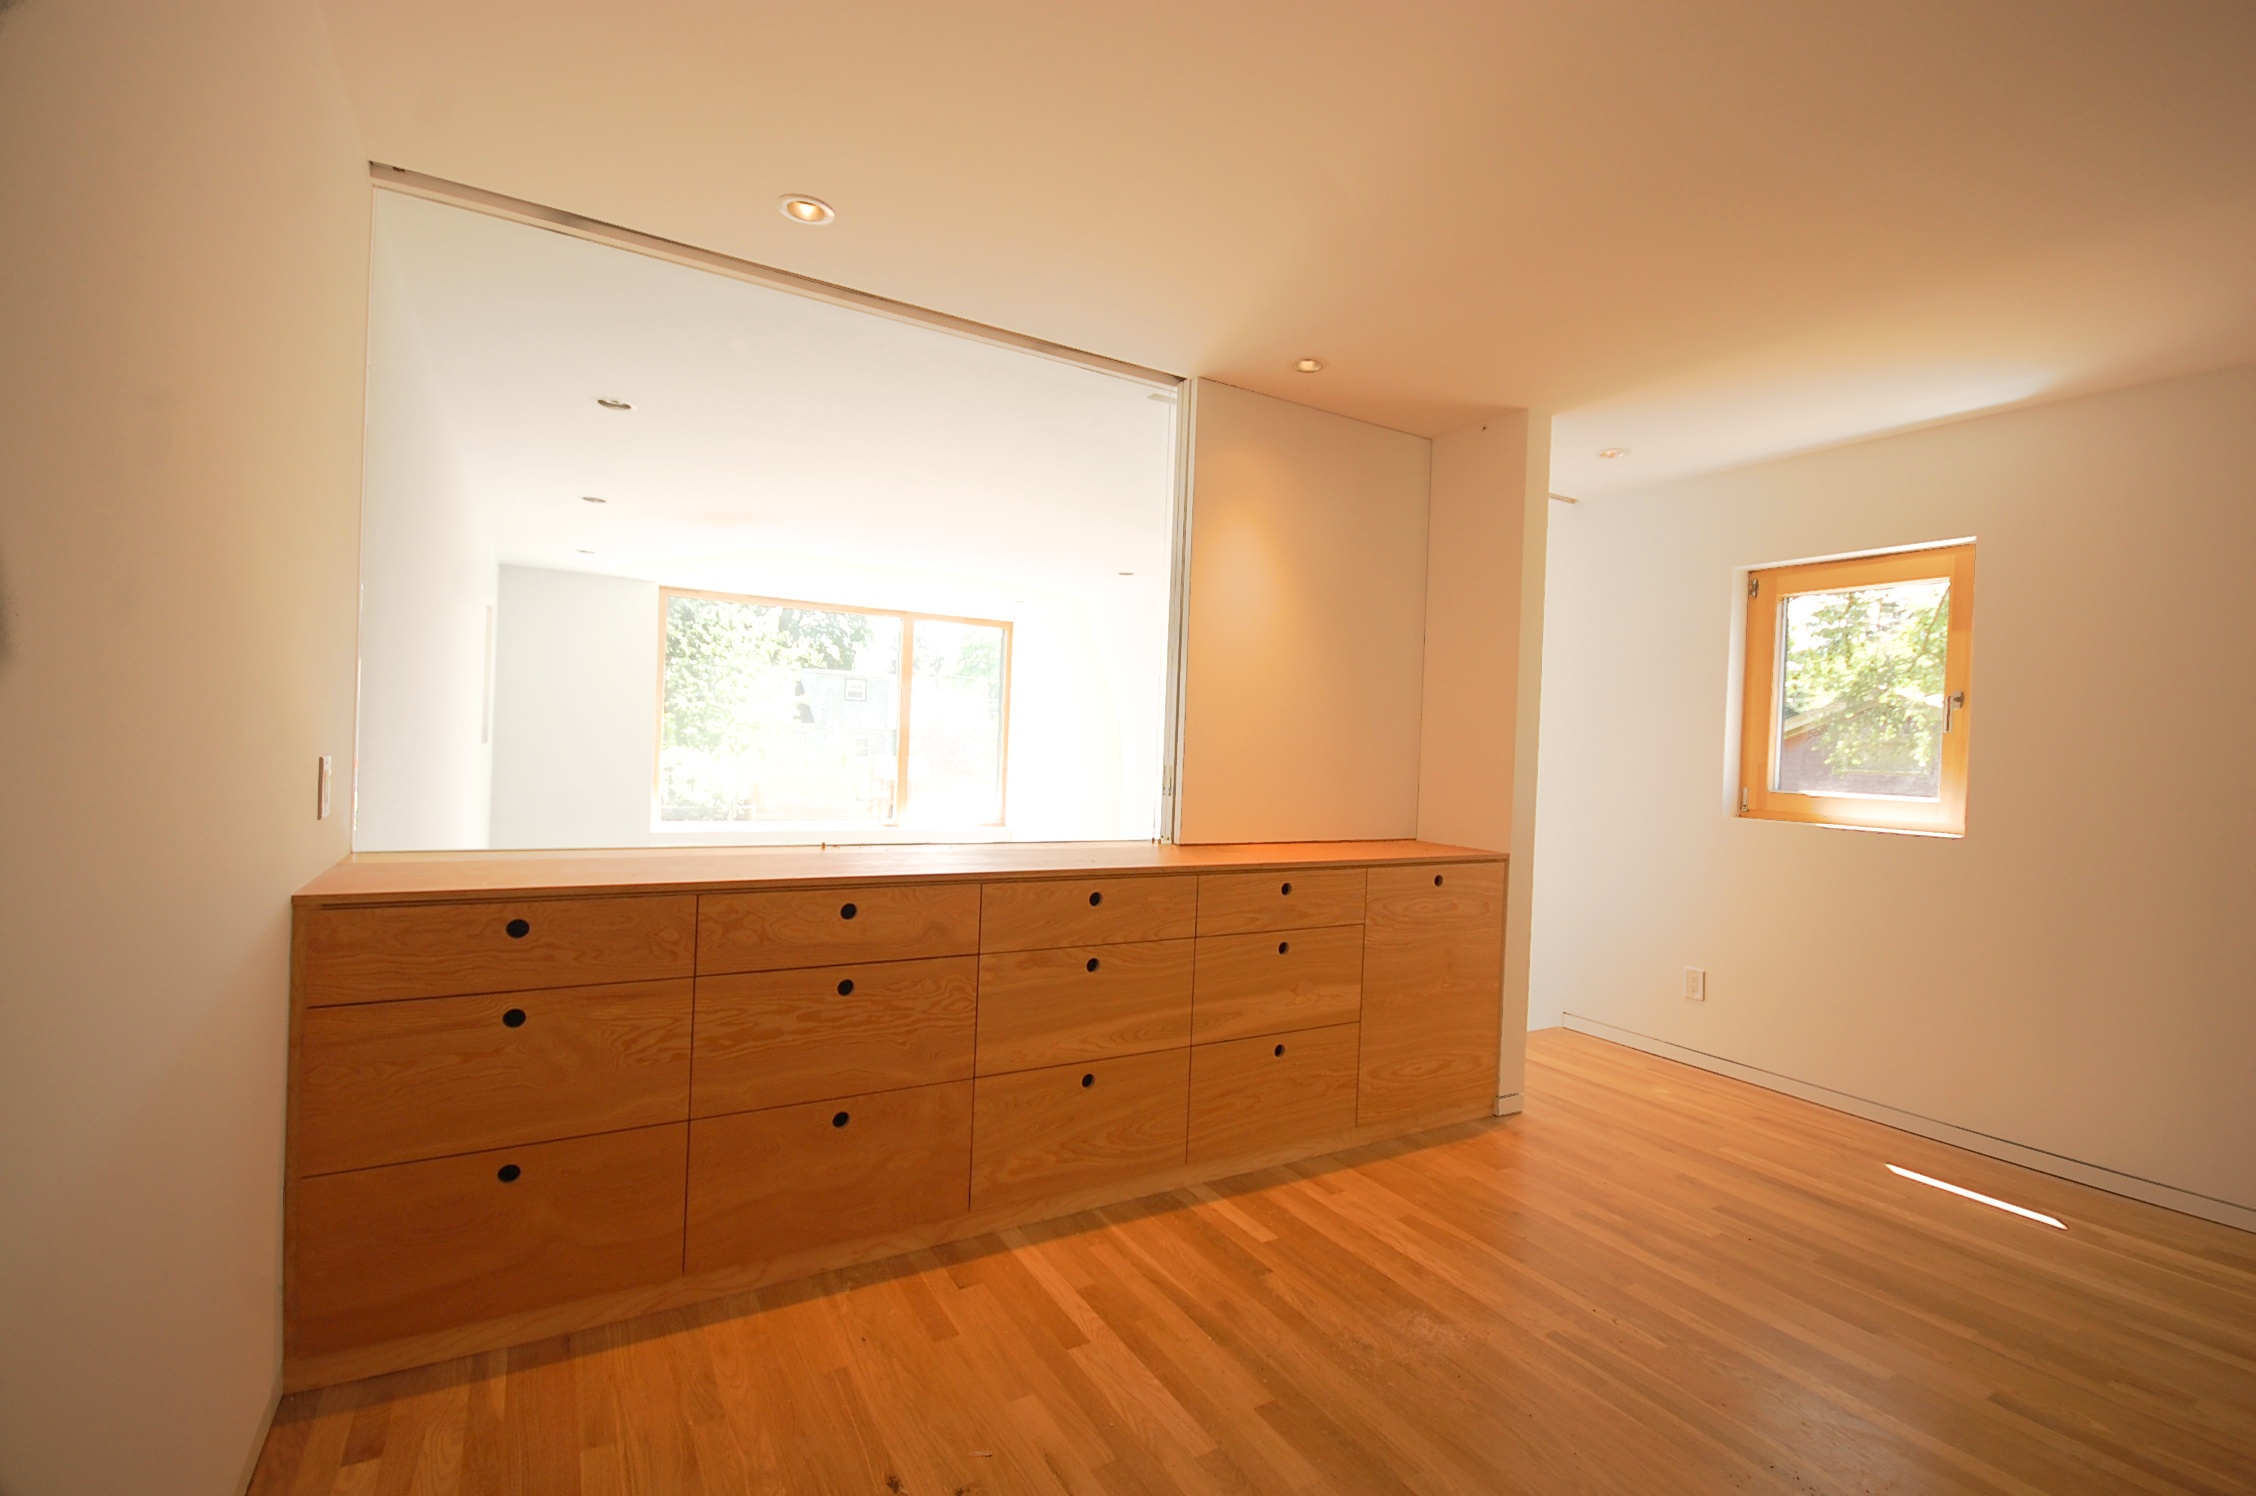


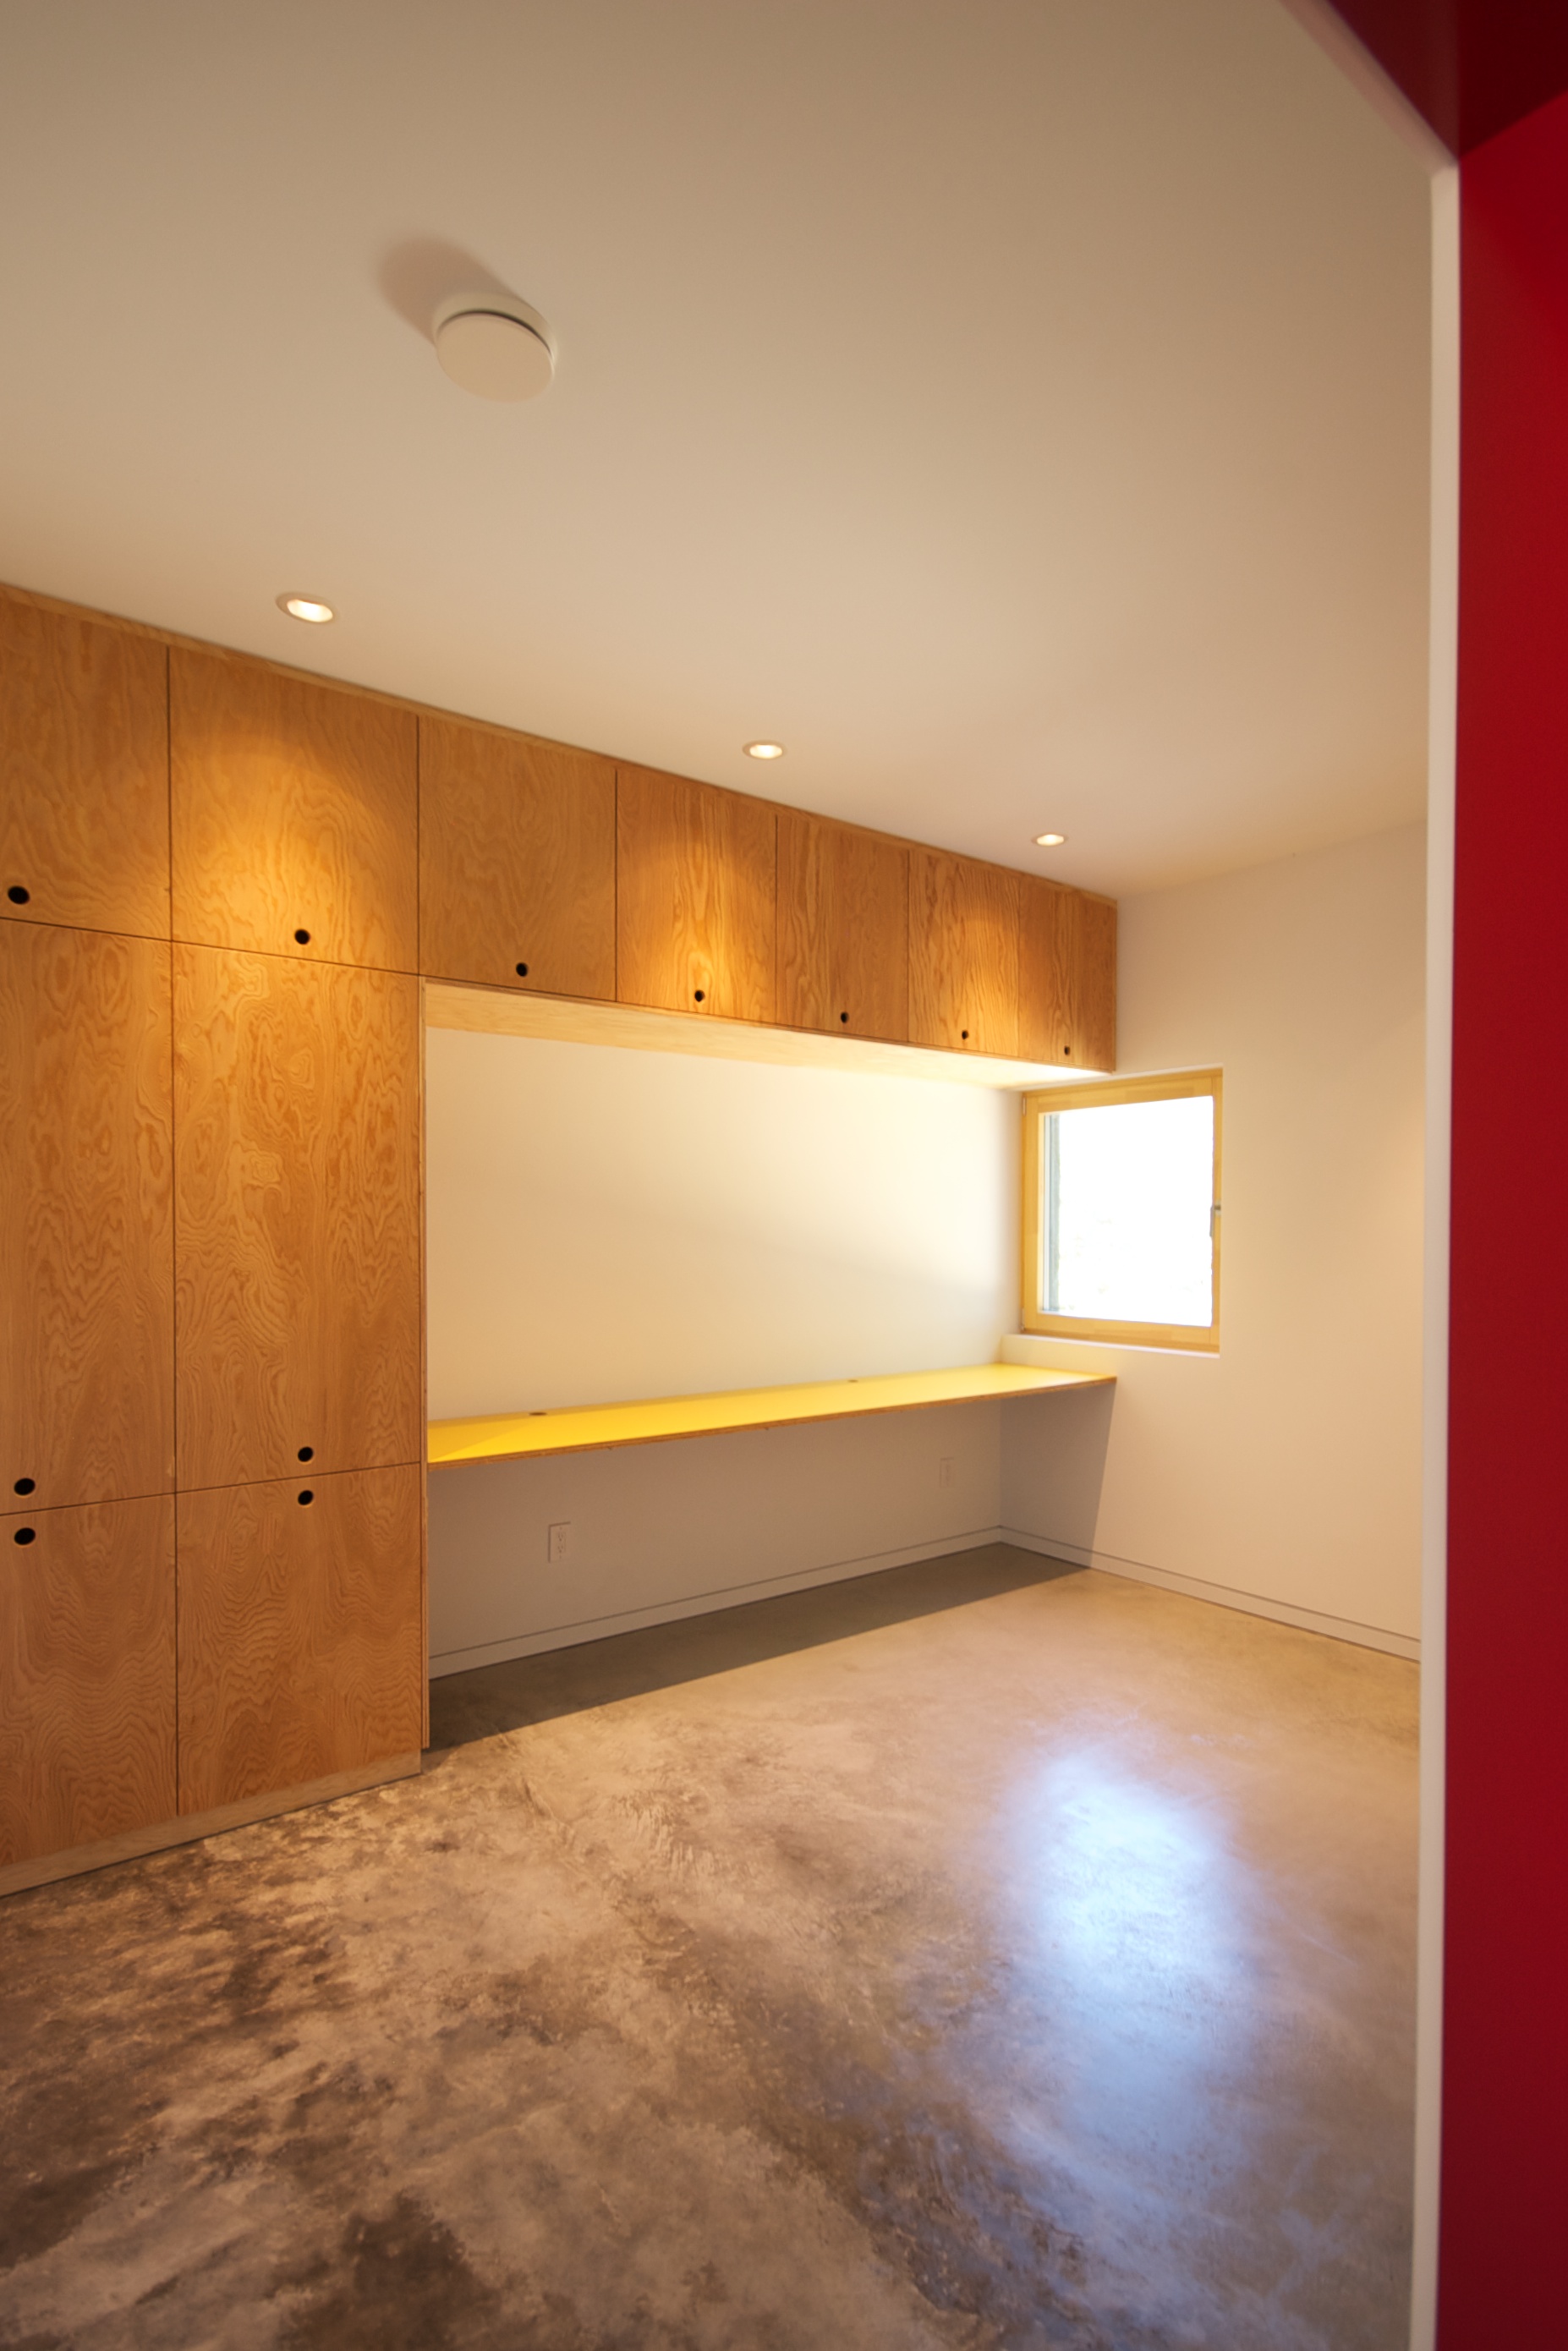
more news, pictures, and the details coming soon.
fast forward
we've been too busy to post for quite awhile, but work has been progressing nicely on the skidmore house. here's a quick look around:


we hope to be putting the final touches on in the next few weeks. lots of catching up to do. check back soon for more on this project and others.
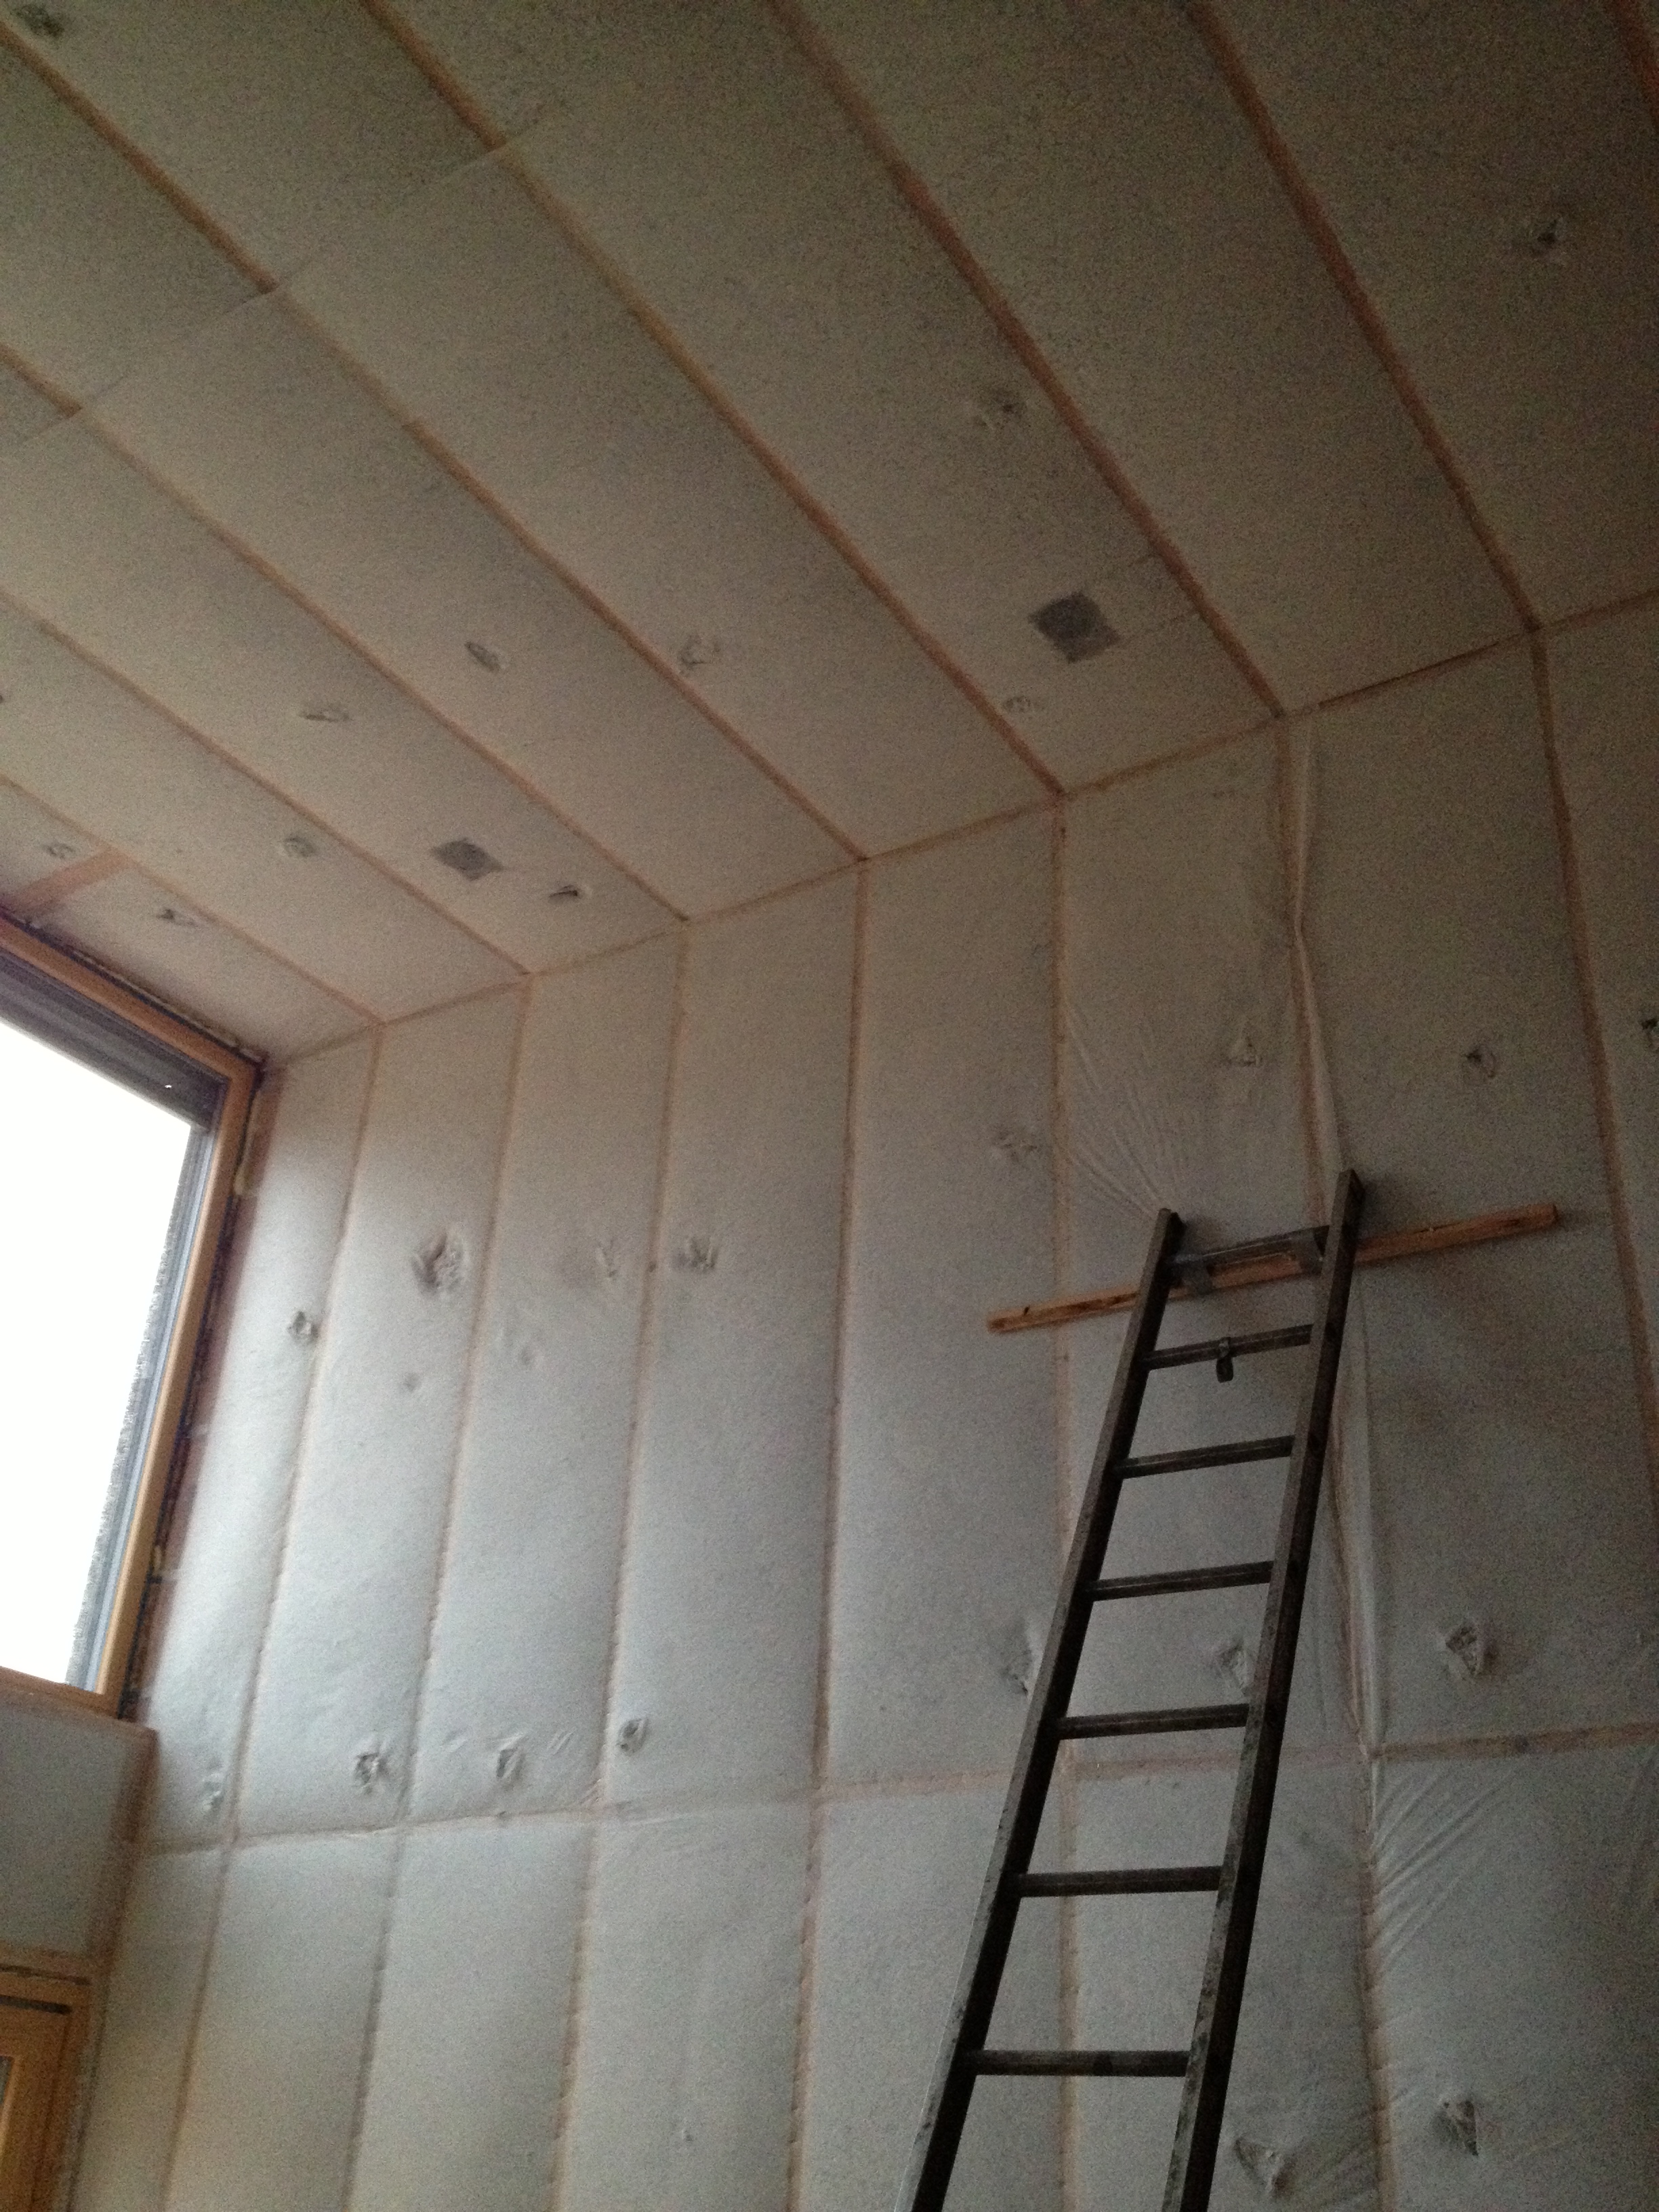
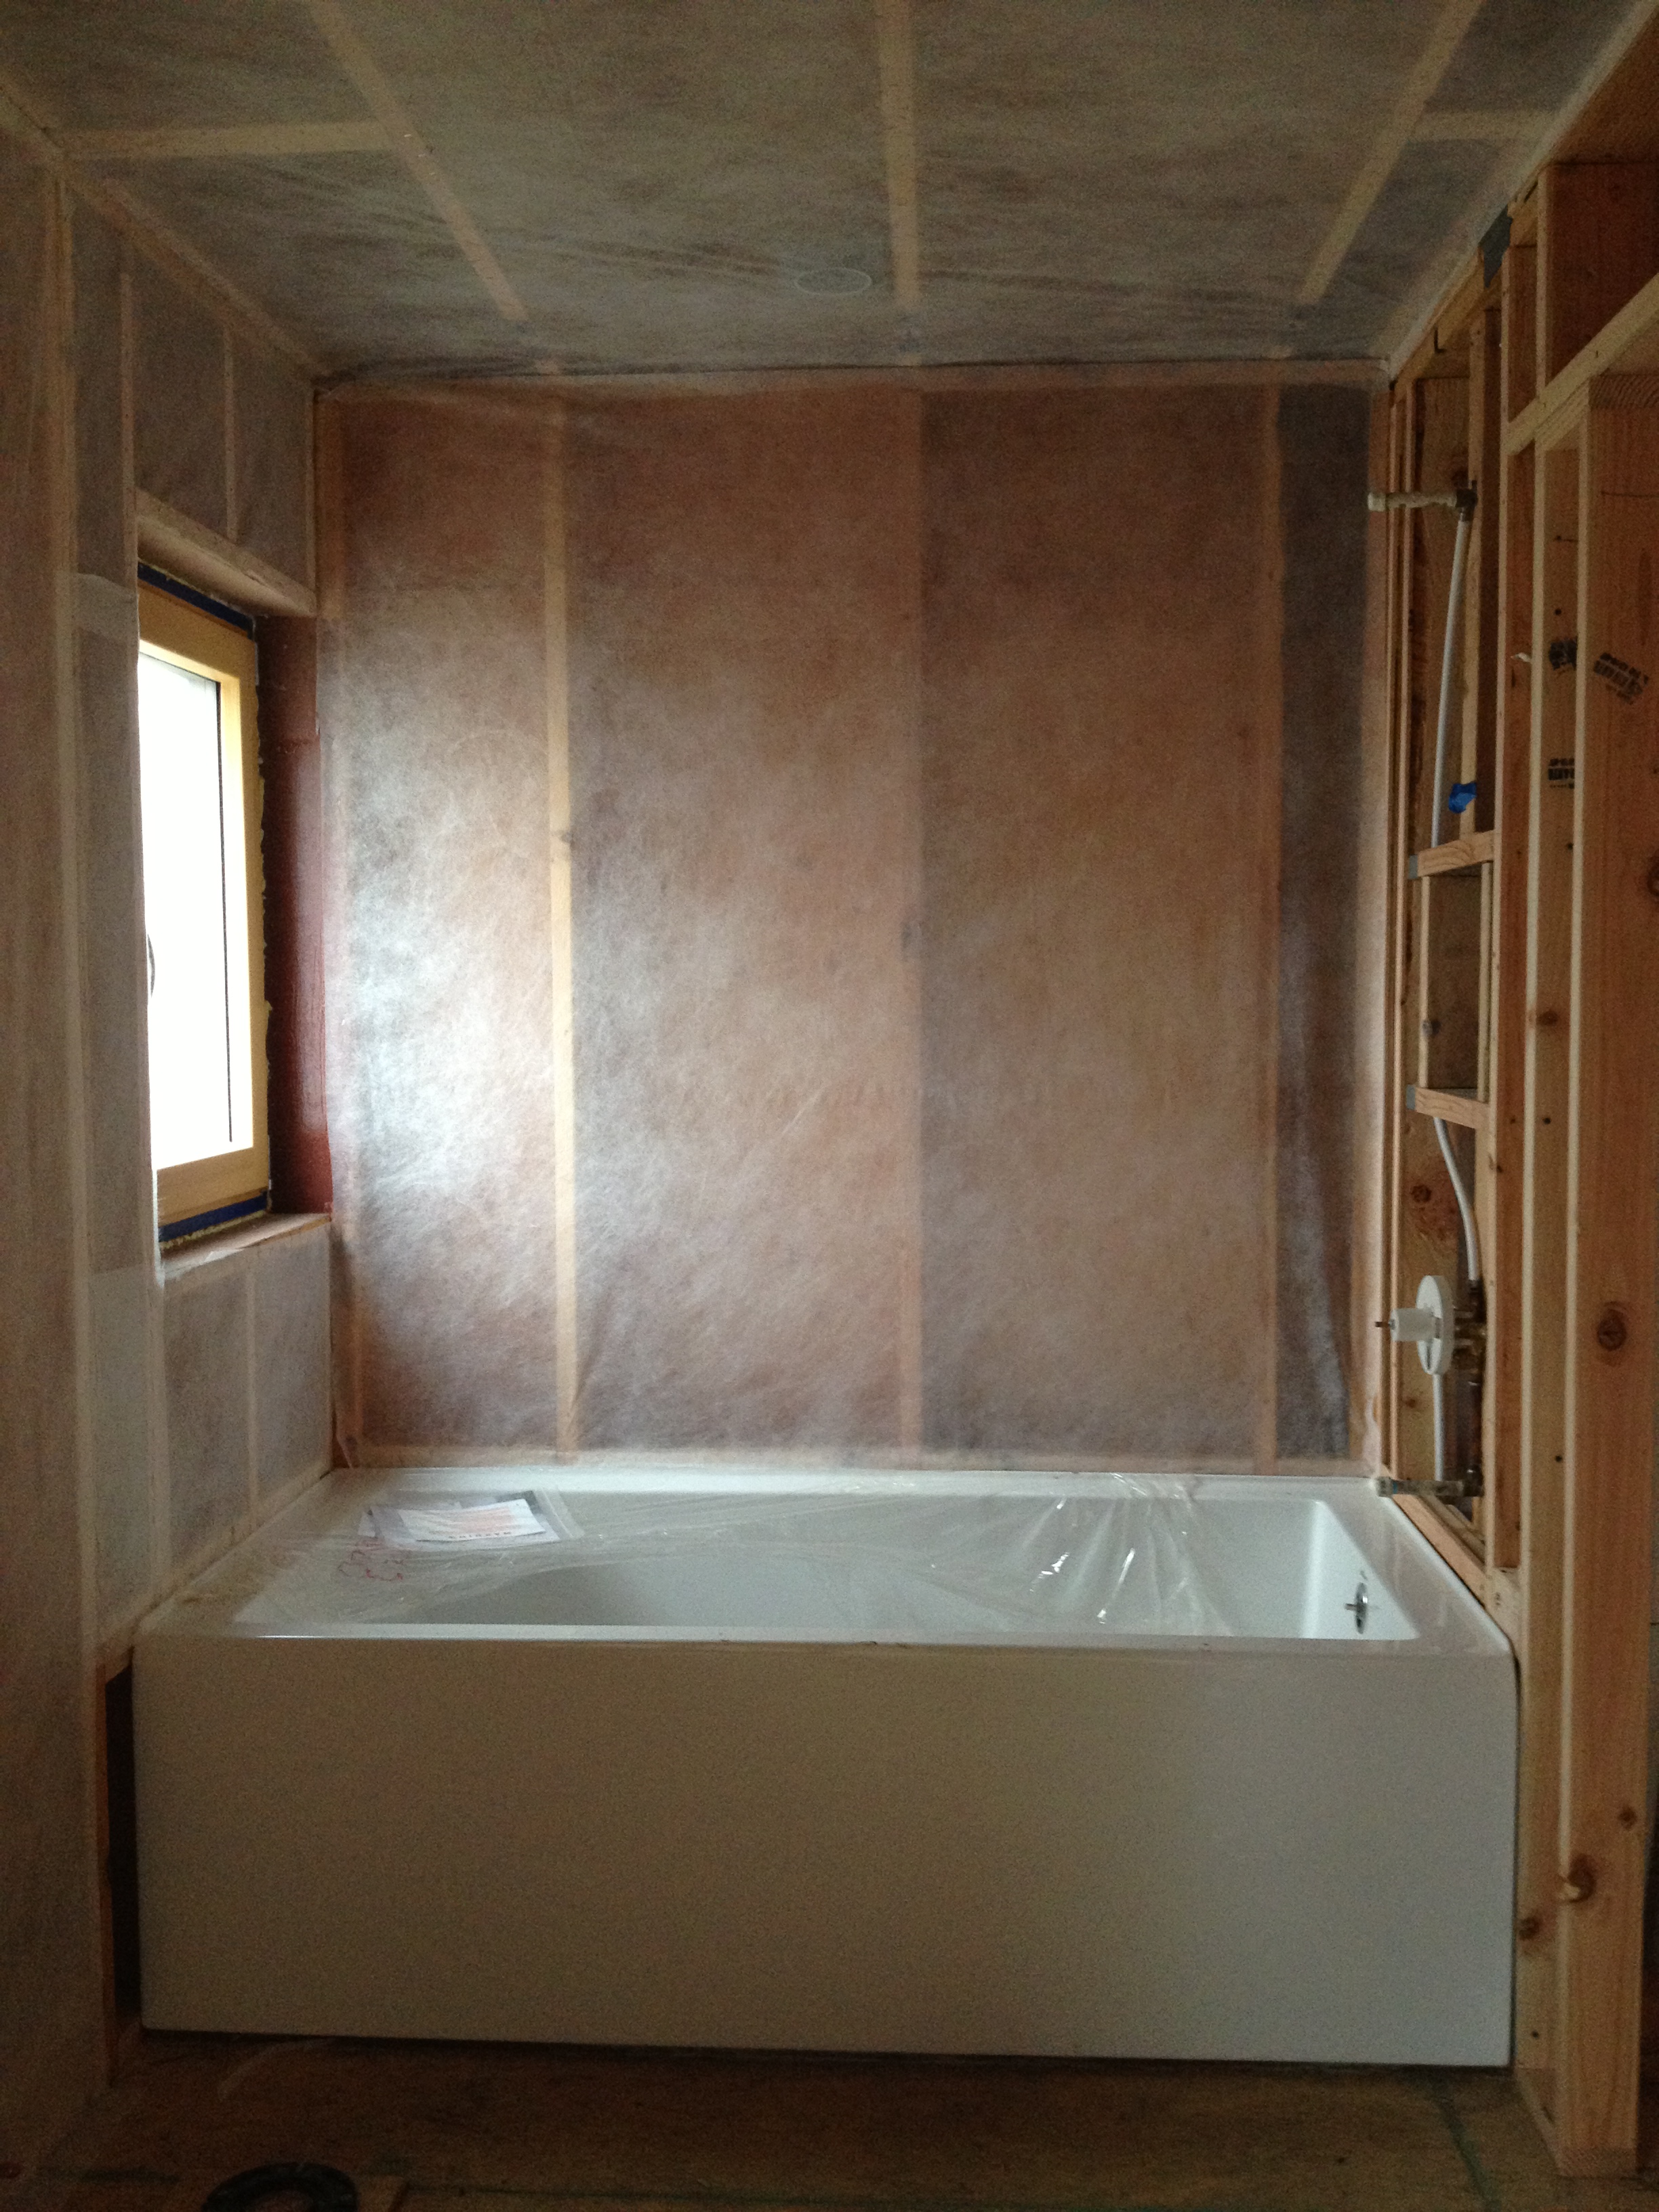
suck and blow
rough-in work has wrapped up on skidmore passivhaus and it's time to look at a few of the features under the hood. this new airtight home (or shall we say leak-free) is equipped with mechanical lungs.
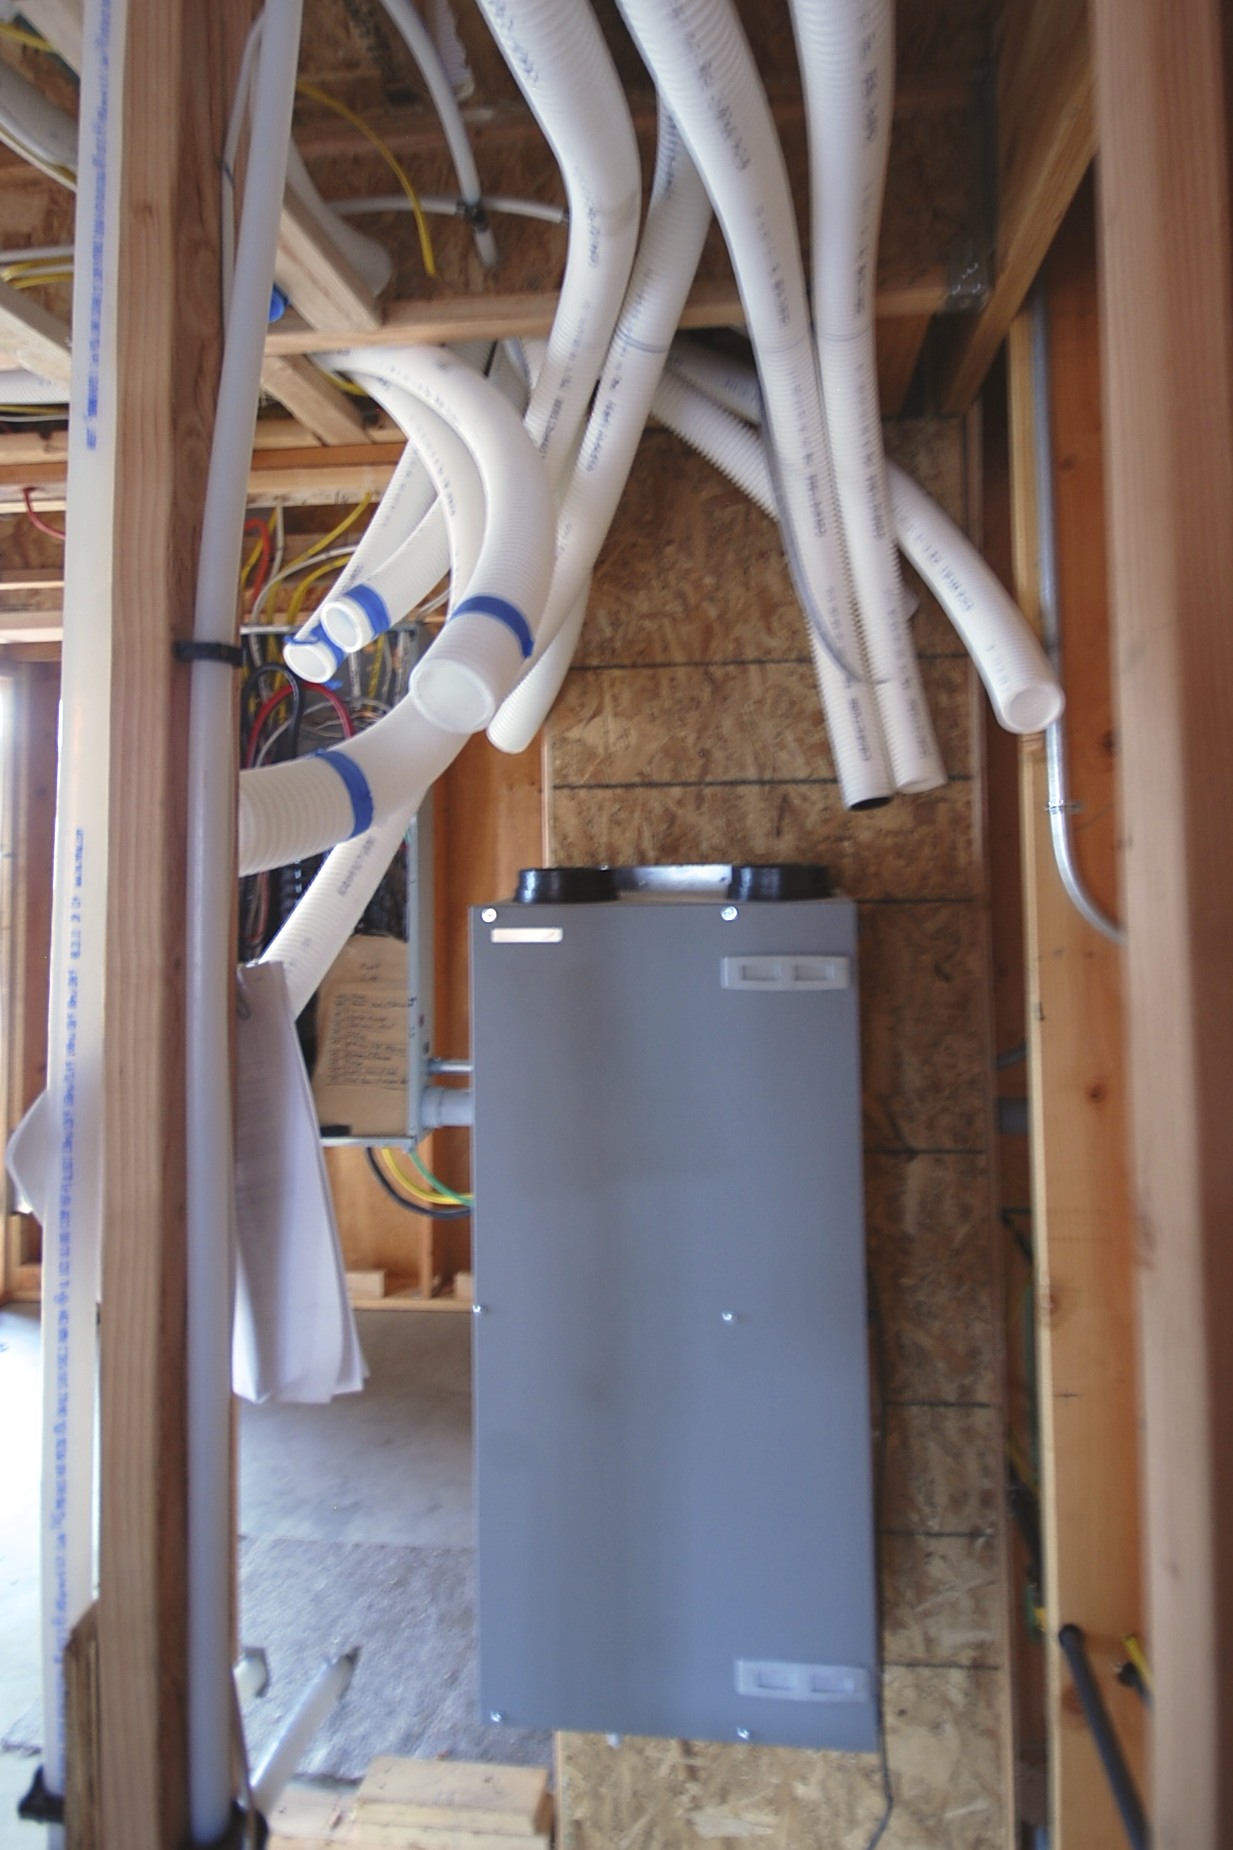
we chose the PH certified zehnder comfoair 200 hrv, capable of producing up to 125 cfm of continuous ventilation. this project requires about 70 cfm (60% setting) to achieve .31 air changes per hour (or roughly 1 air change every 3 hours).
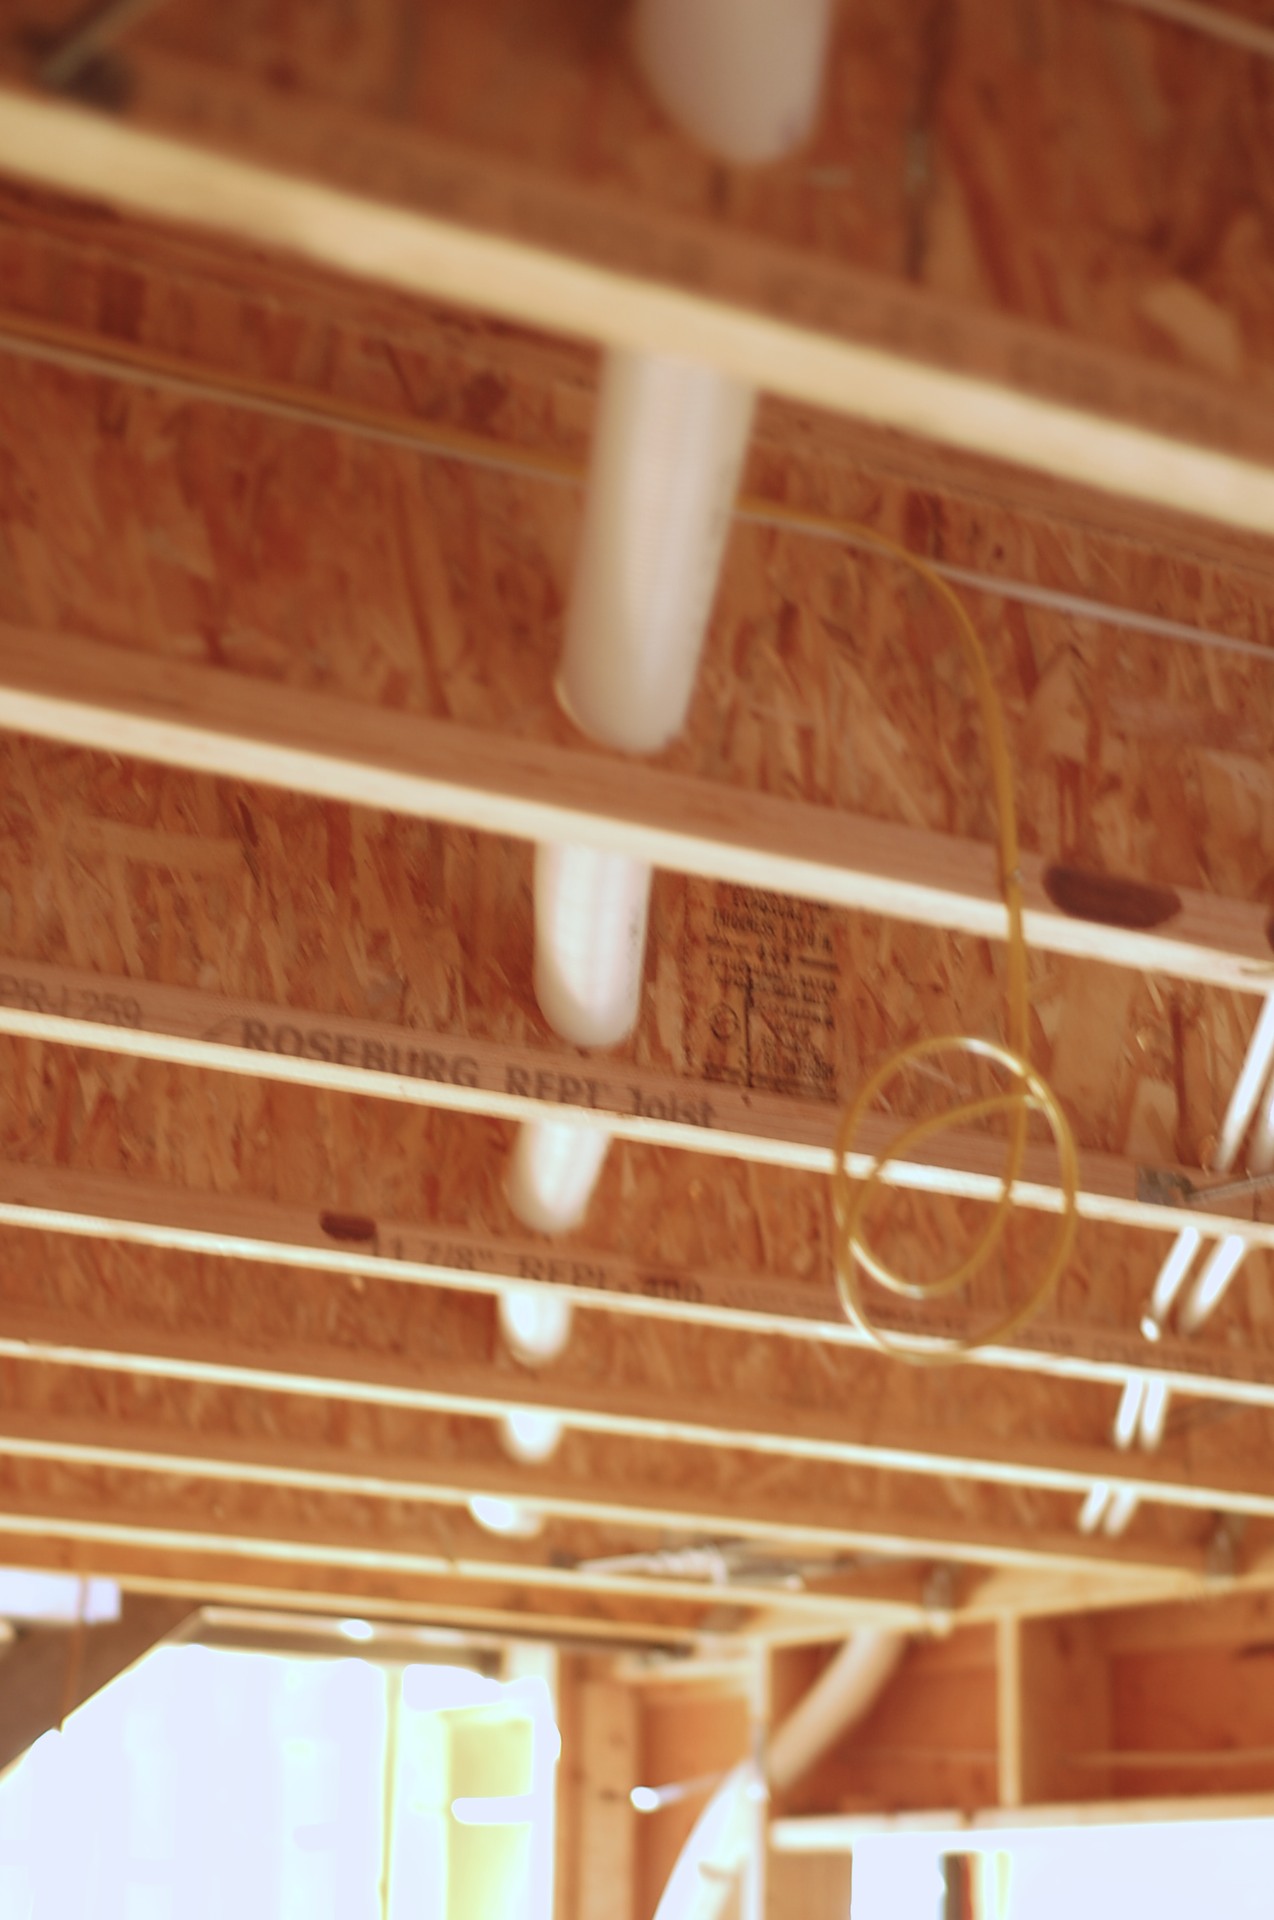
the 3" flexible ductwork is a double-walled proprietary system called comfotube made by zehnder. very easy and fast to install. the goal is to keep the runs as short and straight as possible.
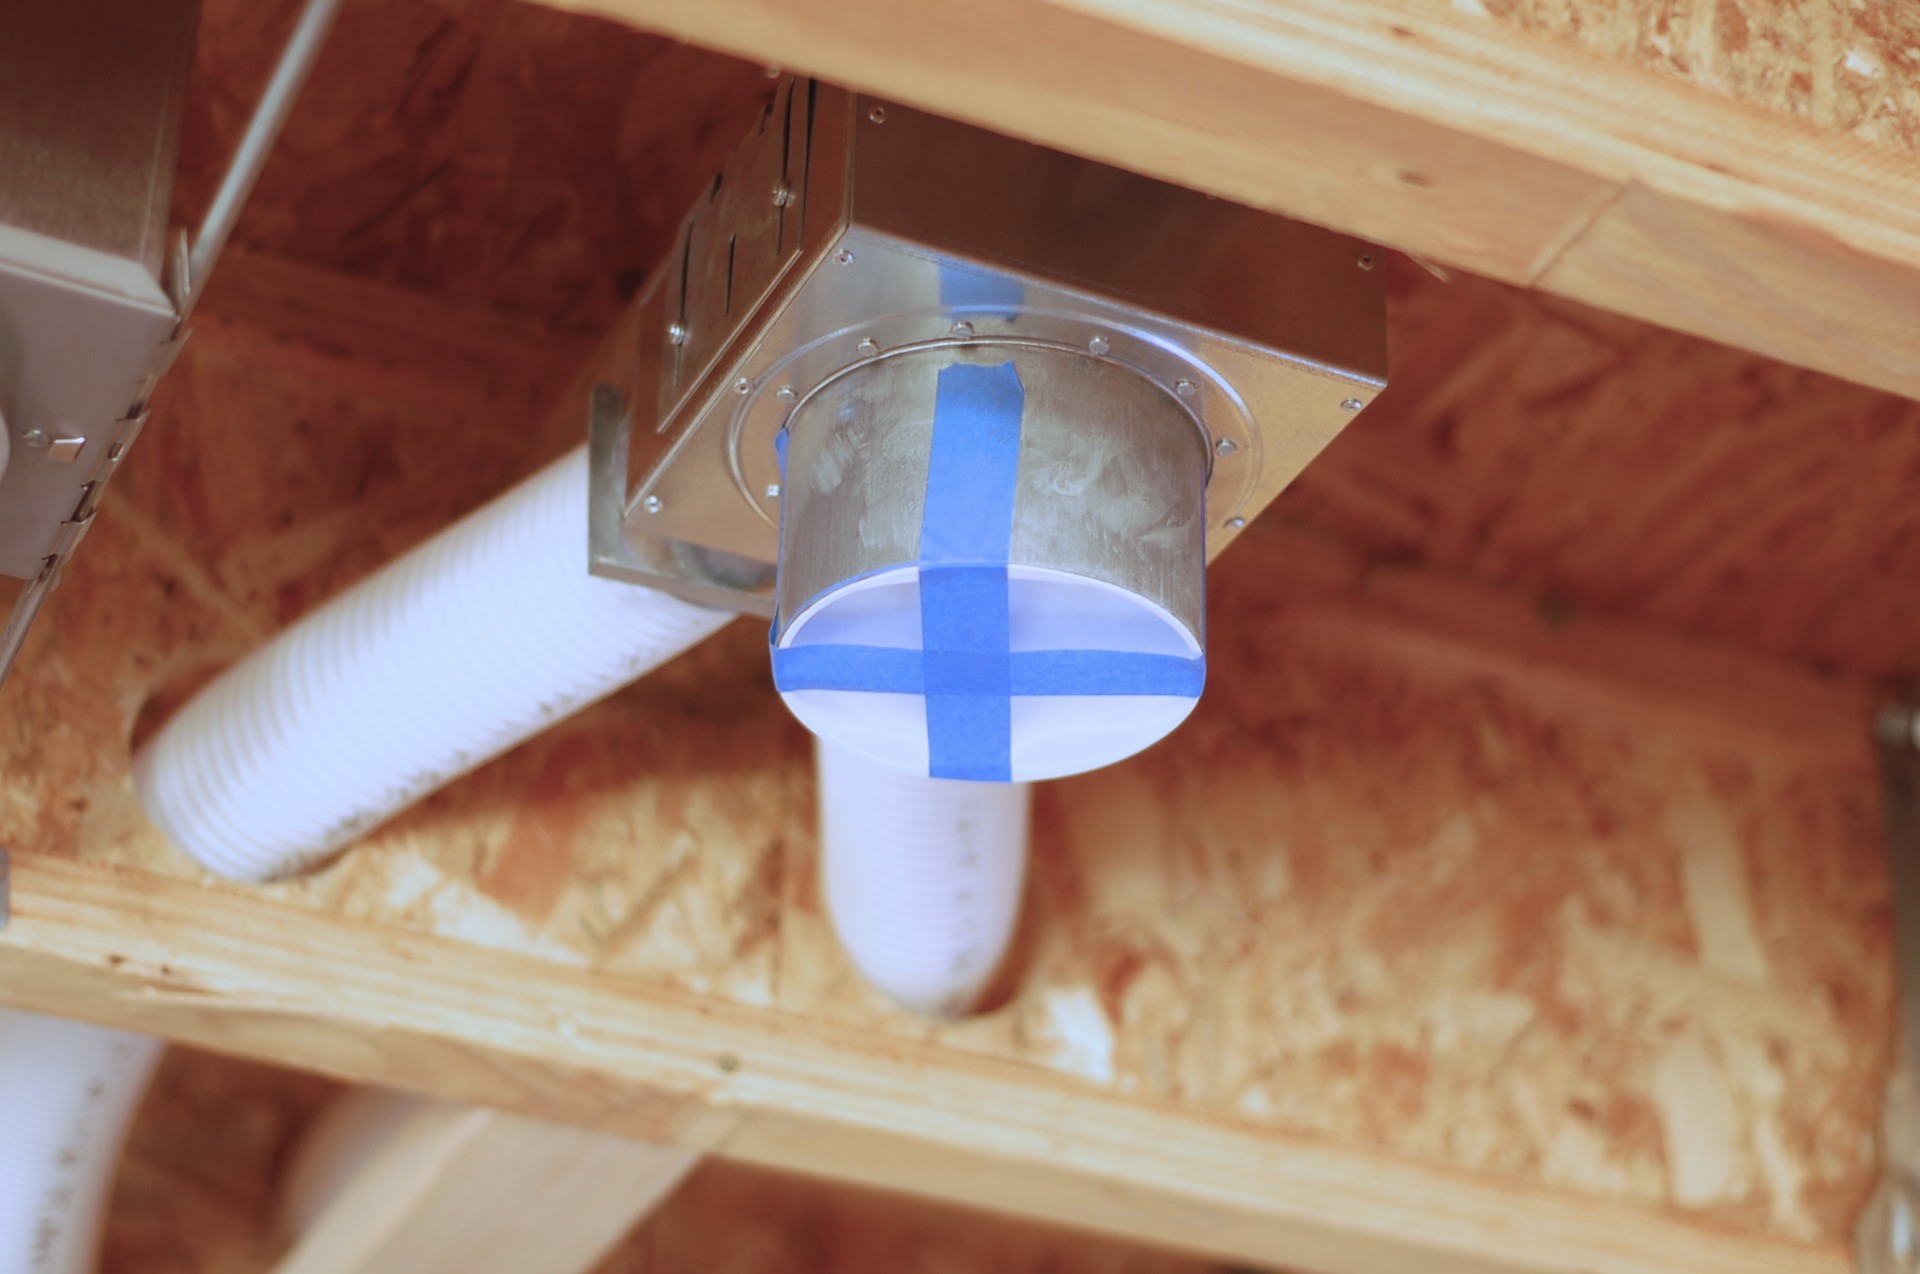
the round ceiling rough-in boxes are used for either supply or exhaust air. either 1 tube or 2 tubes are connected depending on the cfm requirements. exhausts are located in the bathrooms (20 cfm continuous) and kitchen (30 cfm continuous). we have 3 exhaust locations - each with 2 tubes. there are 4 supply locations.
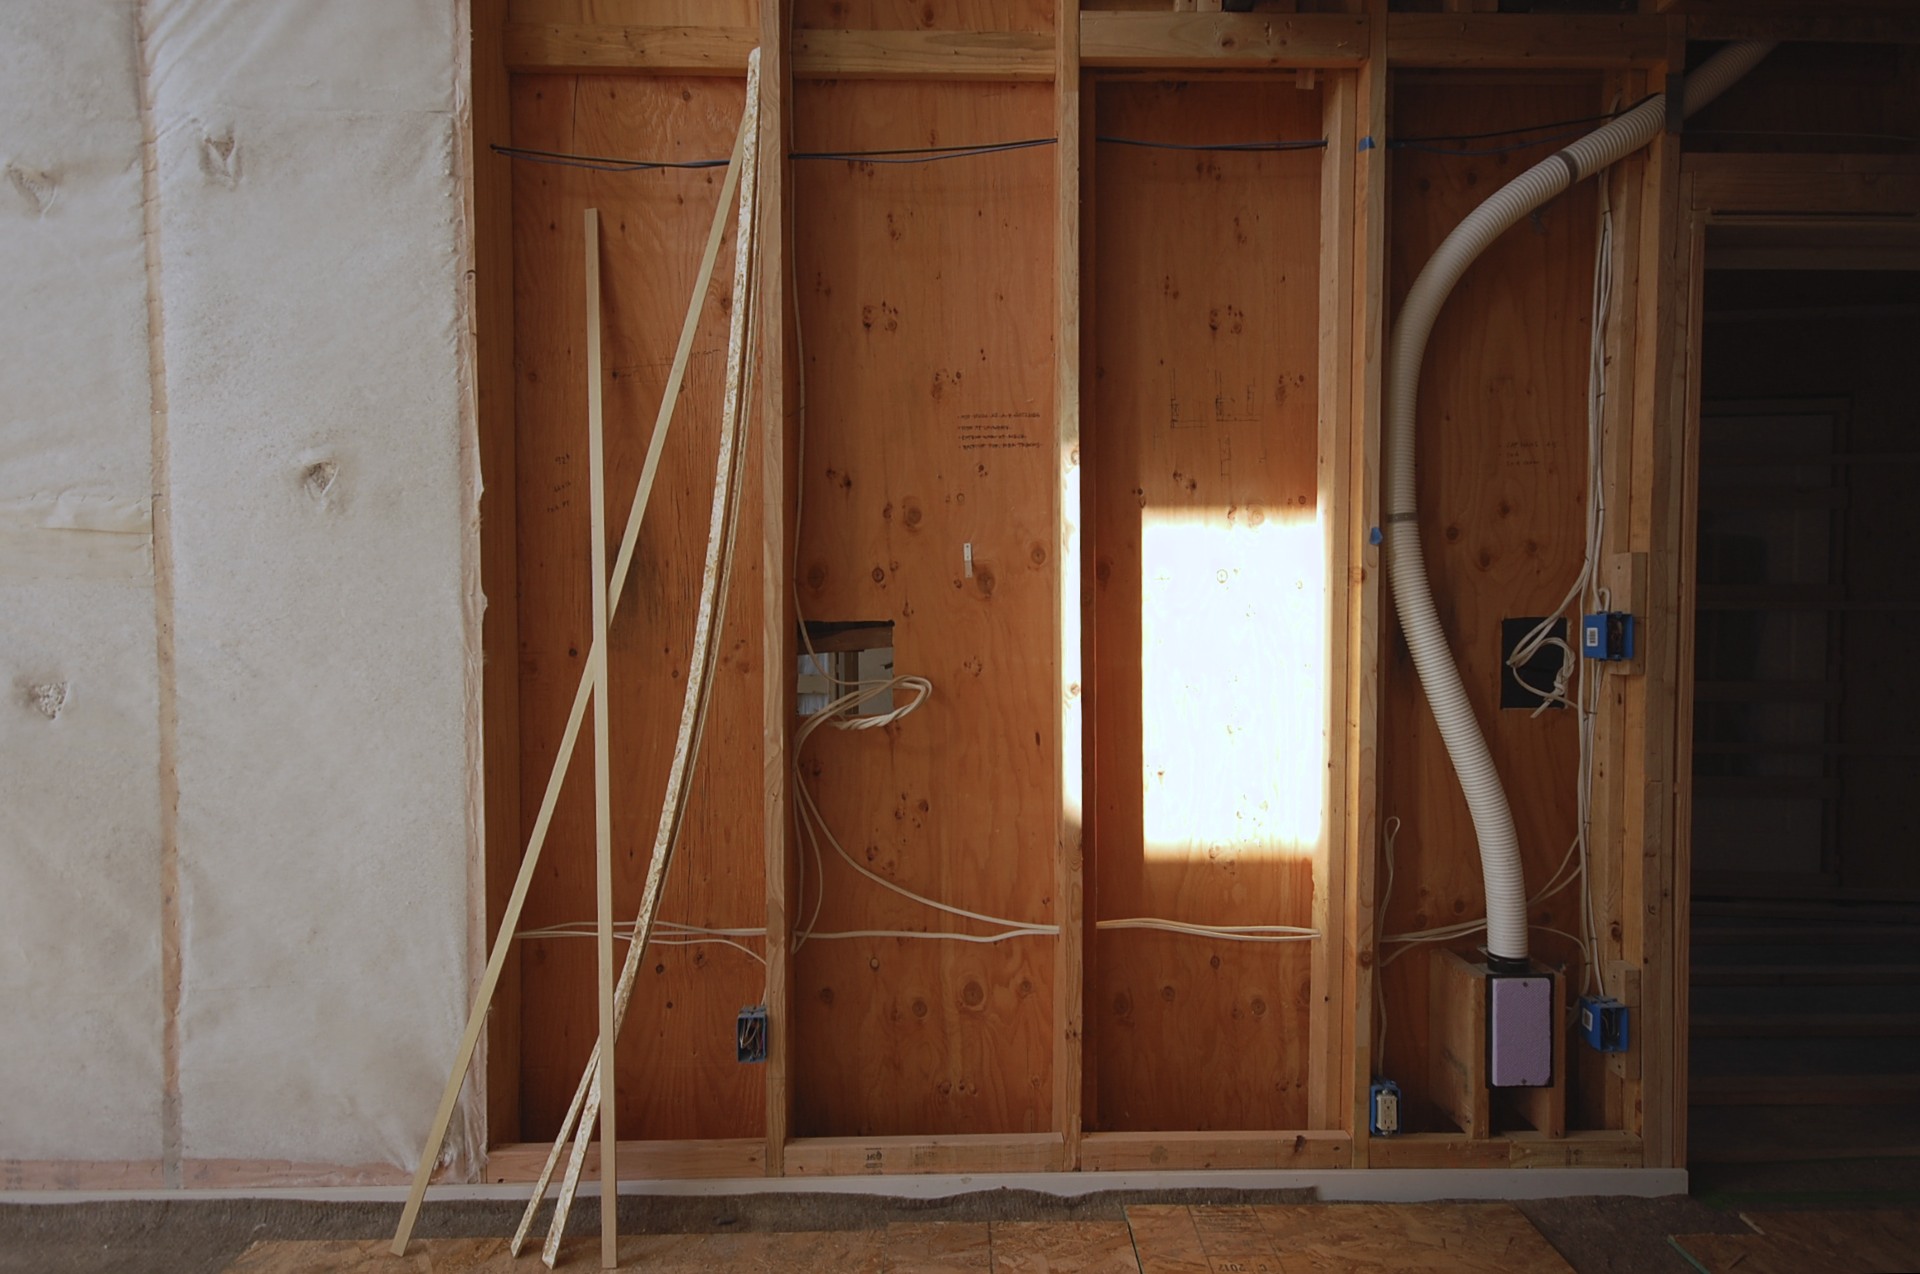
supply air is typically provided at the ceilings but we have a low supply register in the double height living room.

the tubing terminates in the ceiling of the mechanical room. 6 supply tubes and 6 exhaust tubes. manifolds gather the supply and exhaust tubes respectively and connect them to the unit.
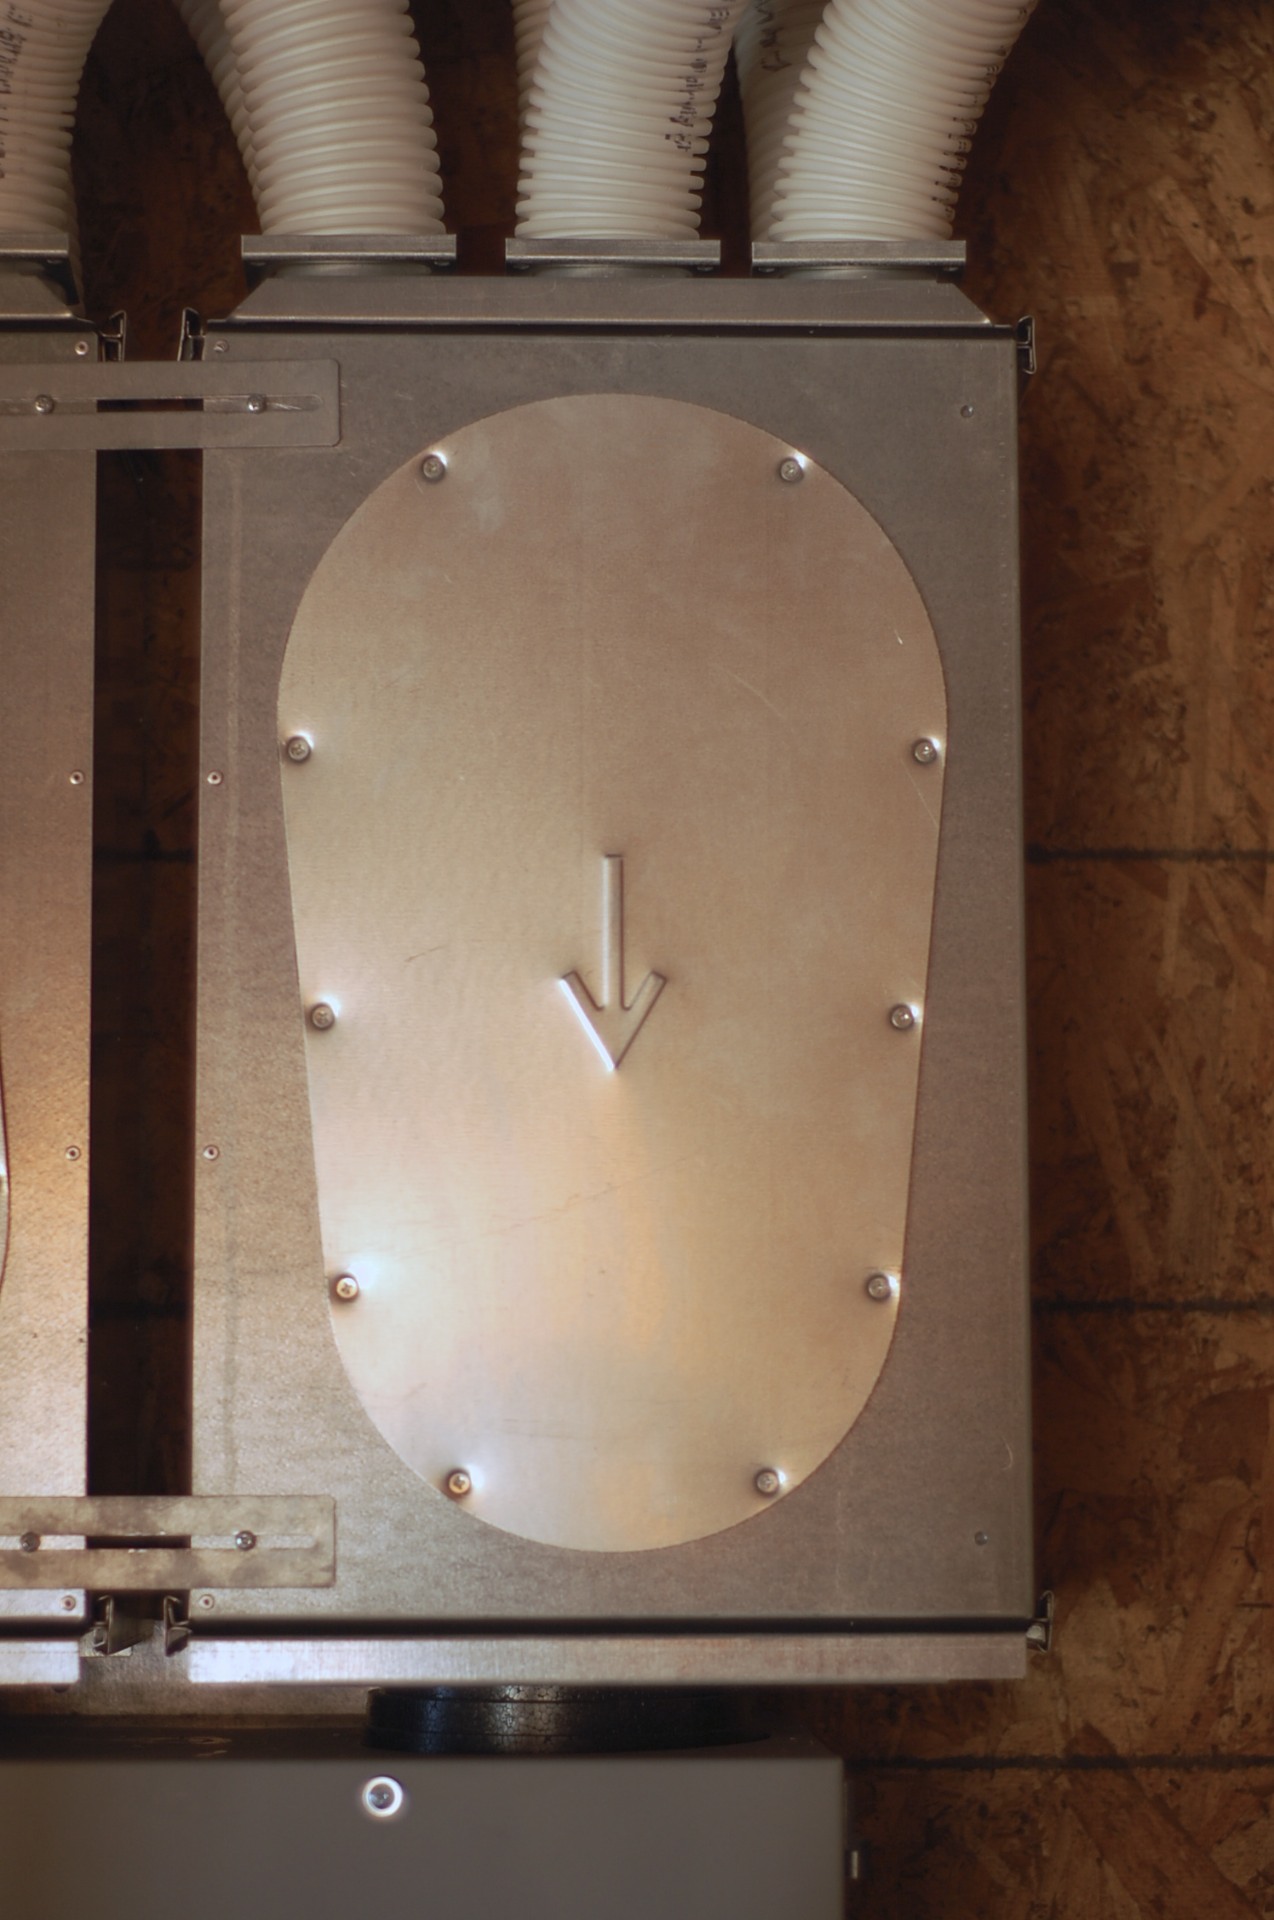
exhaust air flows through the machine, the heat is captured in the core, and the air is expelled to the outside.

fresh air is brought into the machine from the exterior, and warmed by the heat captured from the outgoing air. the zehnder is about 92% efficient and uses just 7.1 watts / cfm.
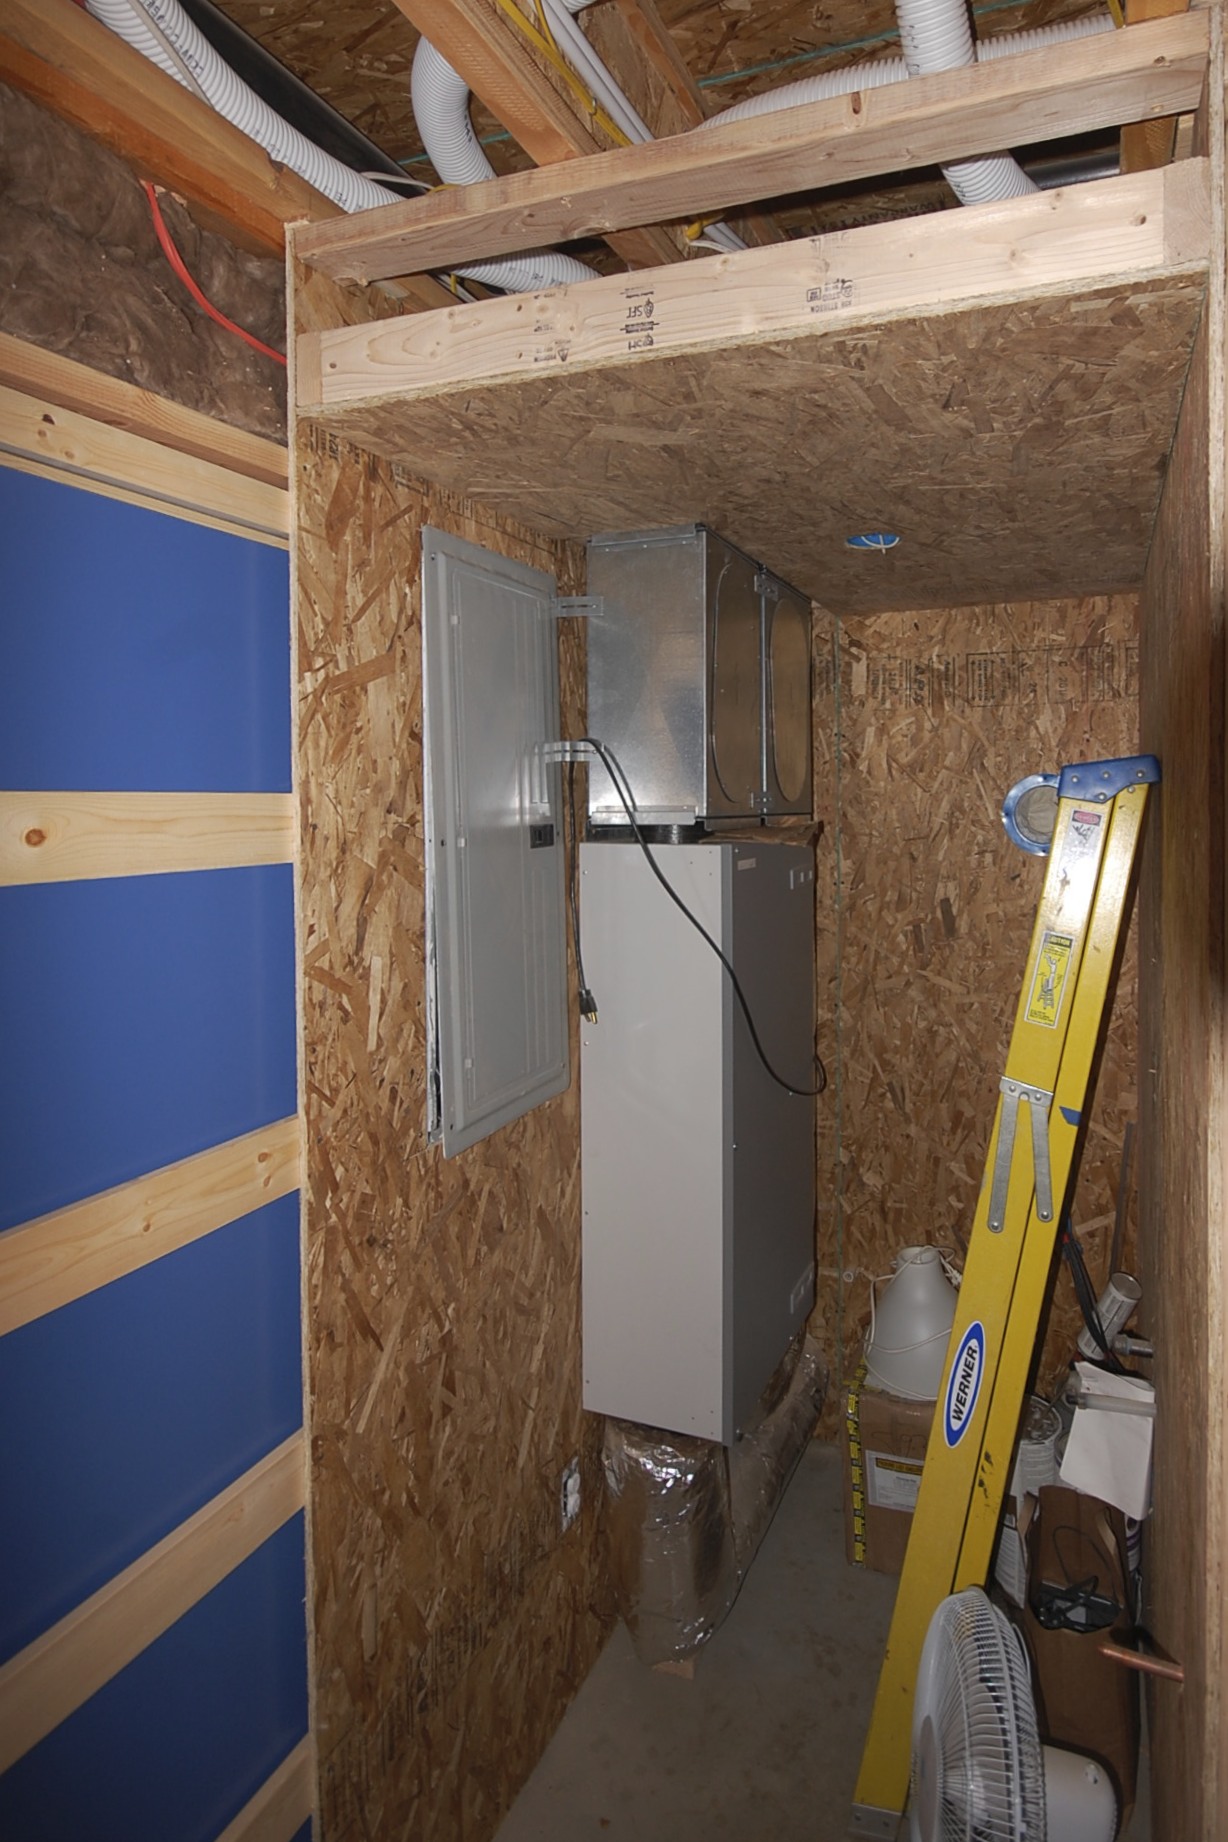
the fresh air supply and exhaust are ducted in well insulated metal ductwork from the bottom of the unit to the exterior. the fresh air supply is located high on the exterior wall with the exhaust about 10' below. the duct penetrations were carefully air sealed to the plywood air-barrier. this unit also requires a condensate drain that we've tied with an air gap into the kitchen waste pipe.
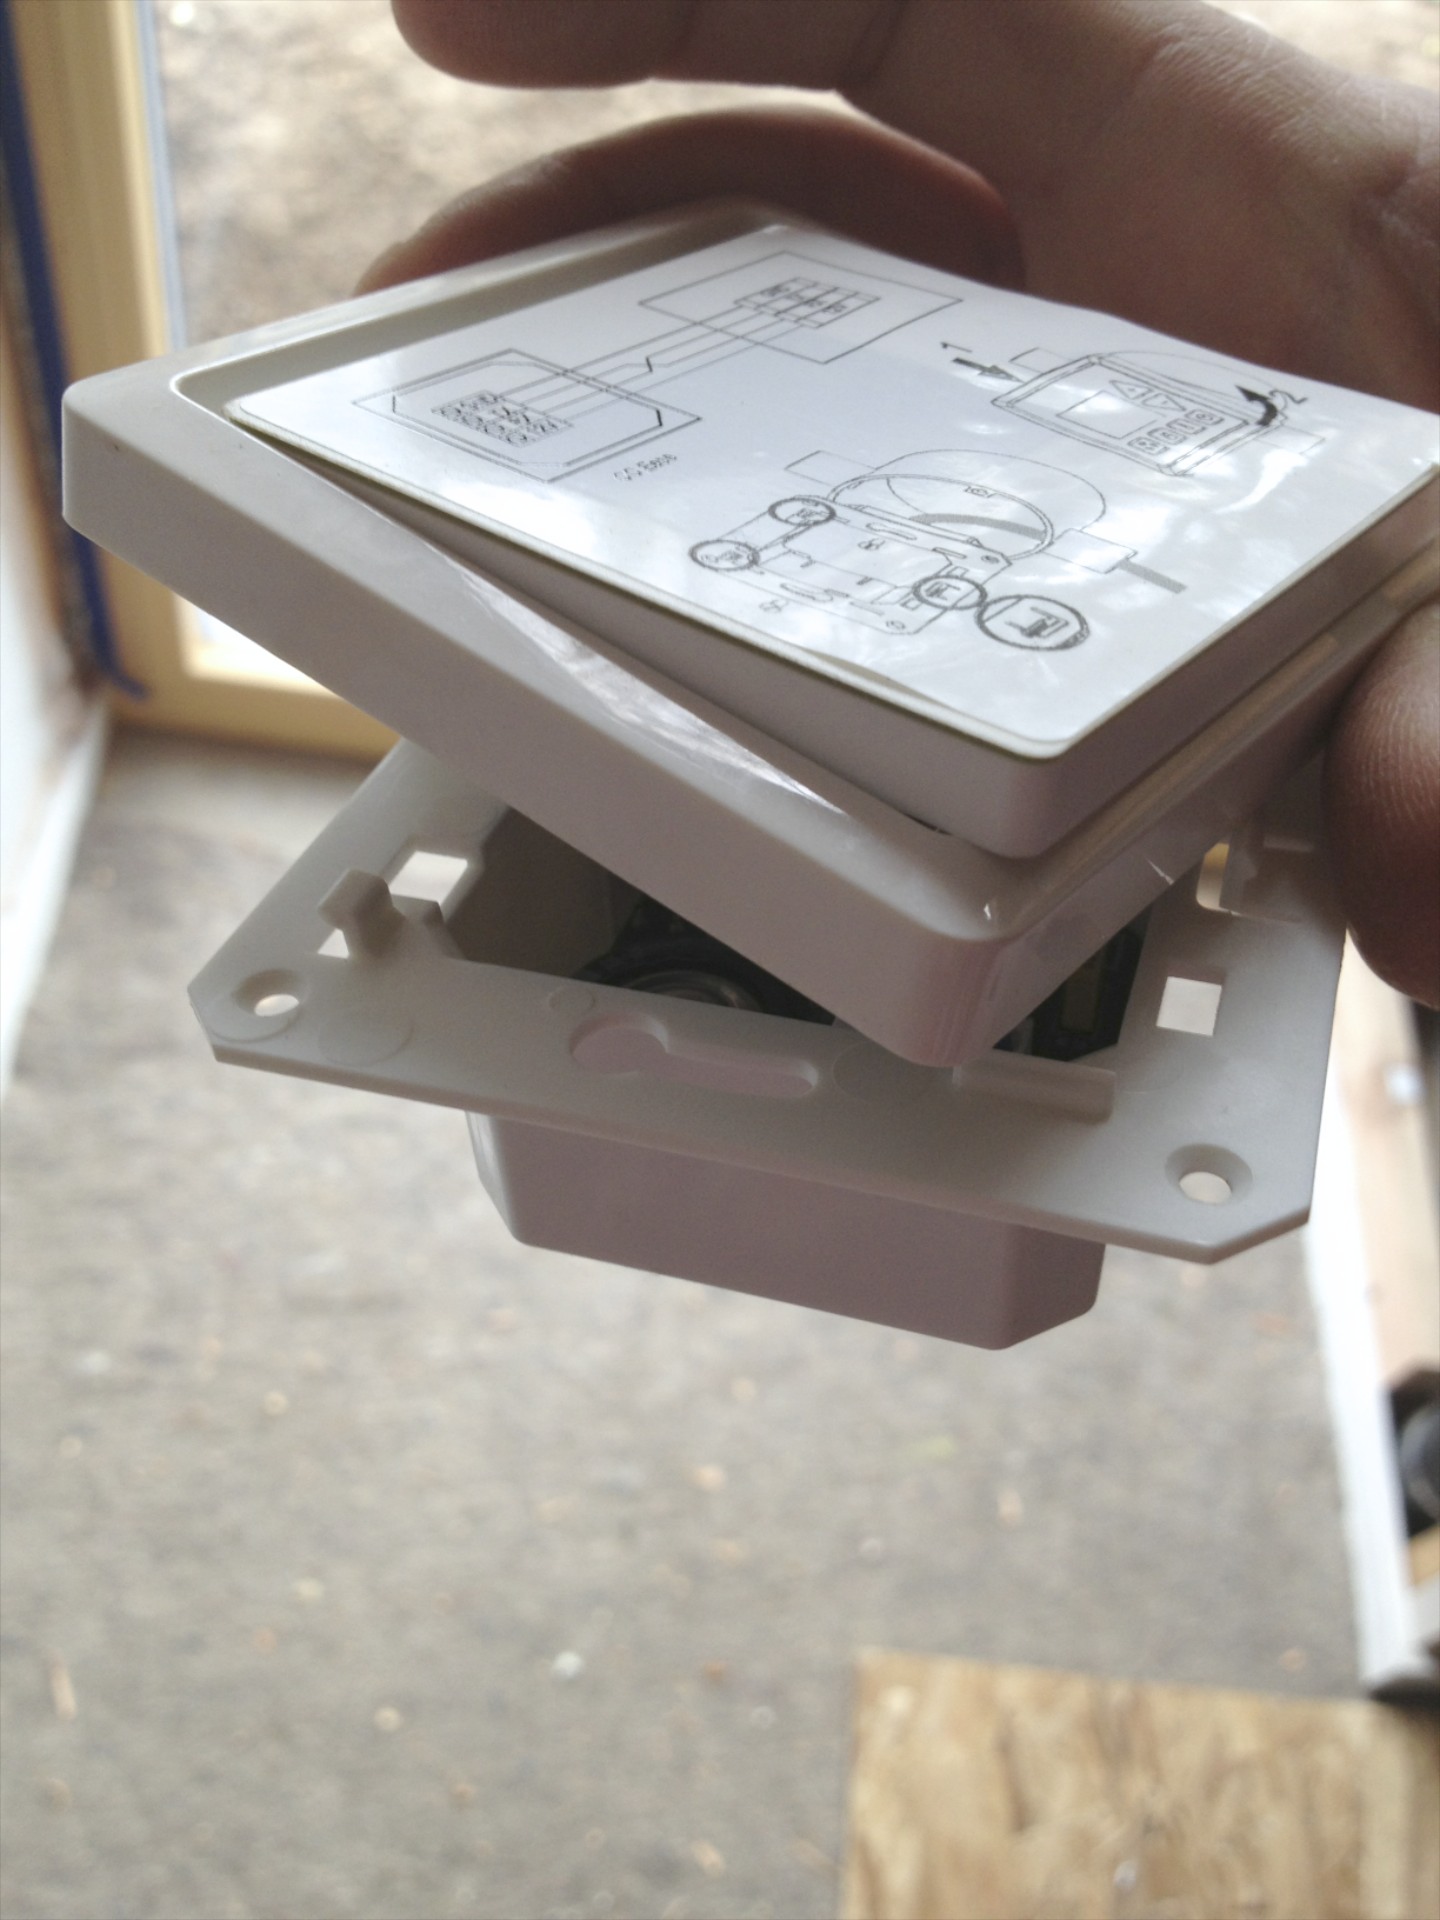
the main controller will be located in the kitchen, providing the ability to boost the ventilation rate temporarily to 35 cfm while cooking. each bathroom will have a timed switch to boost the rate to 24 cfm if needed after a shower. we also conveniently have an operable window located in the kitchen and both showers.
thanks to IM Plumbing for help with the installation, and to Matt Grove from Zehnder for help with the design.
sheetrock has wrapped up and painting has begun. check back soon for more.
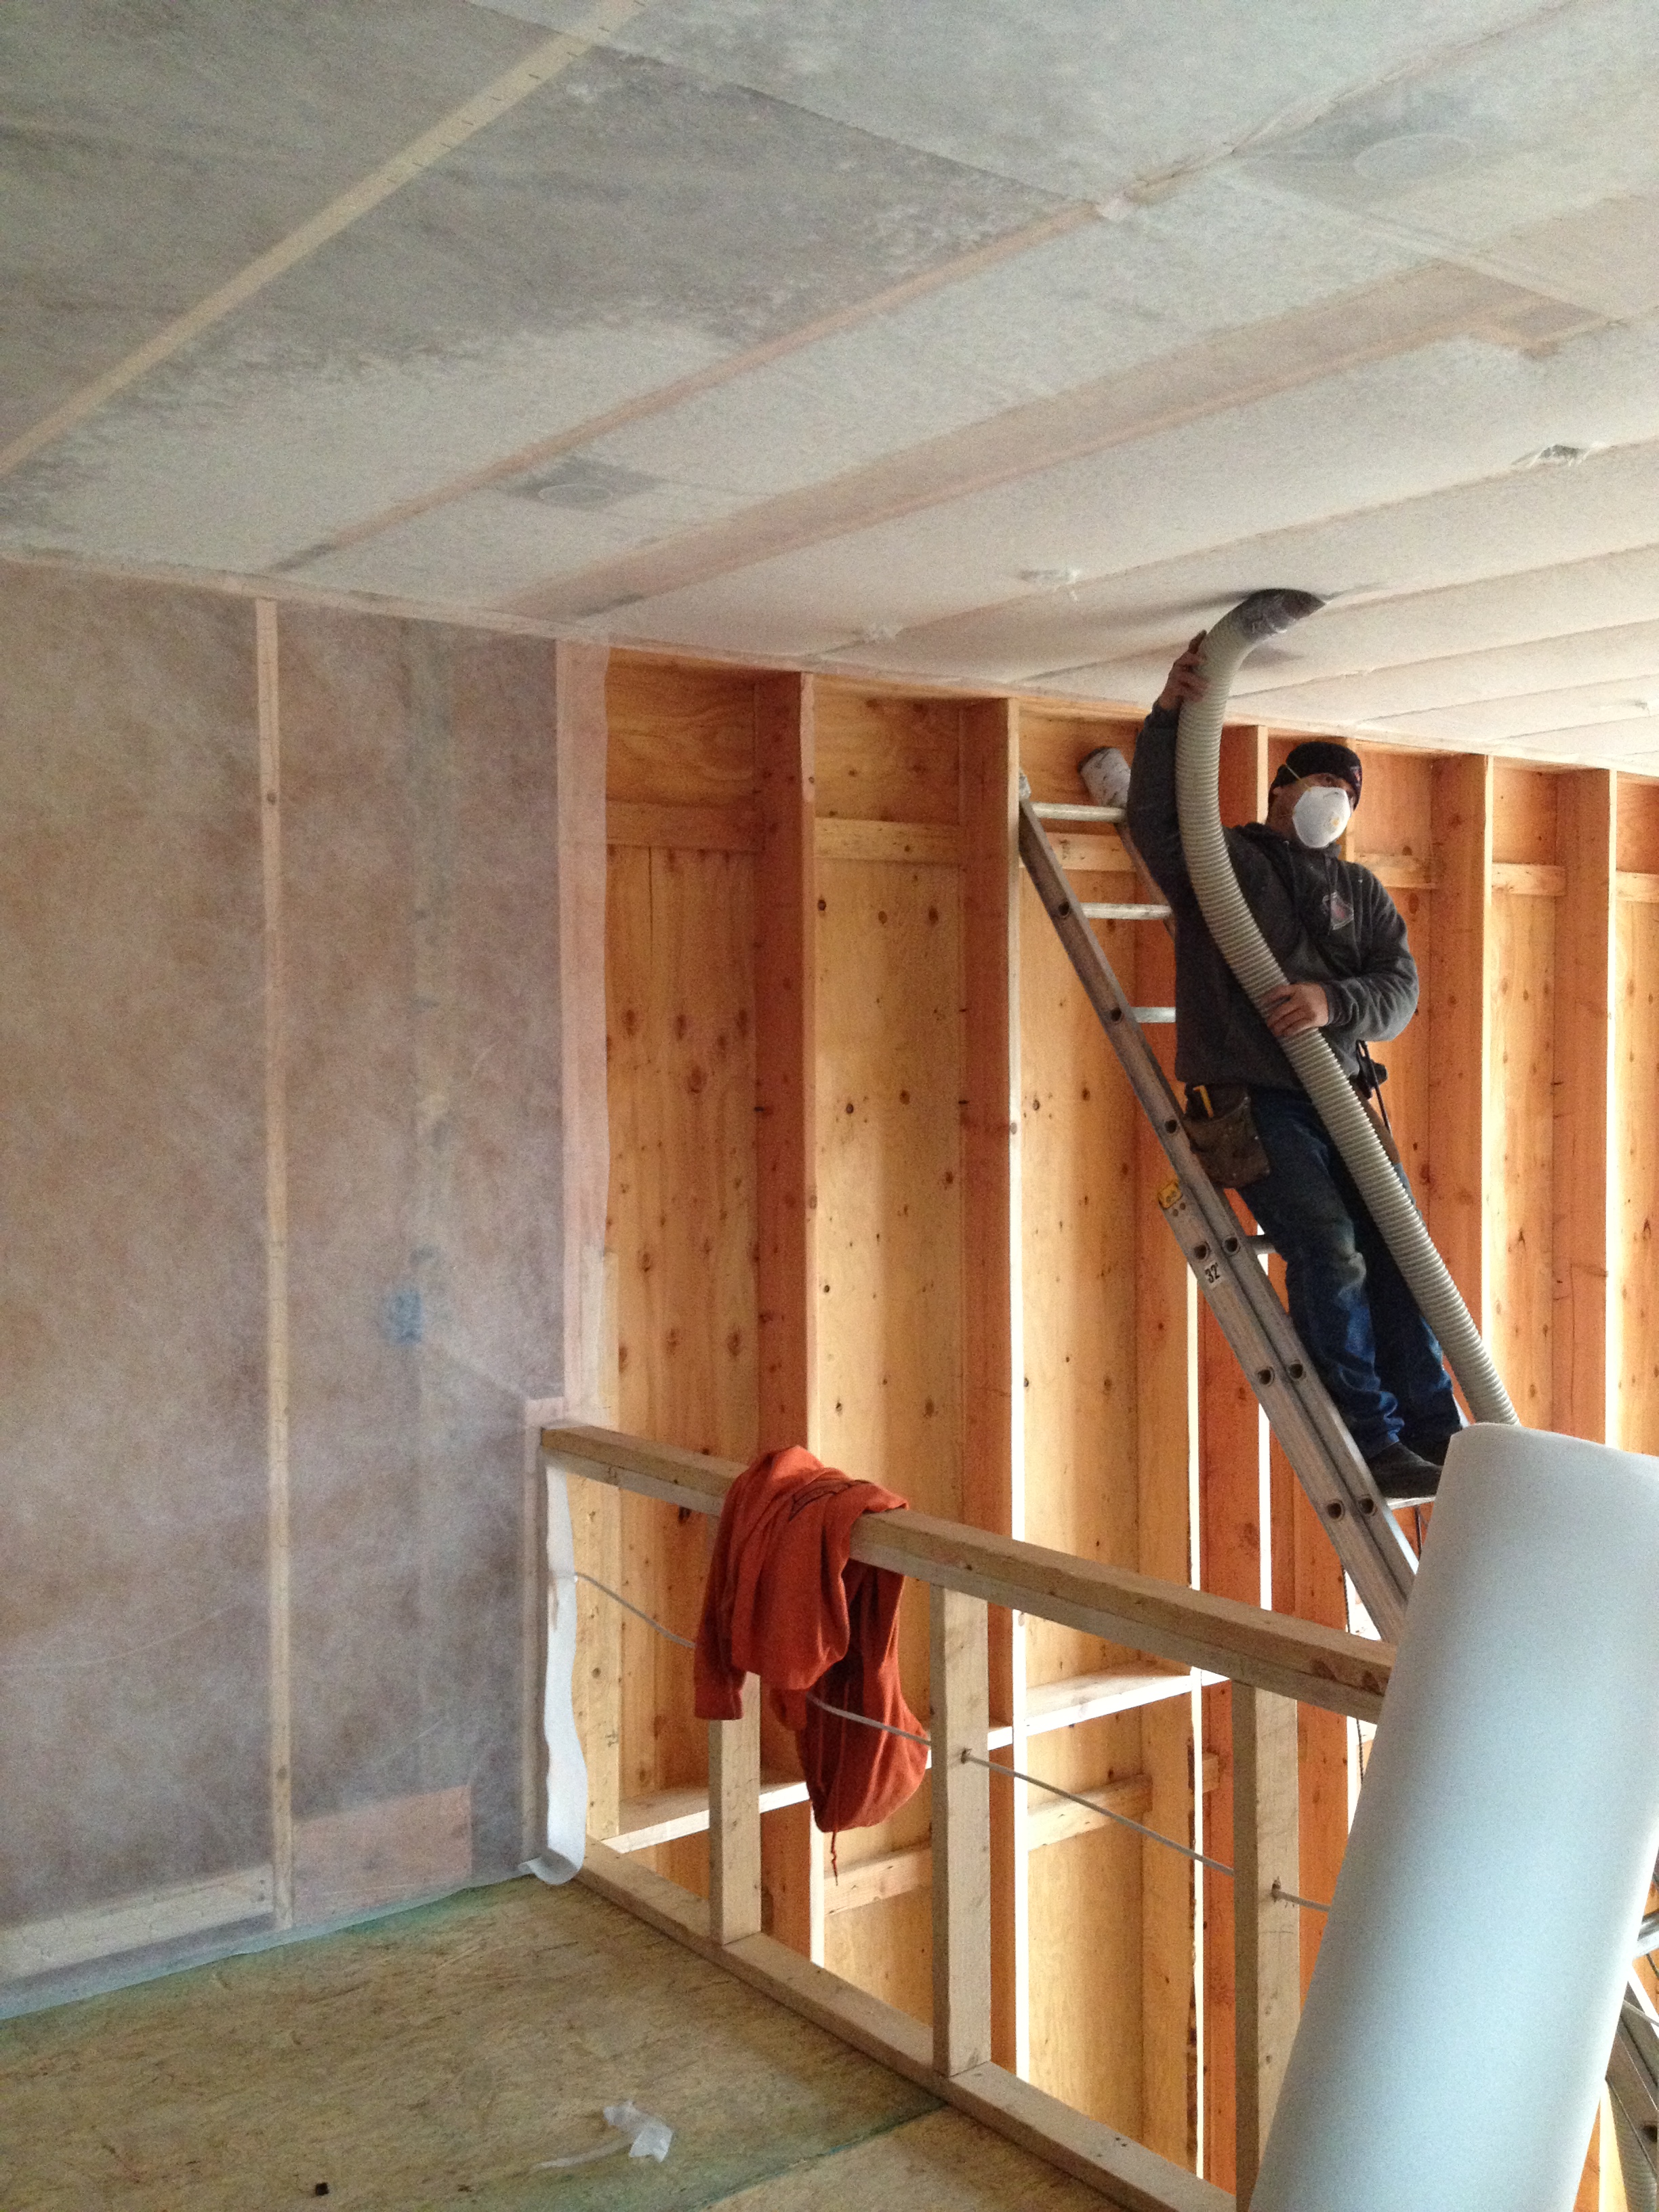
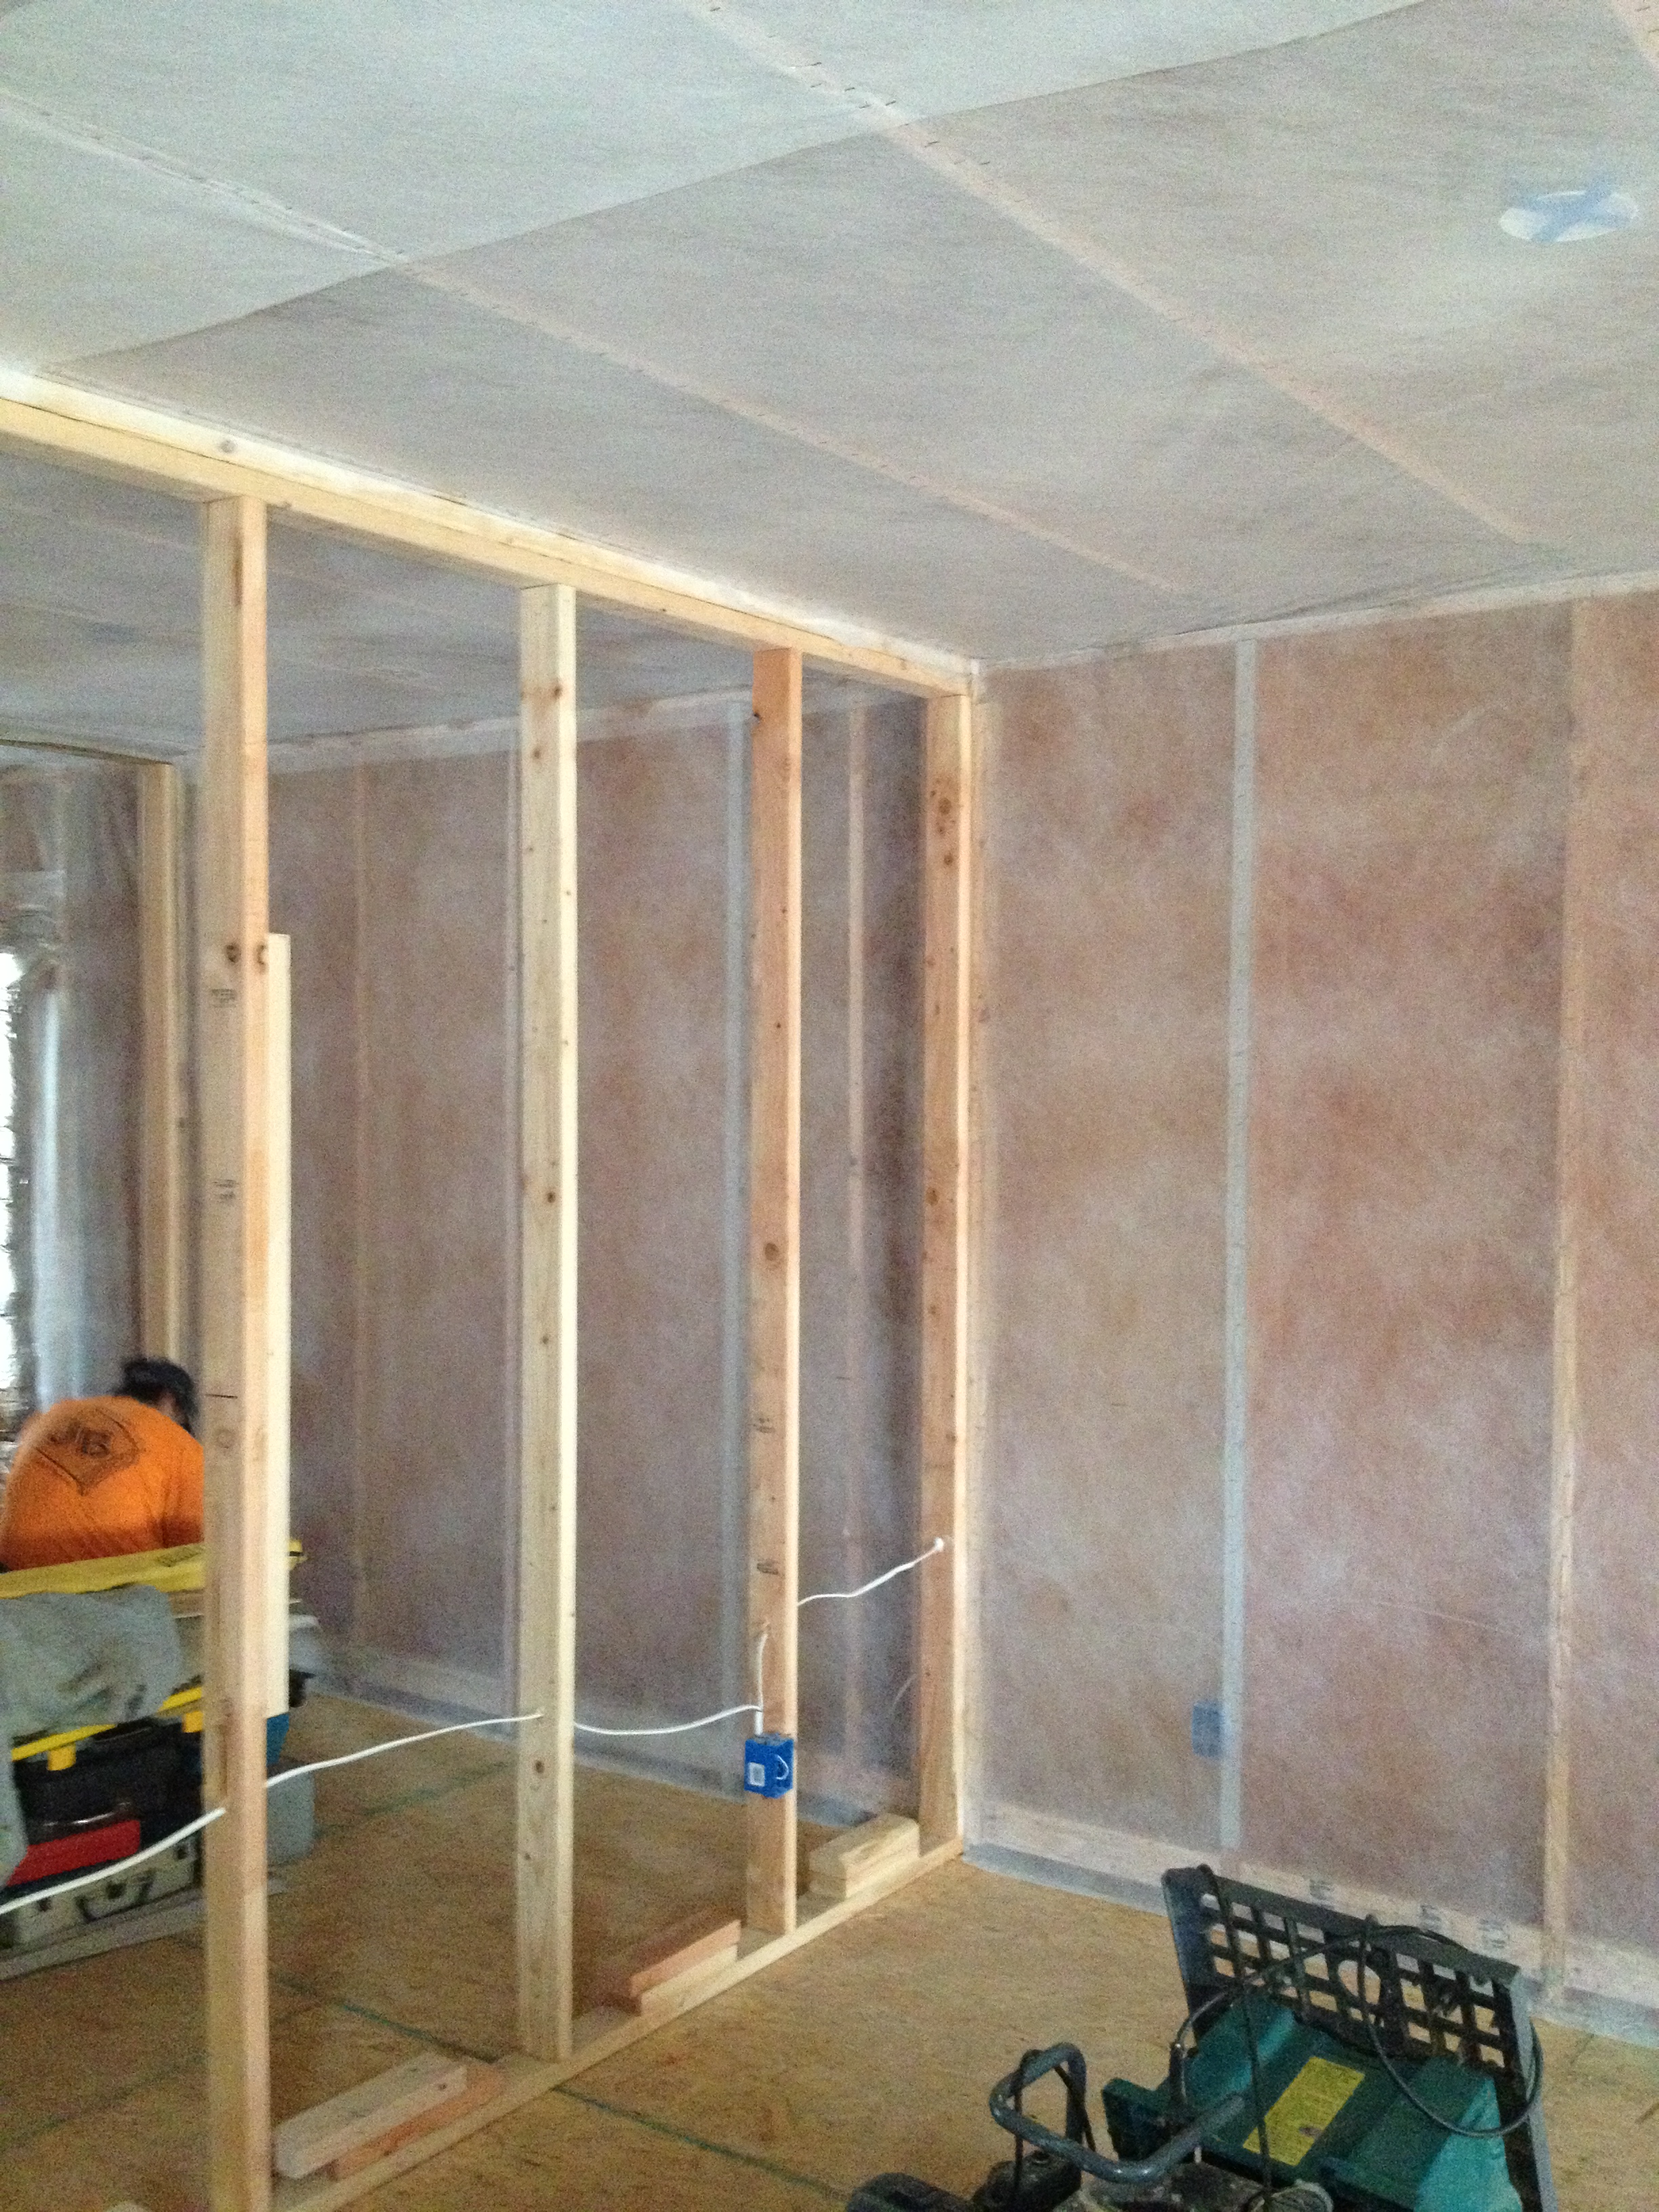
blow


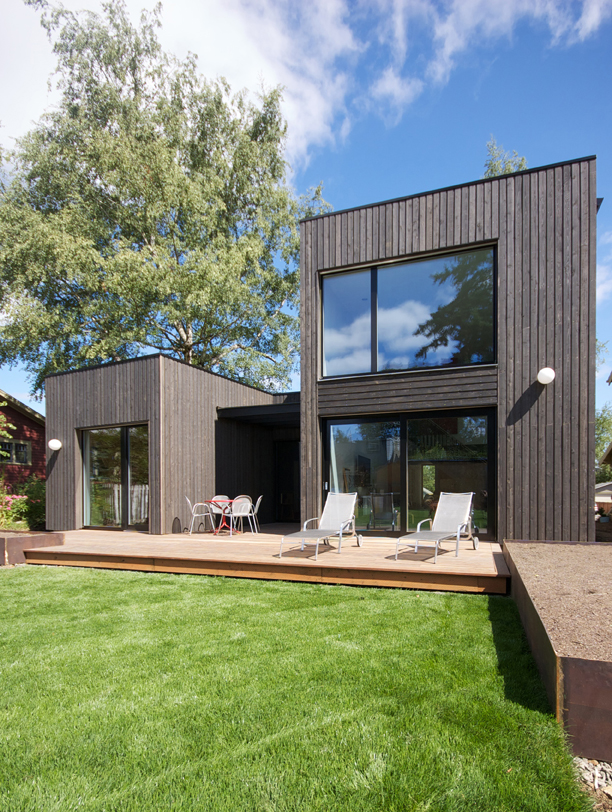
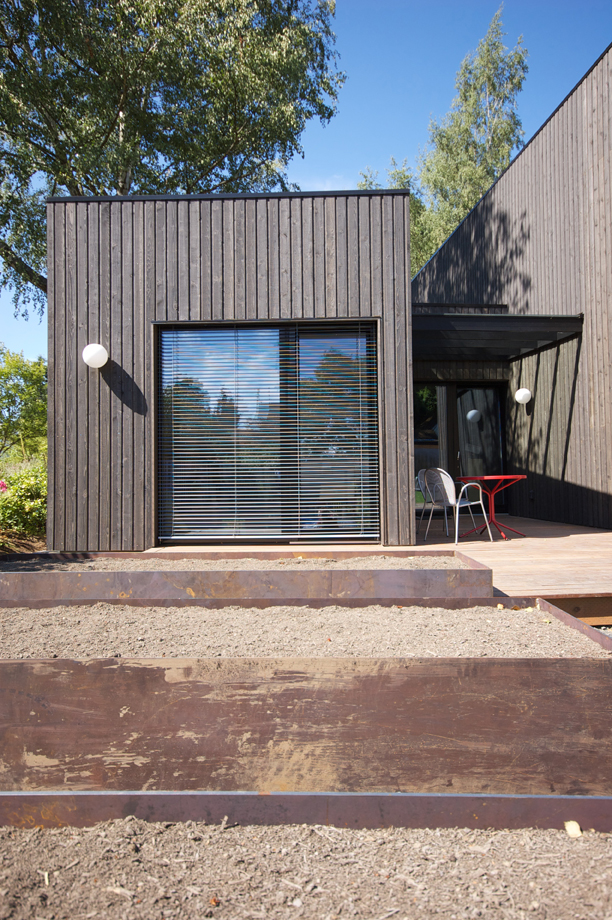
stained cedar siding
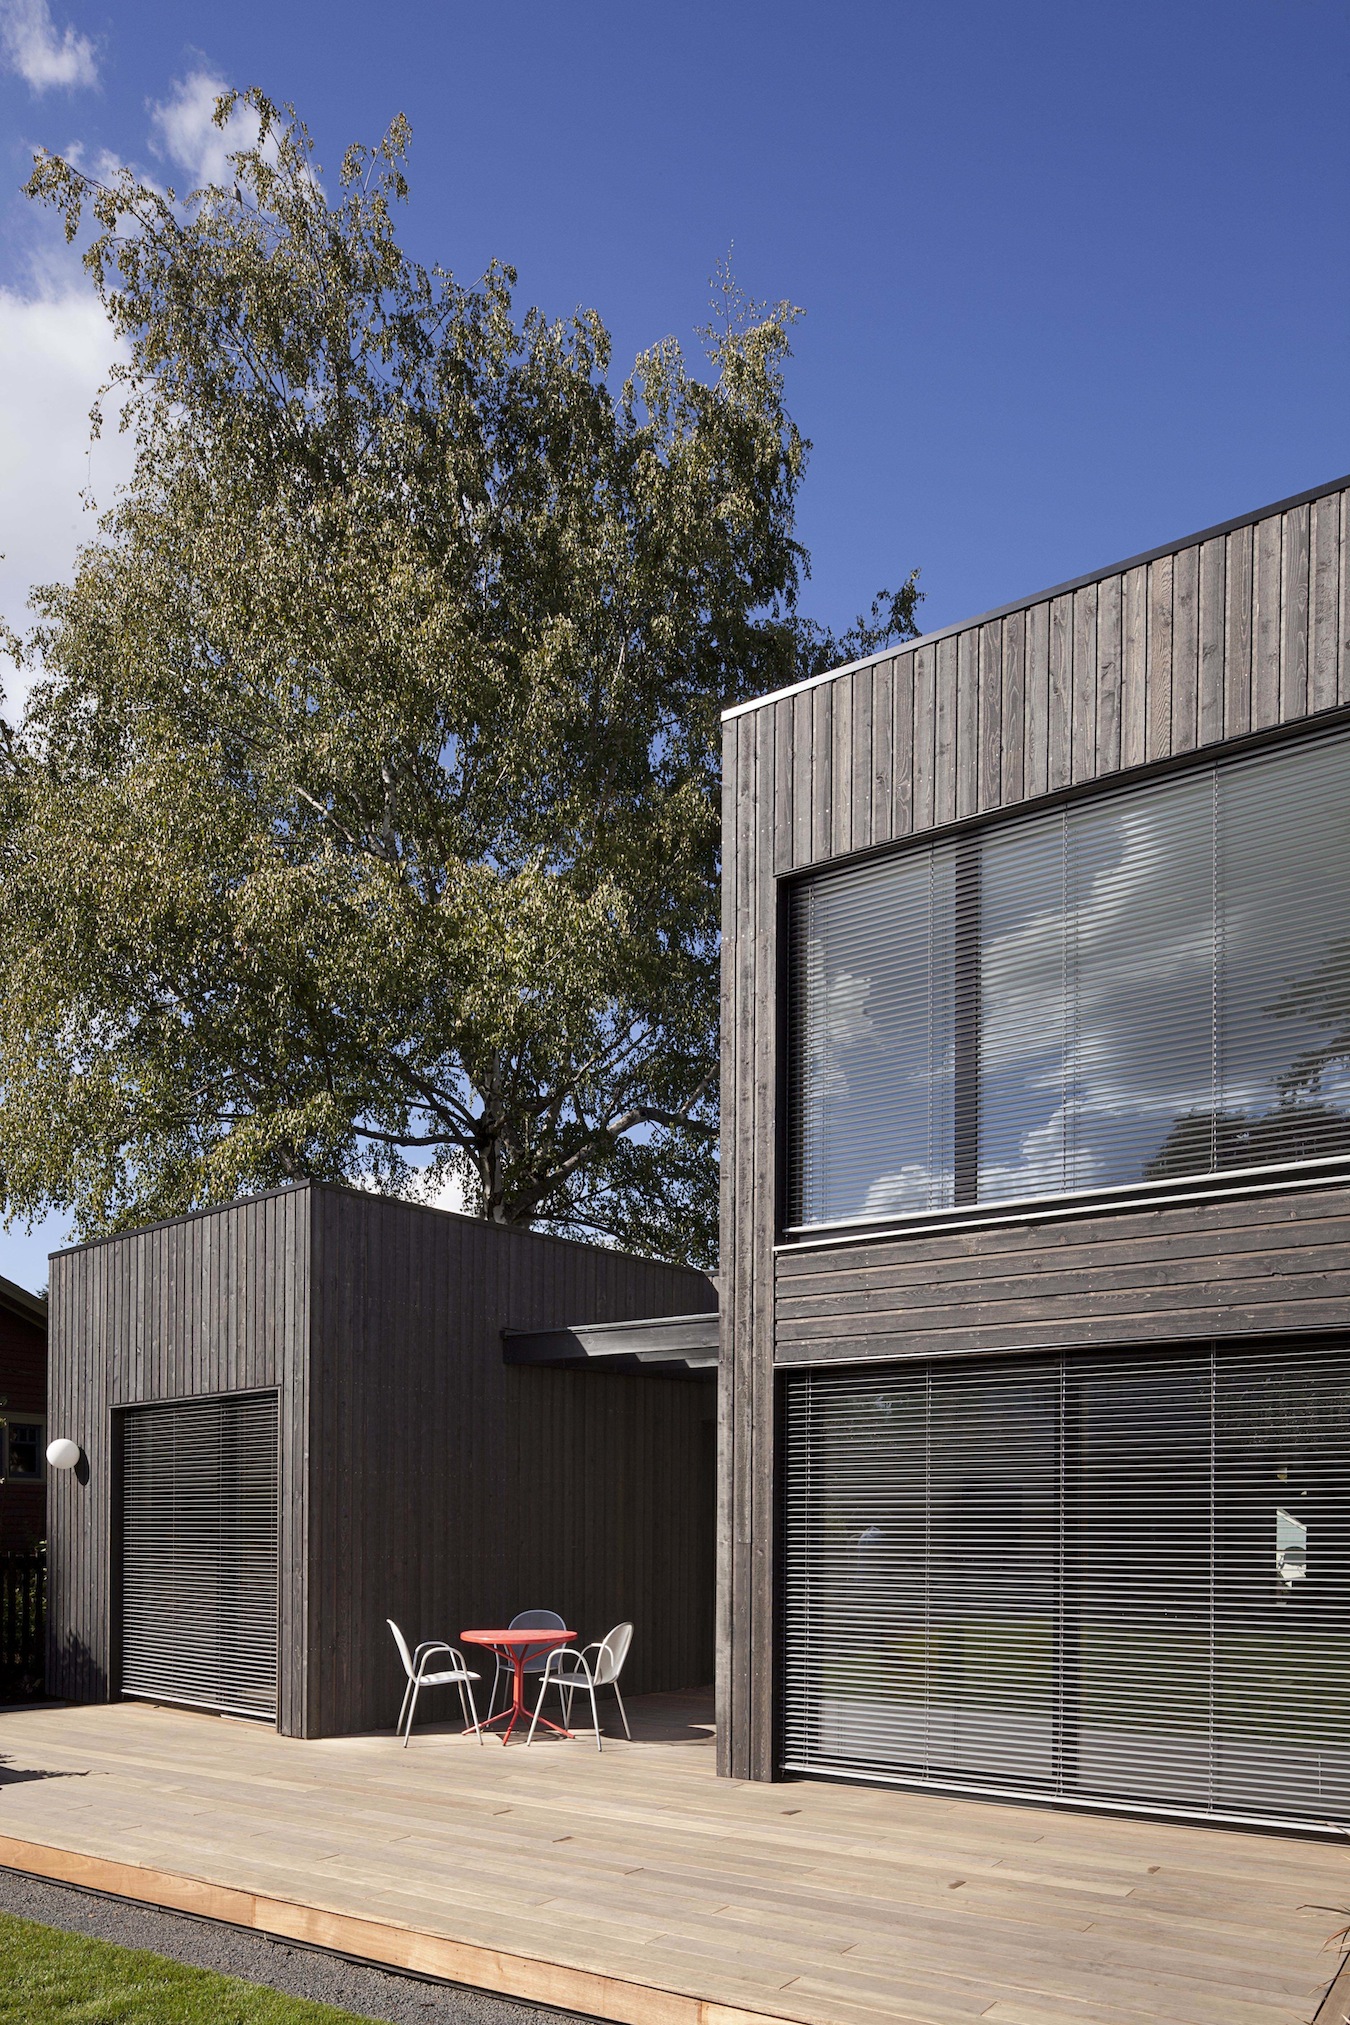
siding work has mostly wrapped up. the vertical siding is installed on rainscreen over rigid exterior insulation. see this past post for more info on the assembly. here's a first look at the siding pretty much completed.

the siding is off the shelf 1x6 channel made from tight knot cedar. it's stained with 1 coat of olympic semi-transparent stain in ebony.

the large south windows (and doors) have exterior motorized aluminum sun shades supplied by hella. the siding has been detailed to allow the shades to stack in recessed pockets. in this photo the shades are down about 9 inches and just visible on the 2 living room units (lift / slide door and fixed upper unit). more on the shading later.

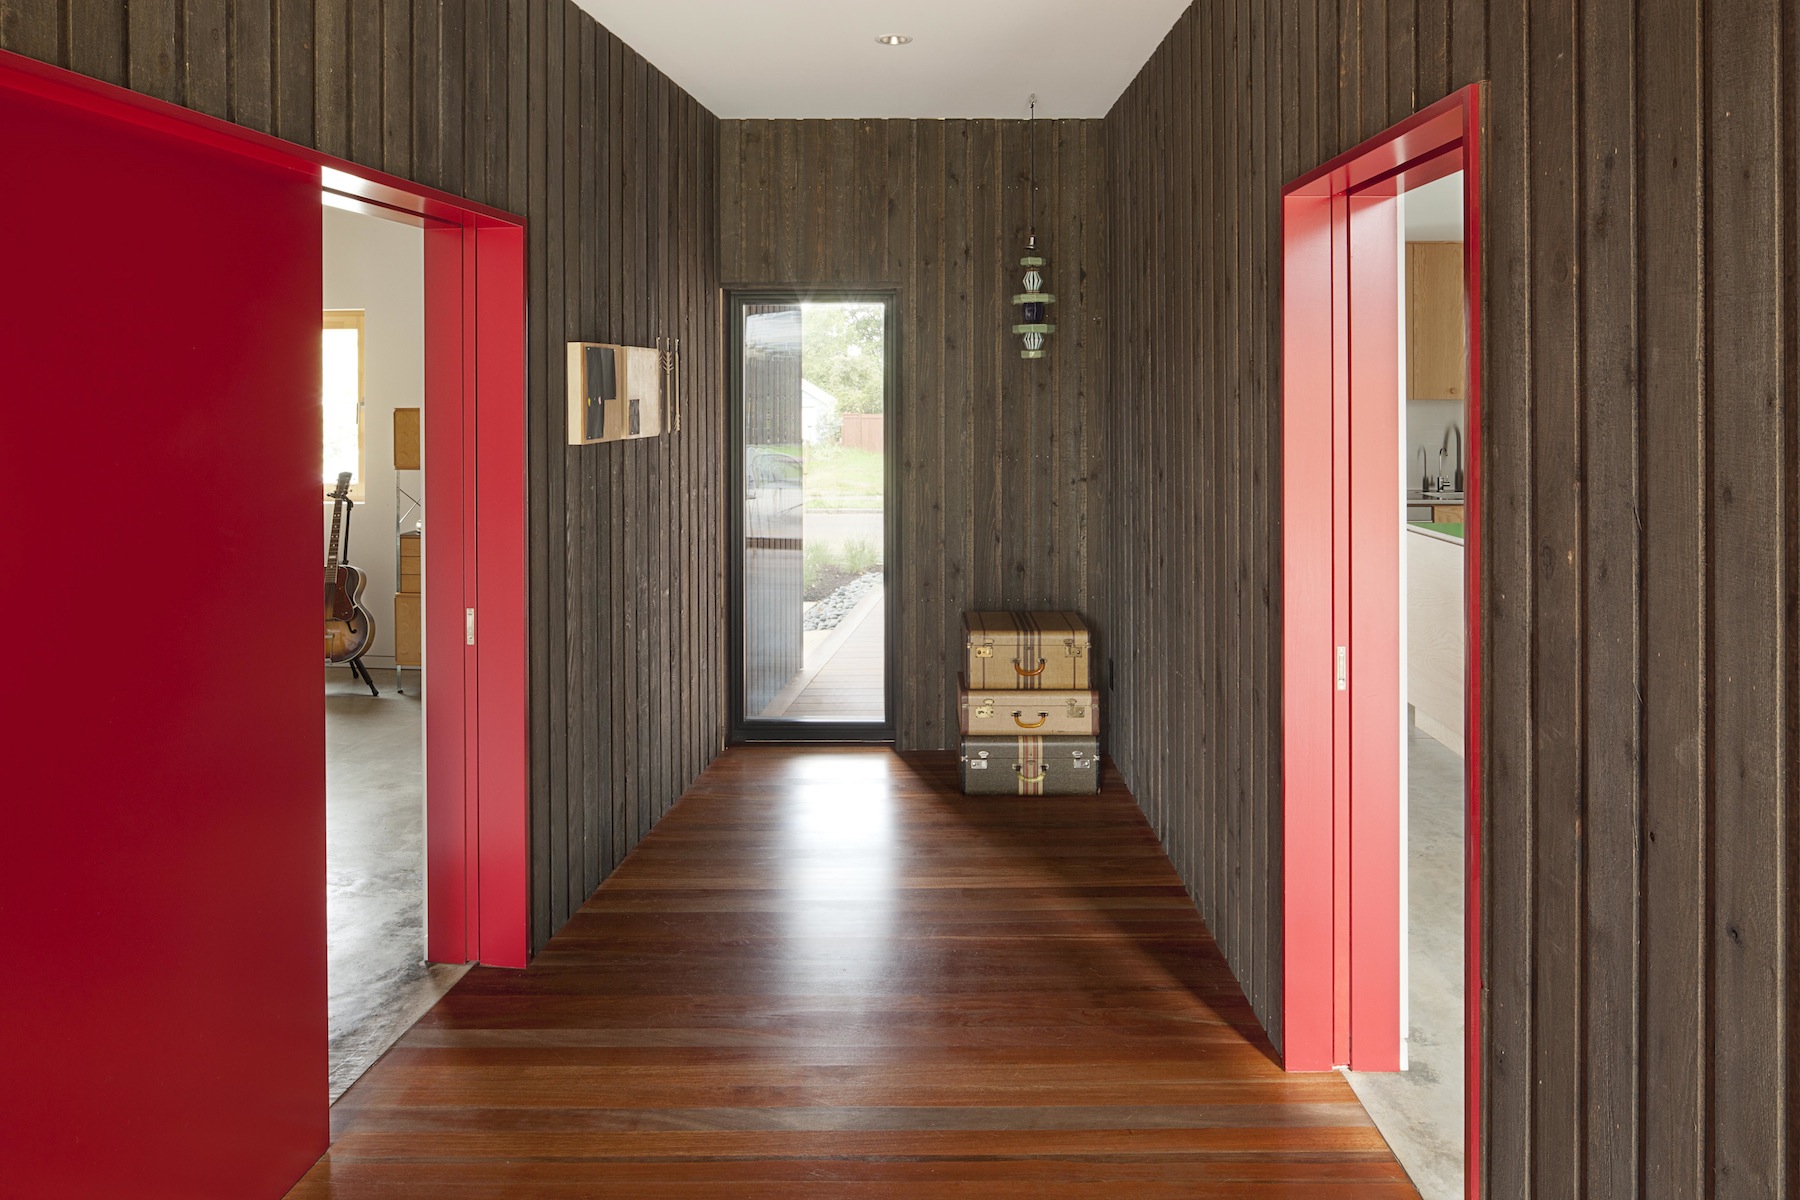
the "breezeway" features a south facing door / window with a wood canopy (to be painted black) topped with clear tempered glass.
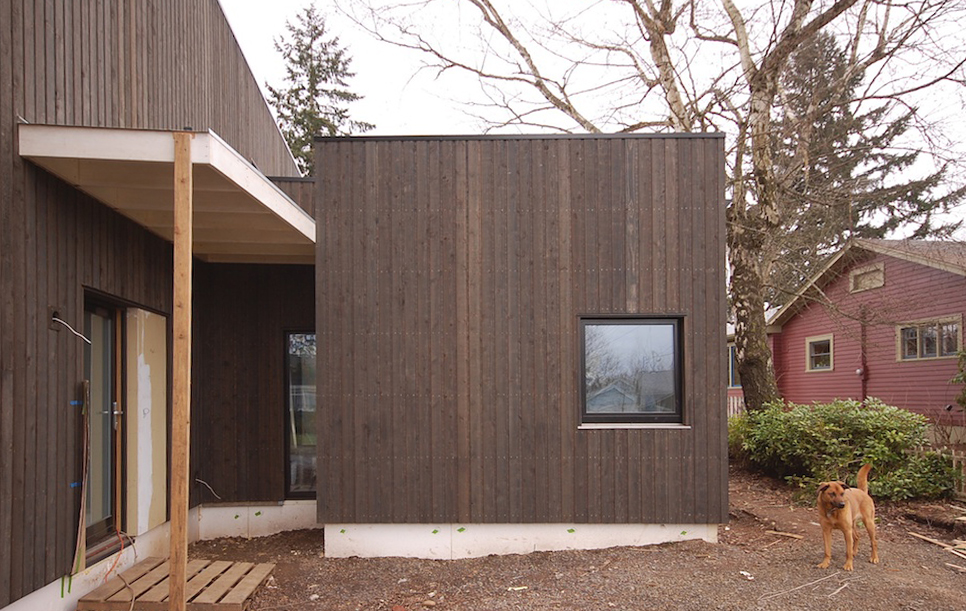
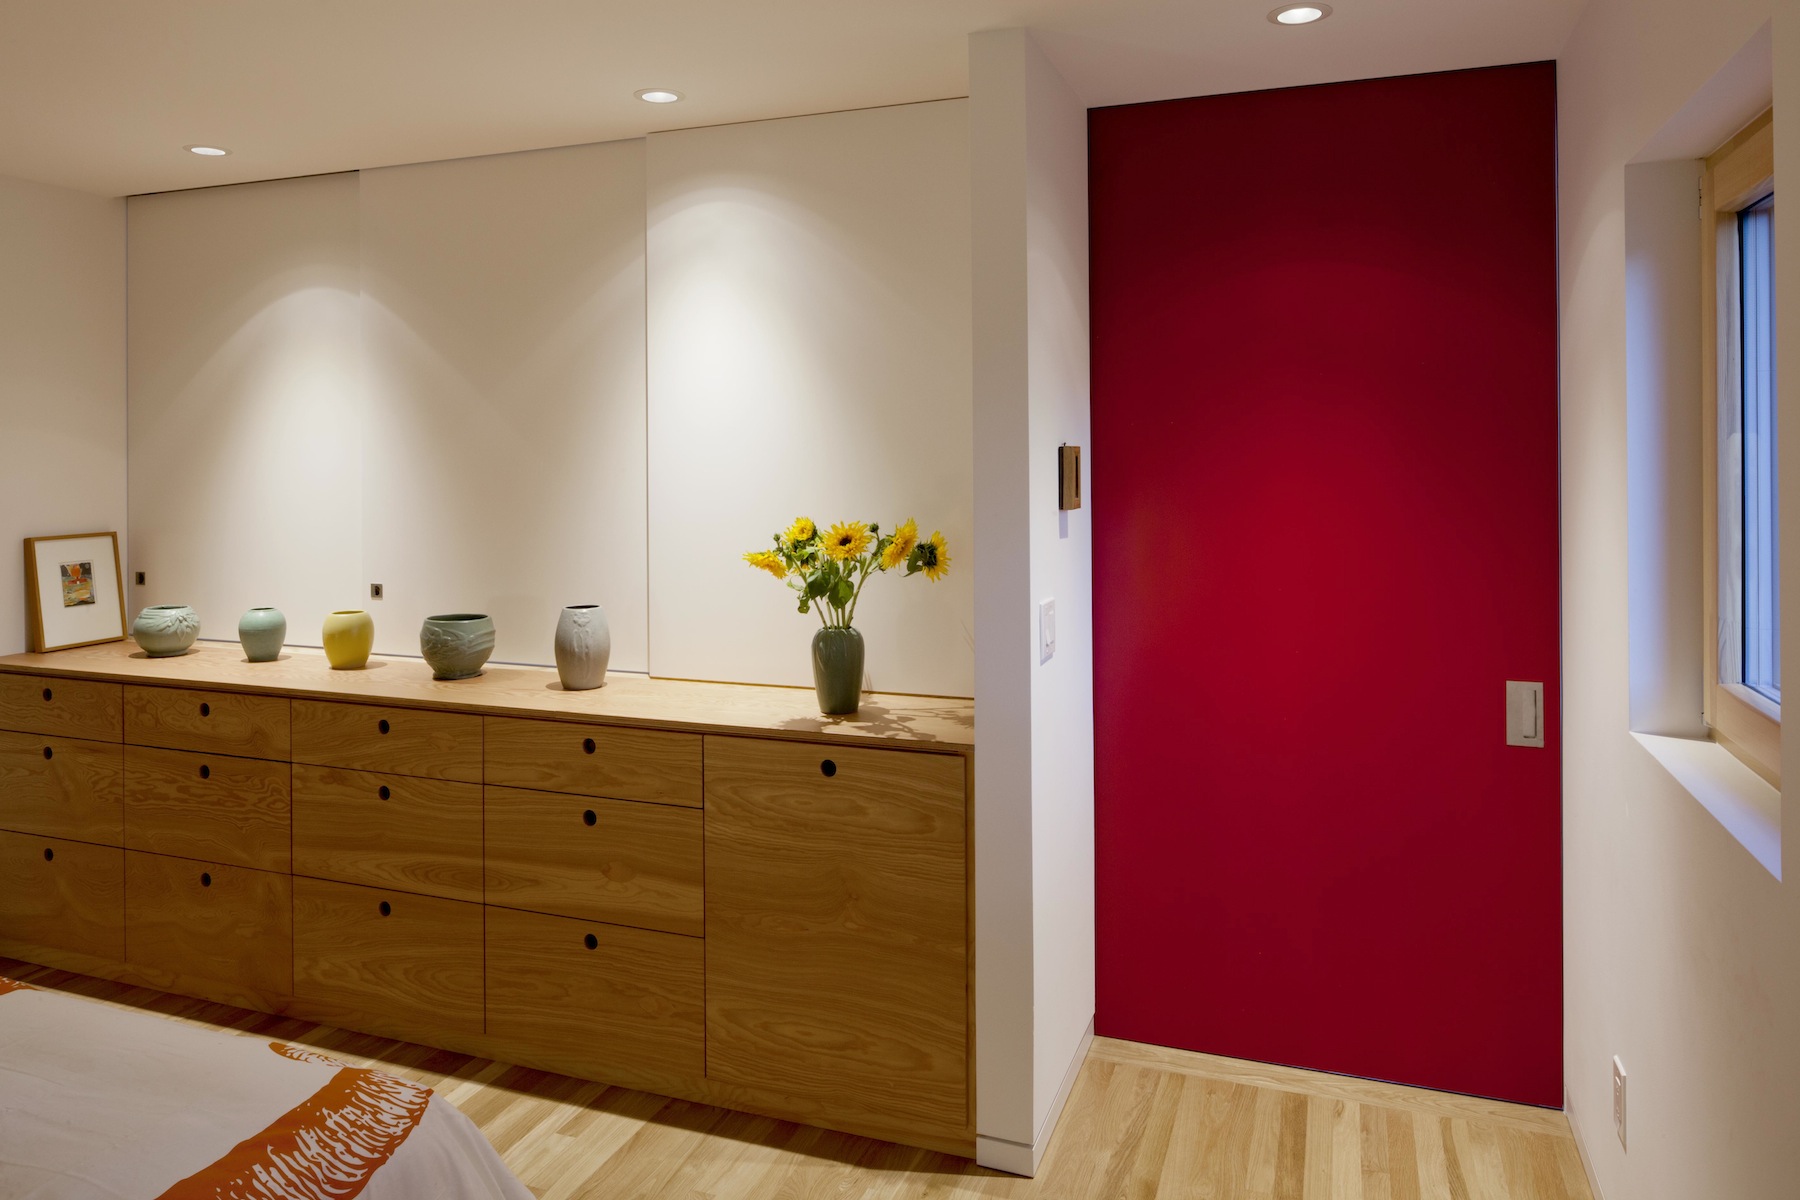
the entry door at left features acid etched glass for privacy and has a smooth accent panel adjacent that will be painted a deep red. the wood canopy will painted black and features a simple galvanized metal pan roof. steel rod will be used to hang the canopy from a bracket mounted to the wall above. a mahogany deck will eventually complete the front porch.

the north street facade also features a narrow smooth accent panel that will be painted with the same deep red. the same siding runs horizontally to form an accent between floors.
check back soon for more.
pre-certified
after 6 months of hard work, persistence and a bit of cash, skidmore passivhaus is officially pre-certified.

(next time i will do a more accurate solar shading report BEFORE the start of construction)

here are the latest results of the PHPP model:

more photos soon.
going solar
the rare sunny portland winter day has allowed us to regale in the golden rays.
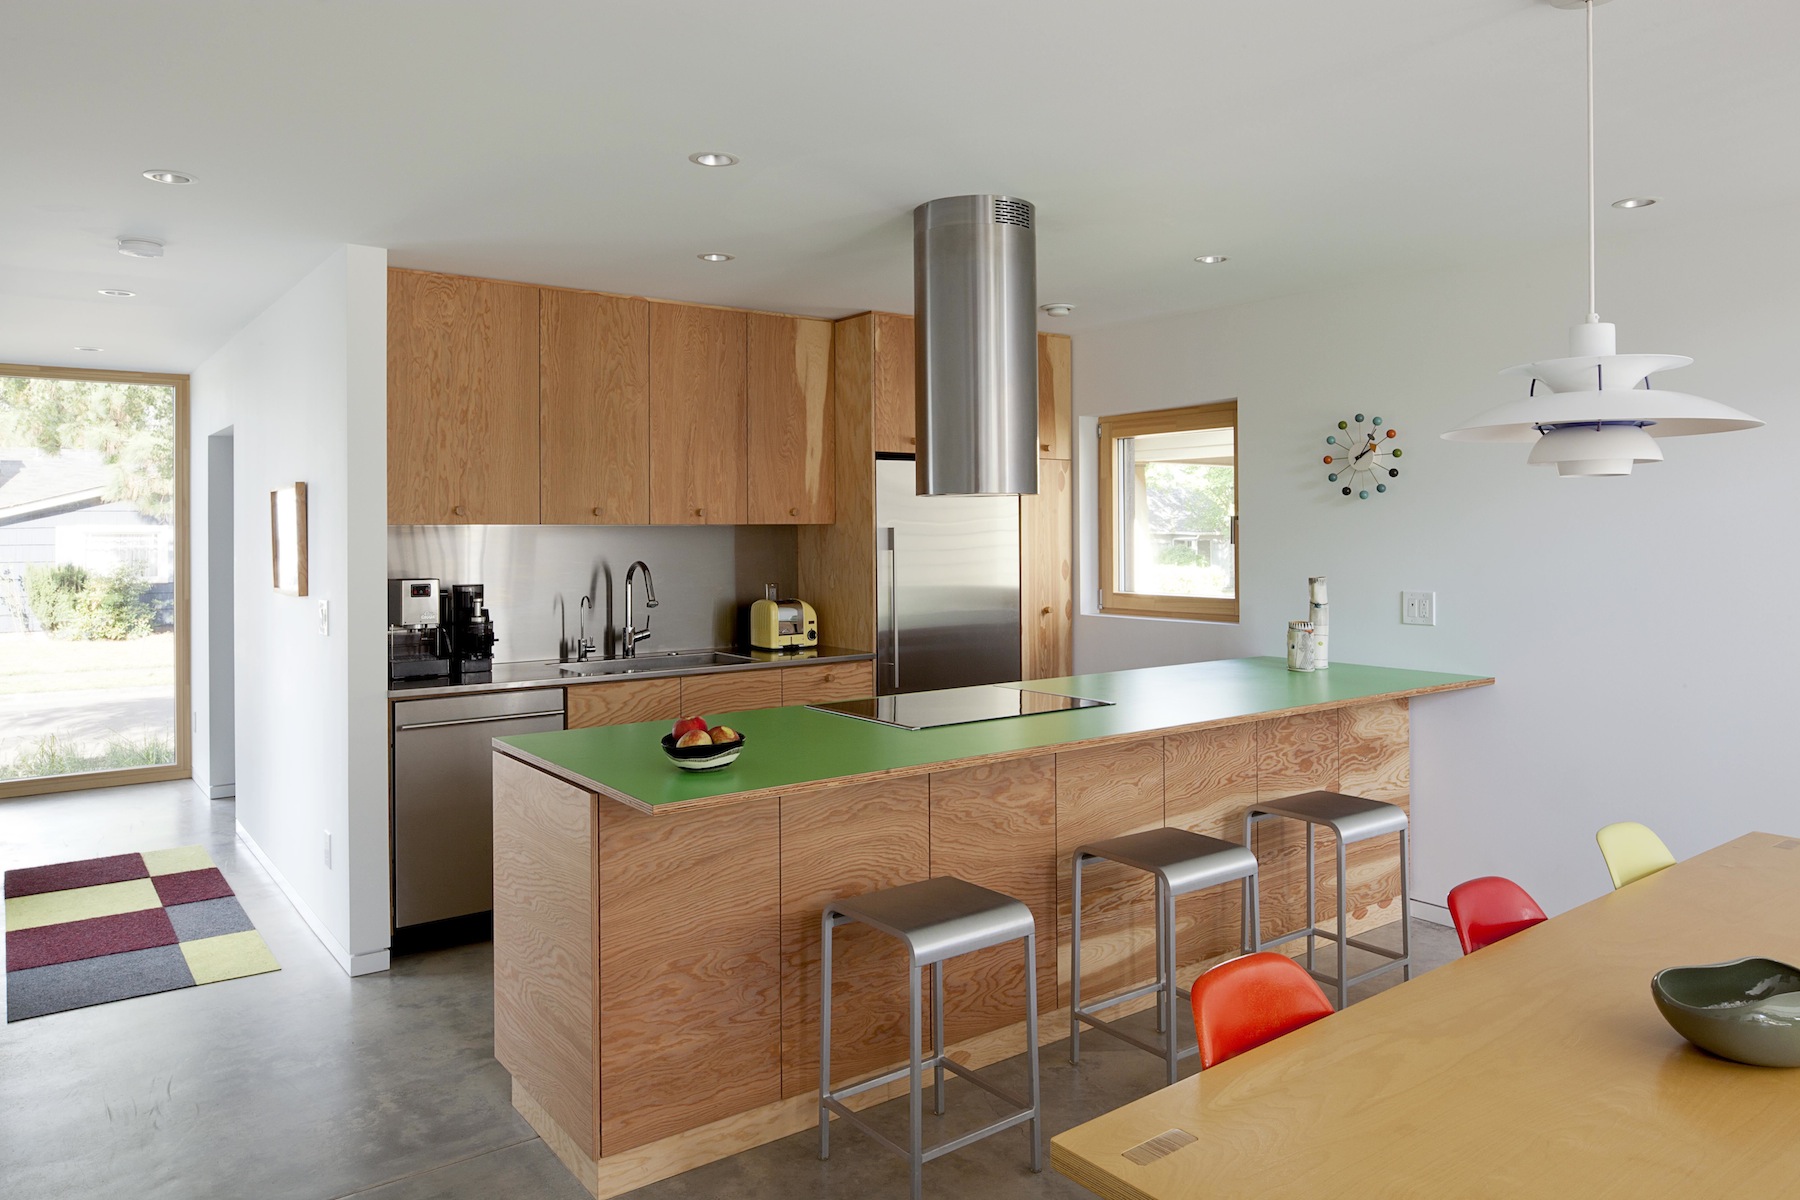
glorious sun reaches all the way to the back of the kitchen.
the south facing windows / heaters are working.
the studio flooded in mid-day sun.
the breezeway will be a study in light and dark.
rejoice.
in addition to direct gain, we will have a small PV system on the roof. more on that later.
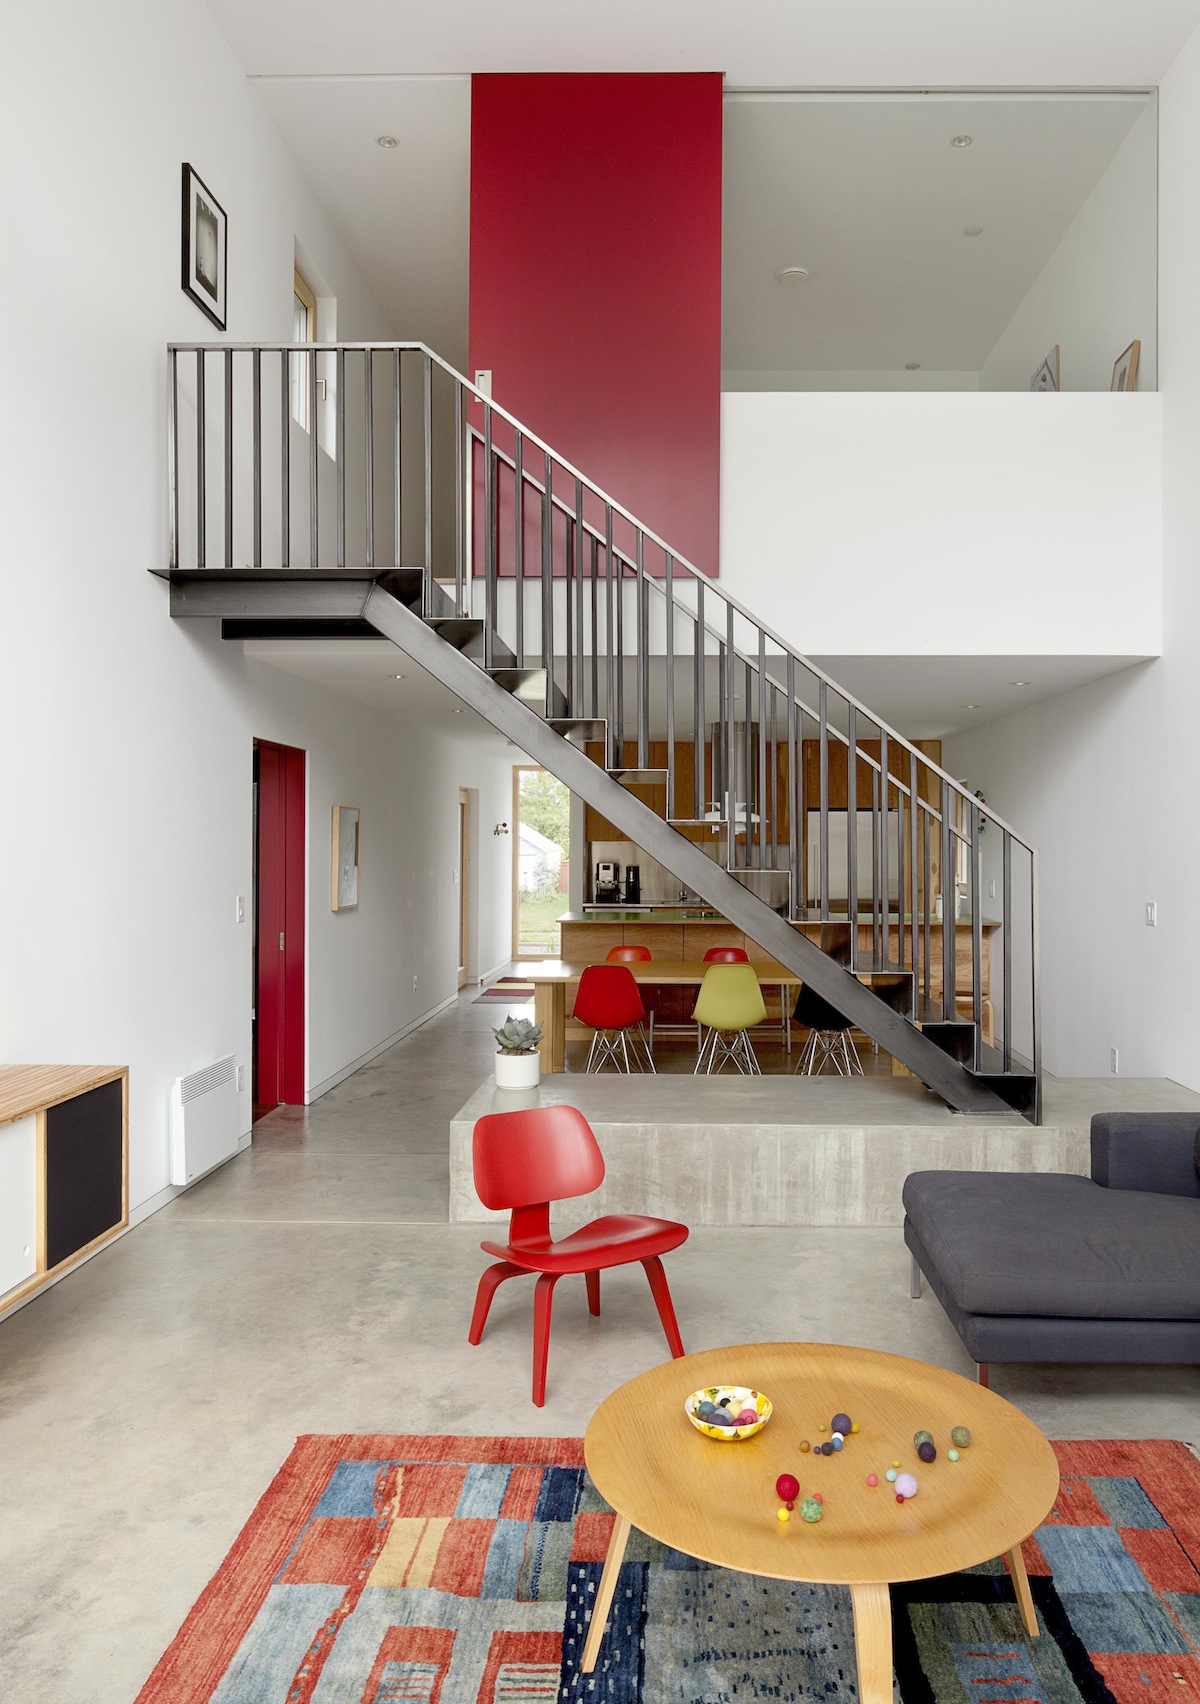
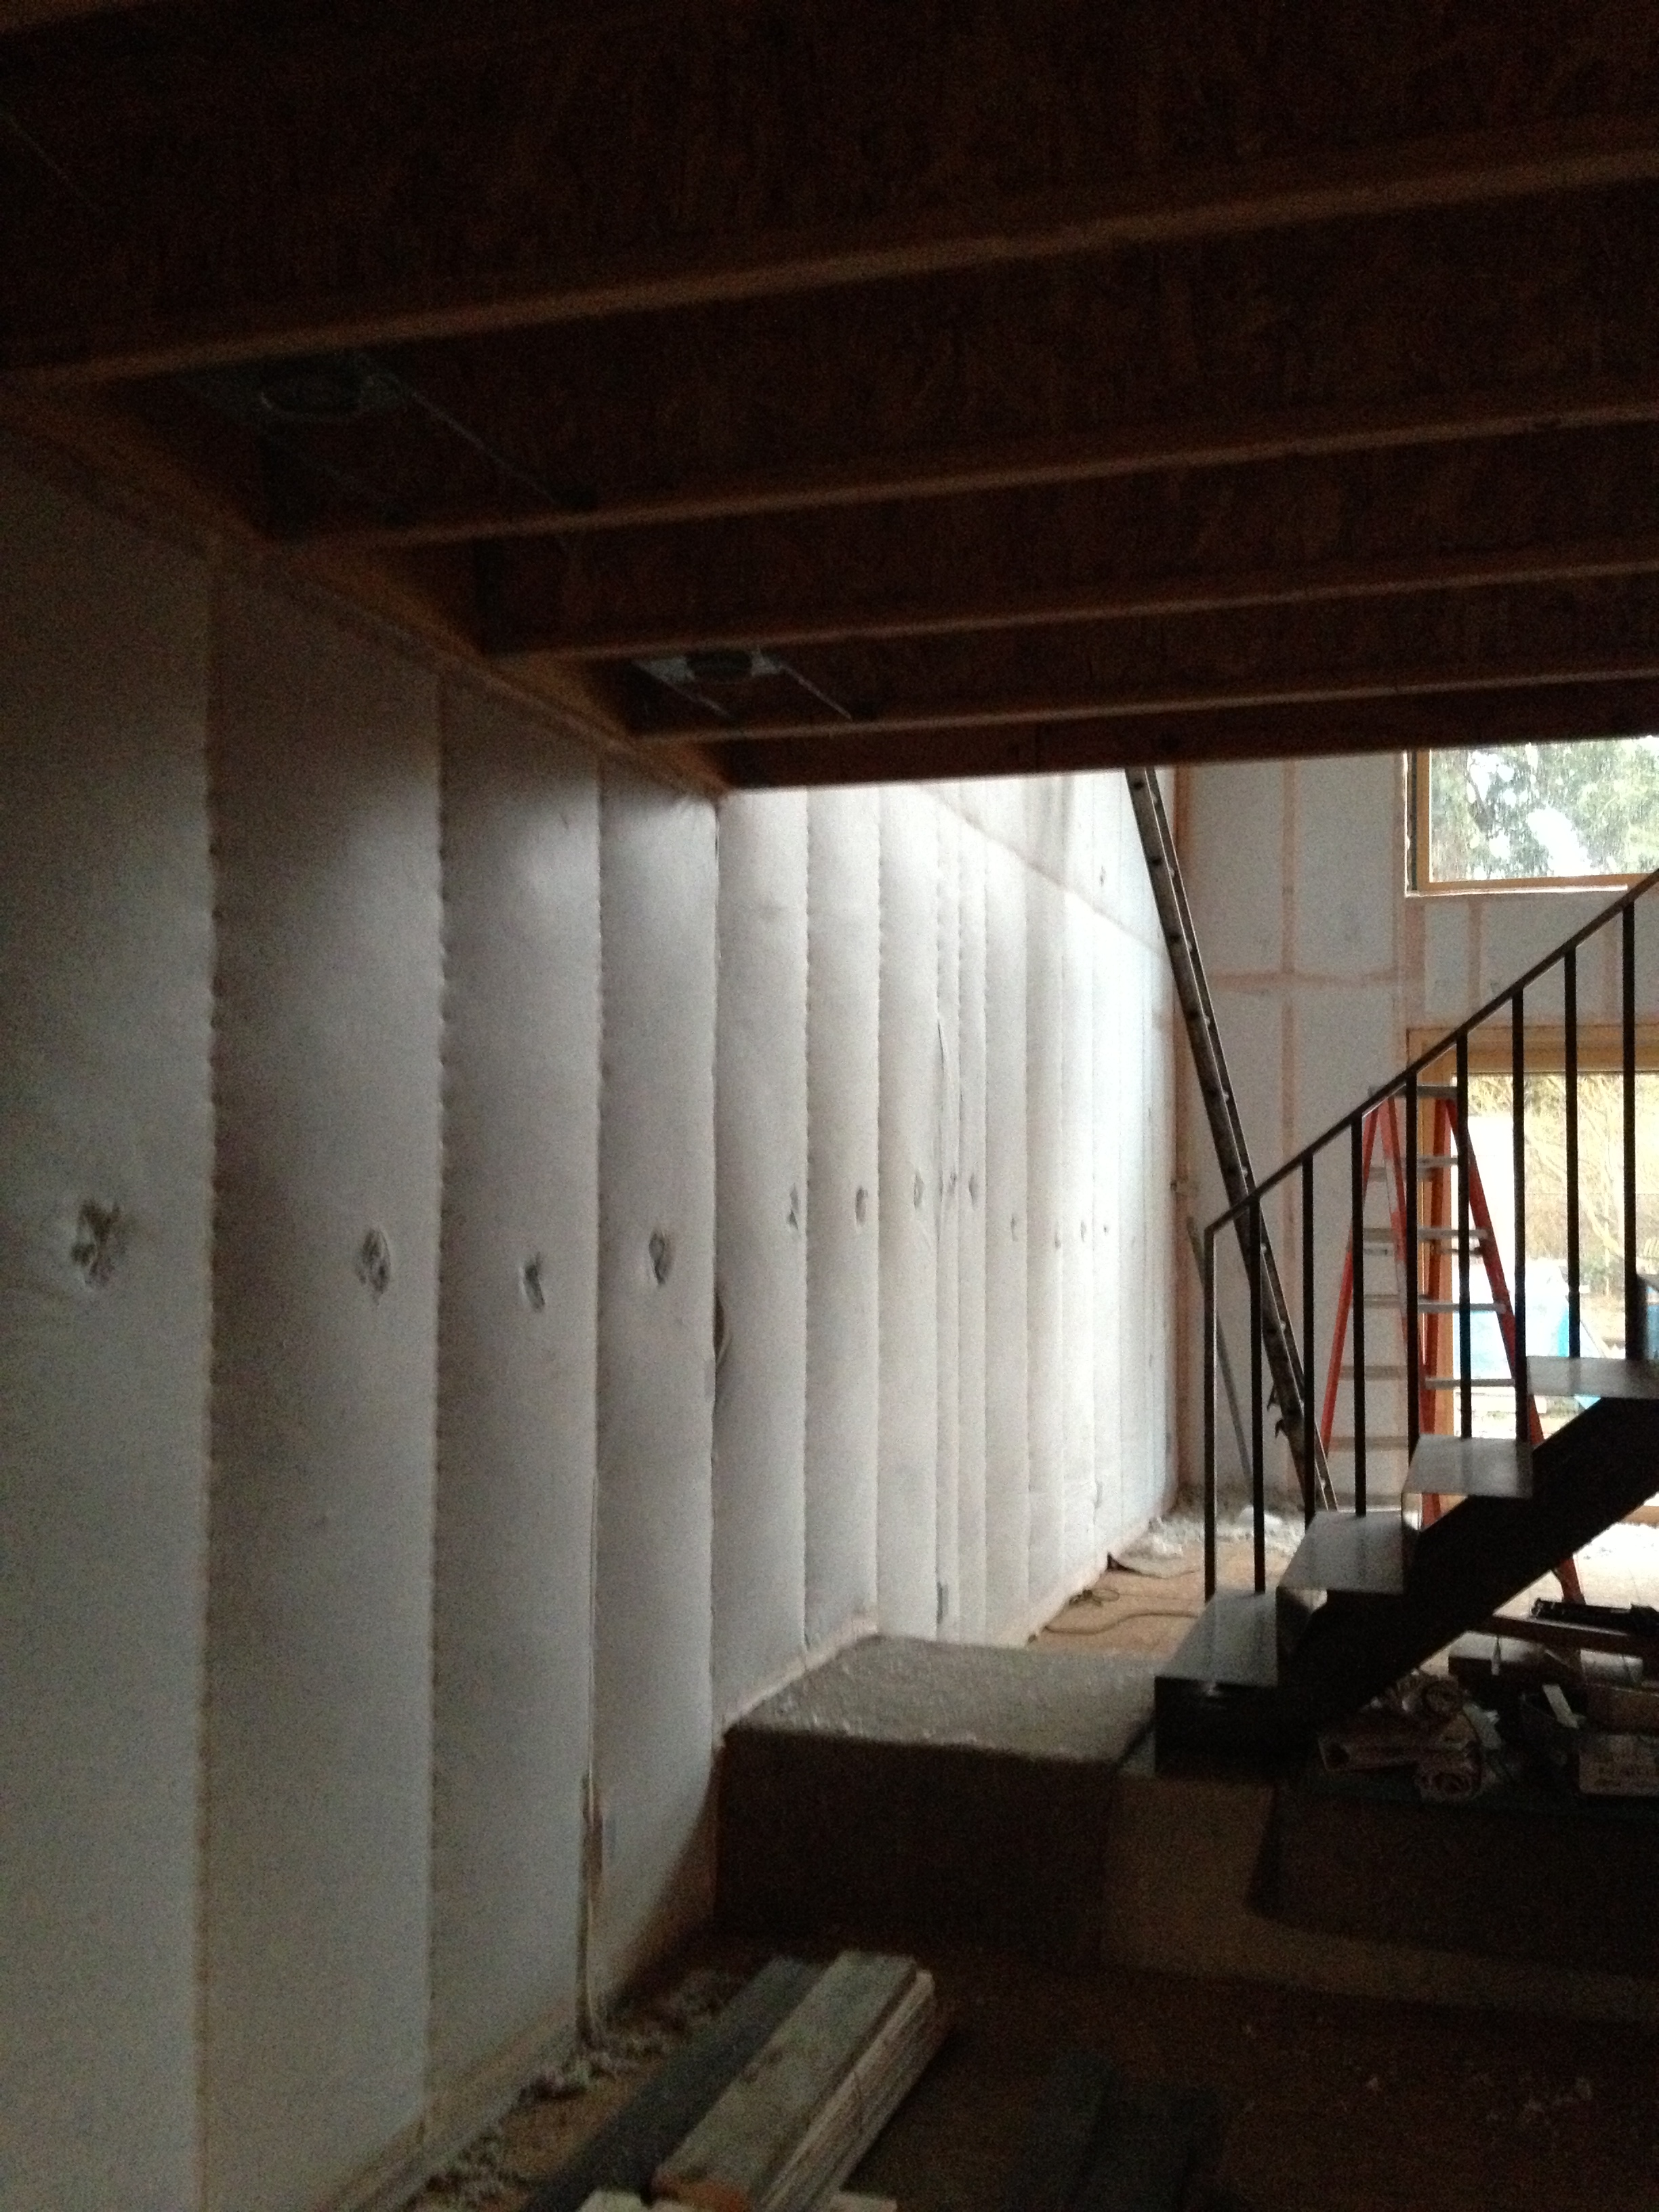
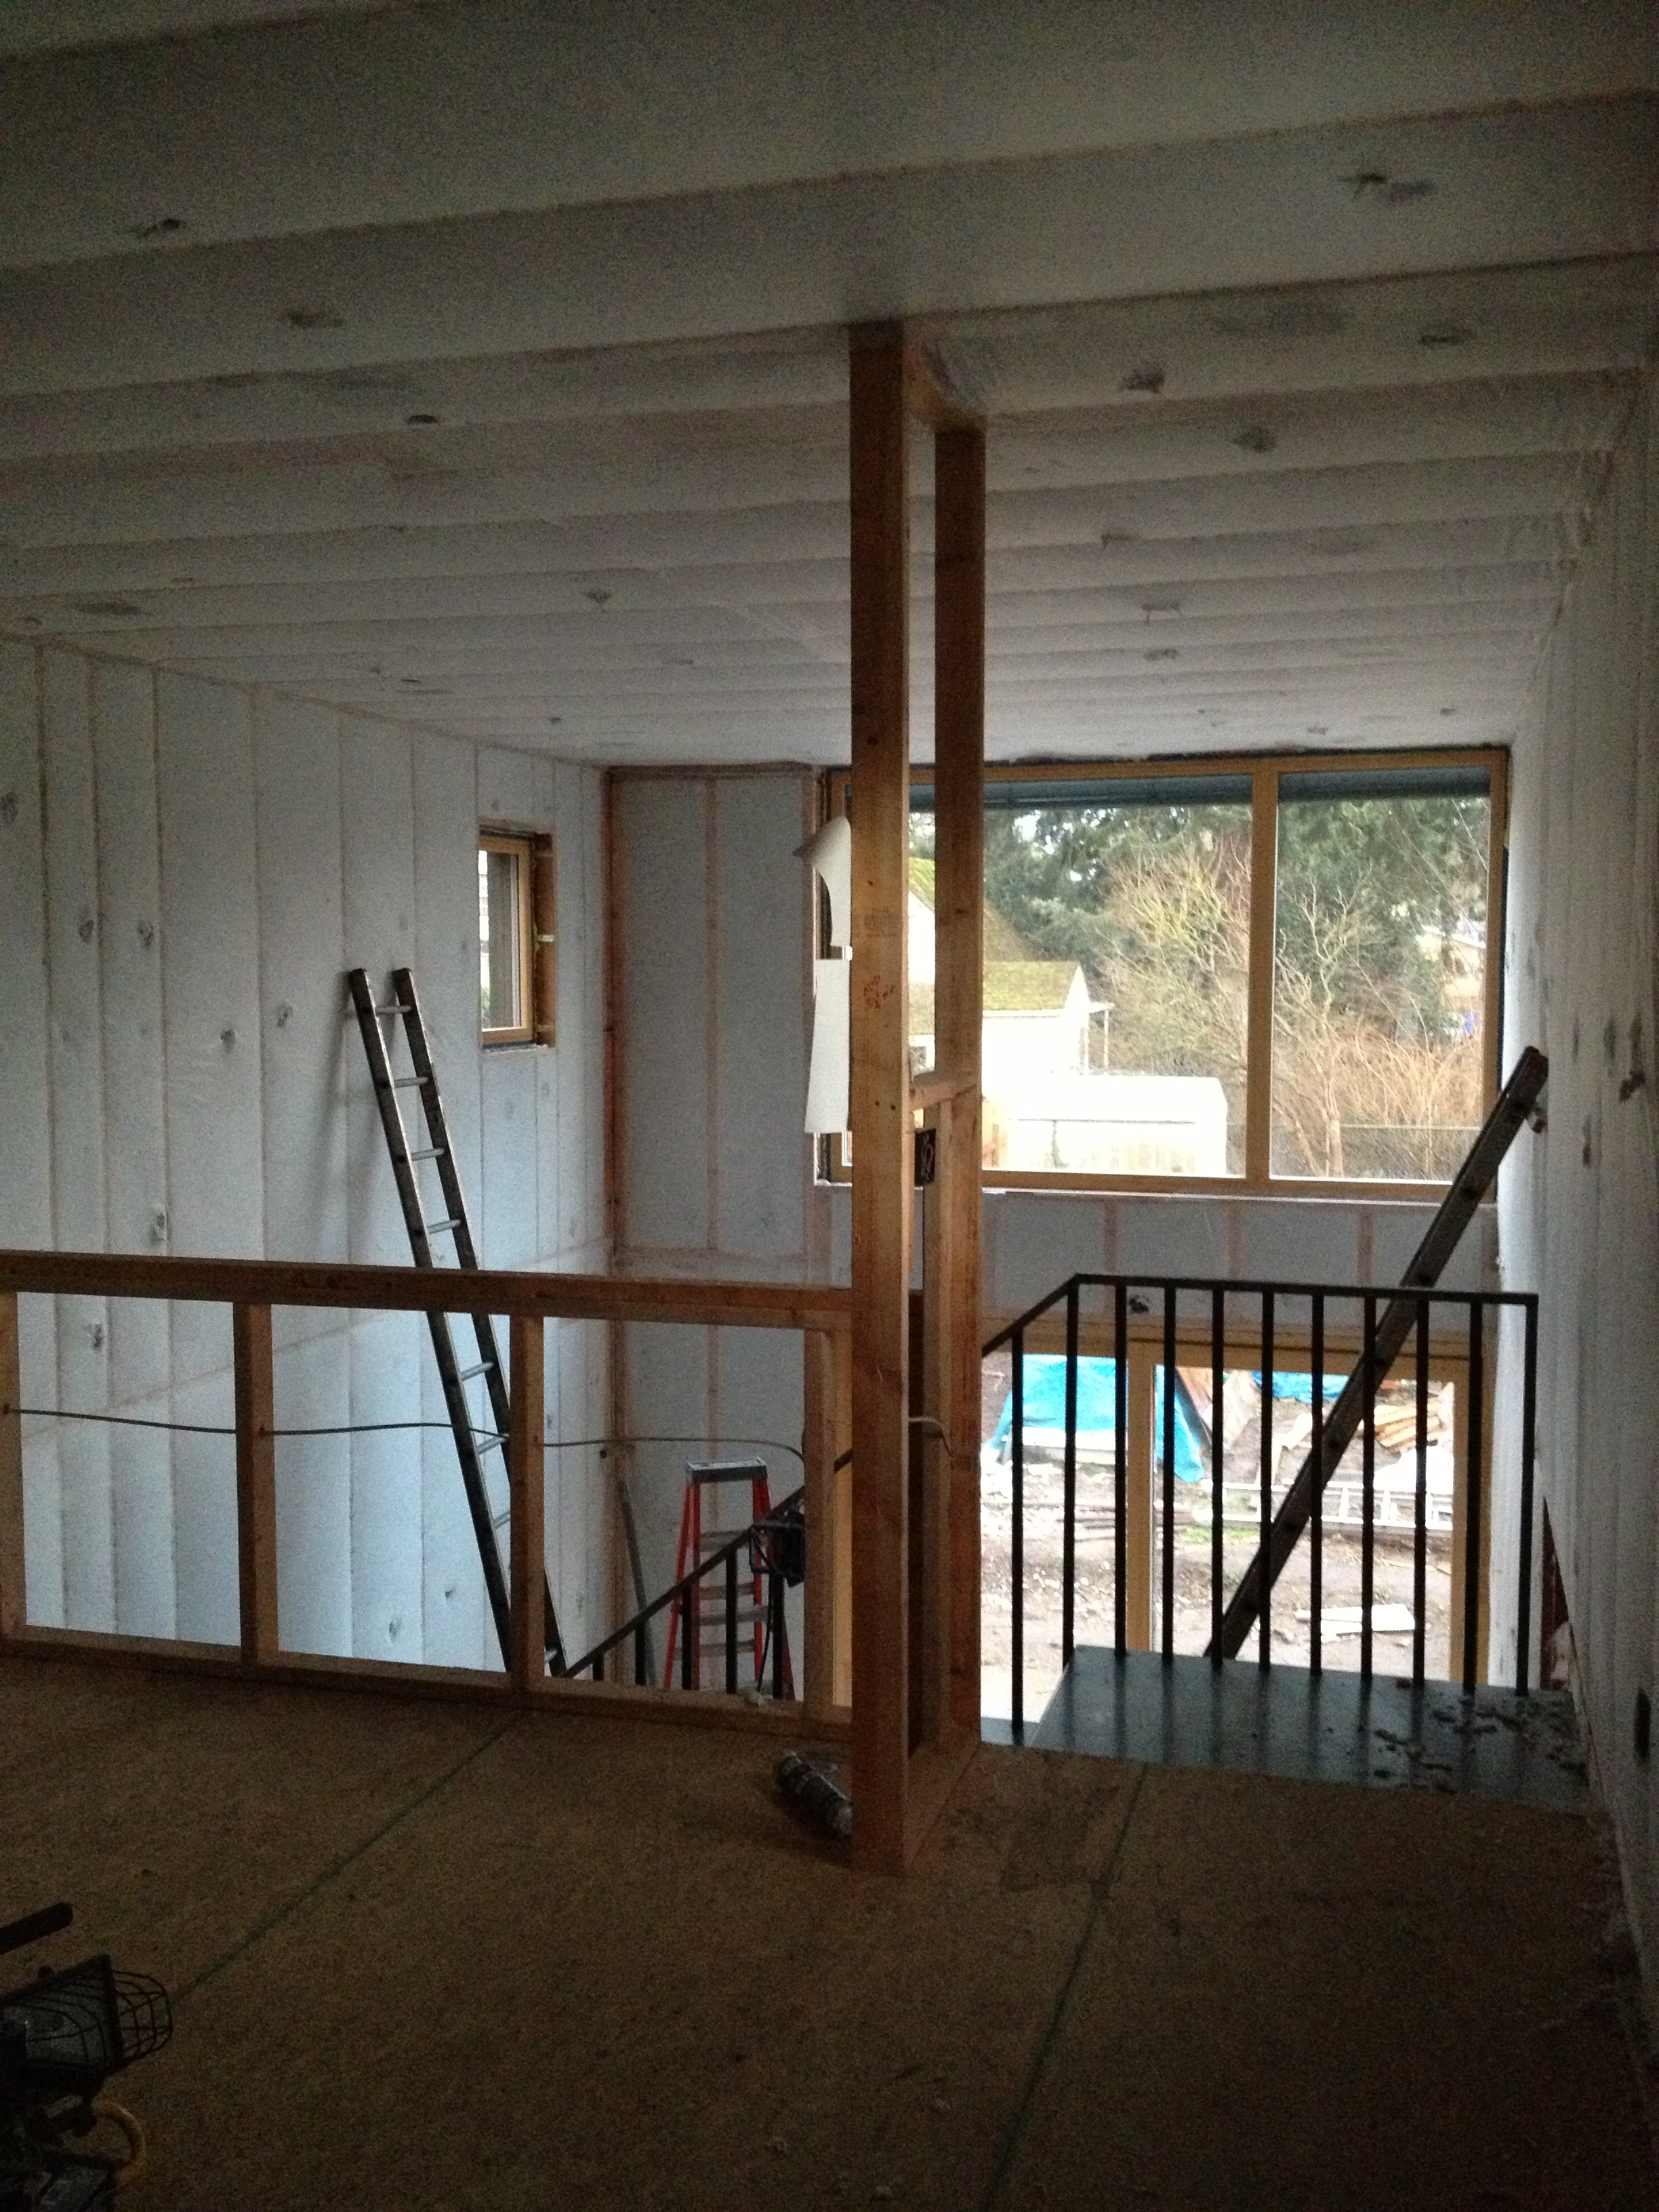
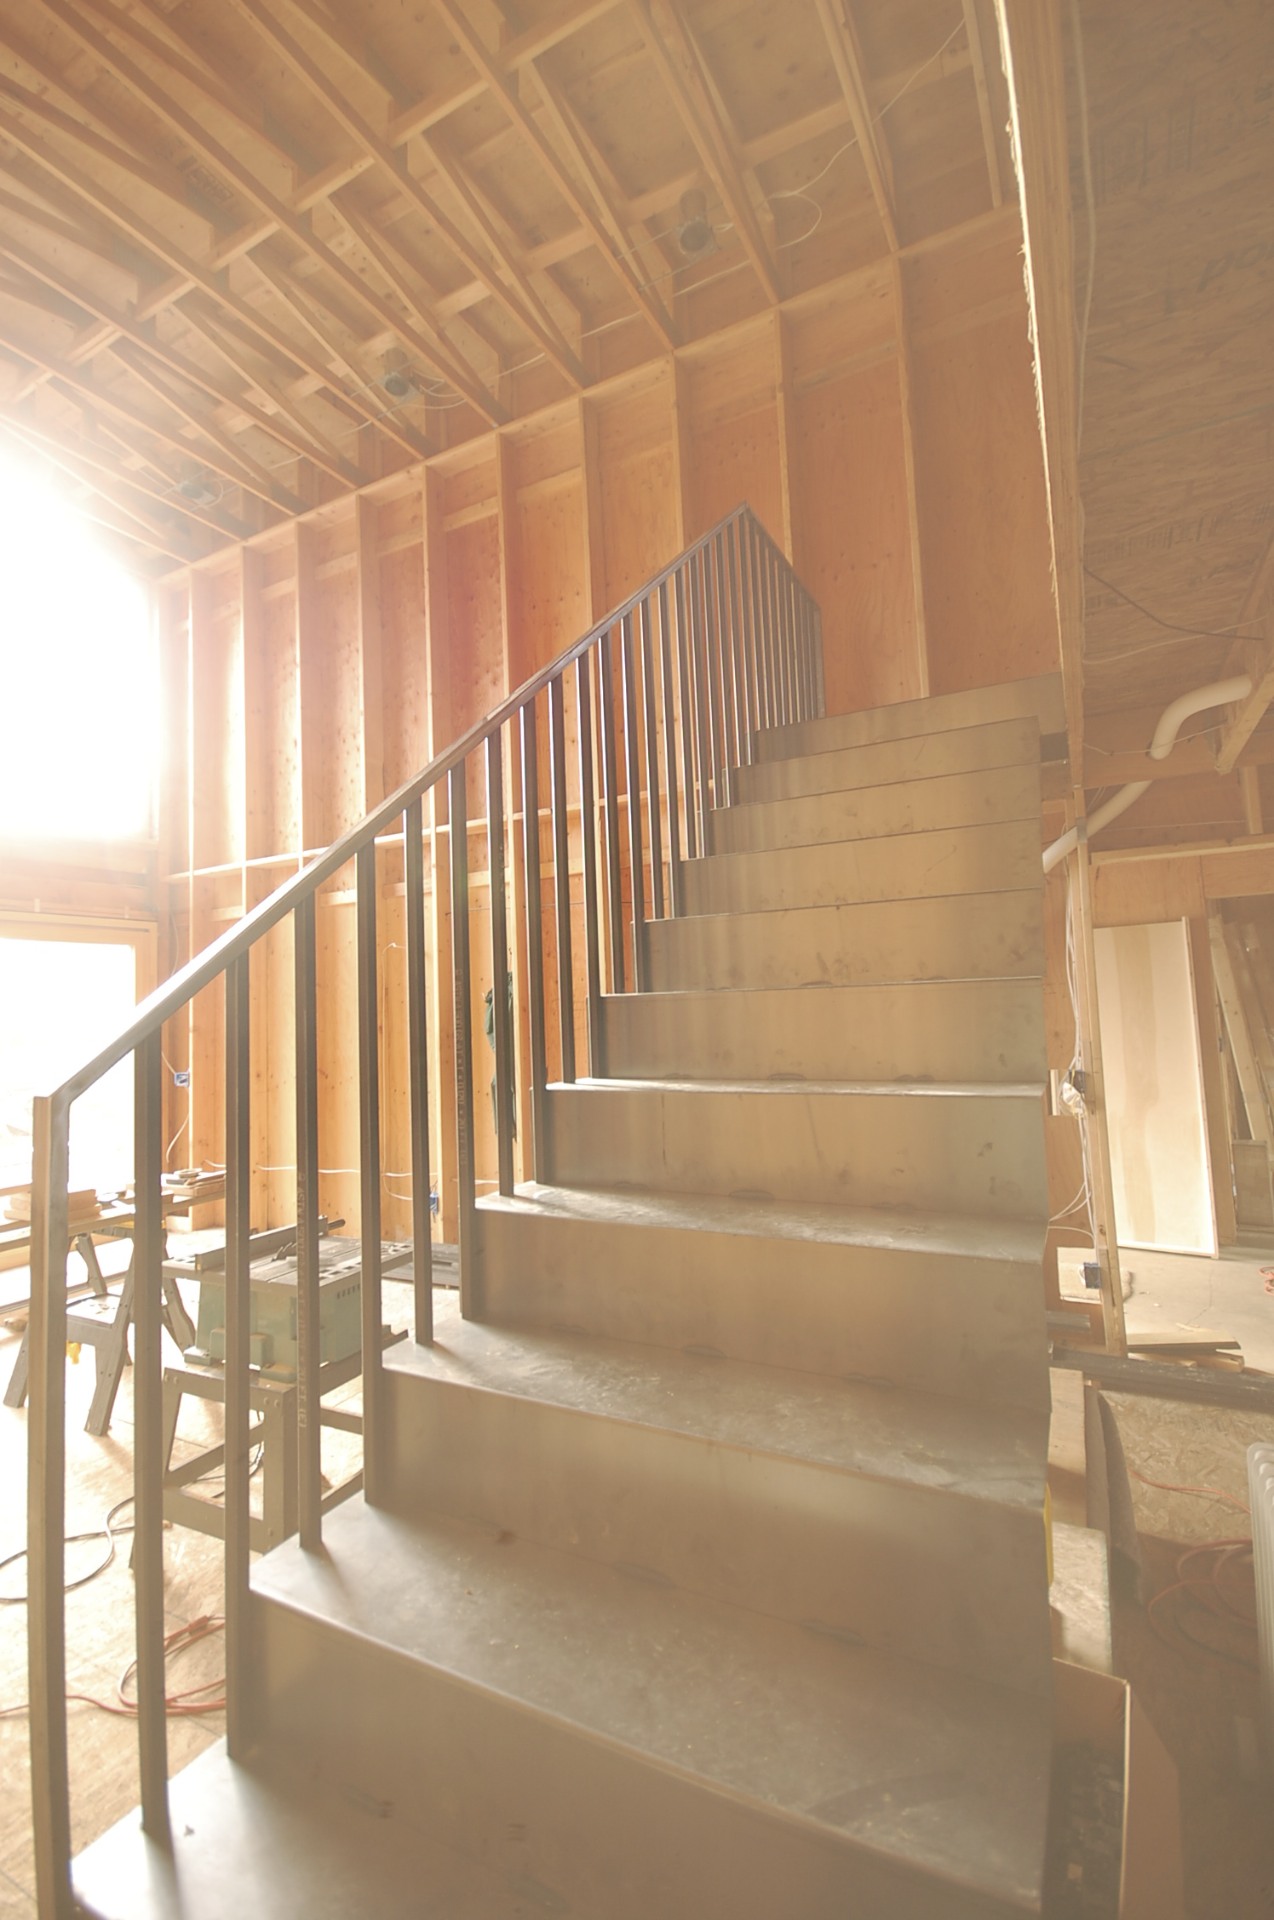
stair progresses
while most of the attention has been focused on the insulation, windows and air sealing, the interior stair has made slow but steady progress.
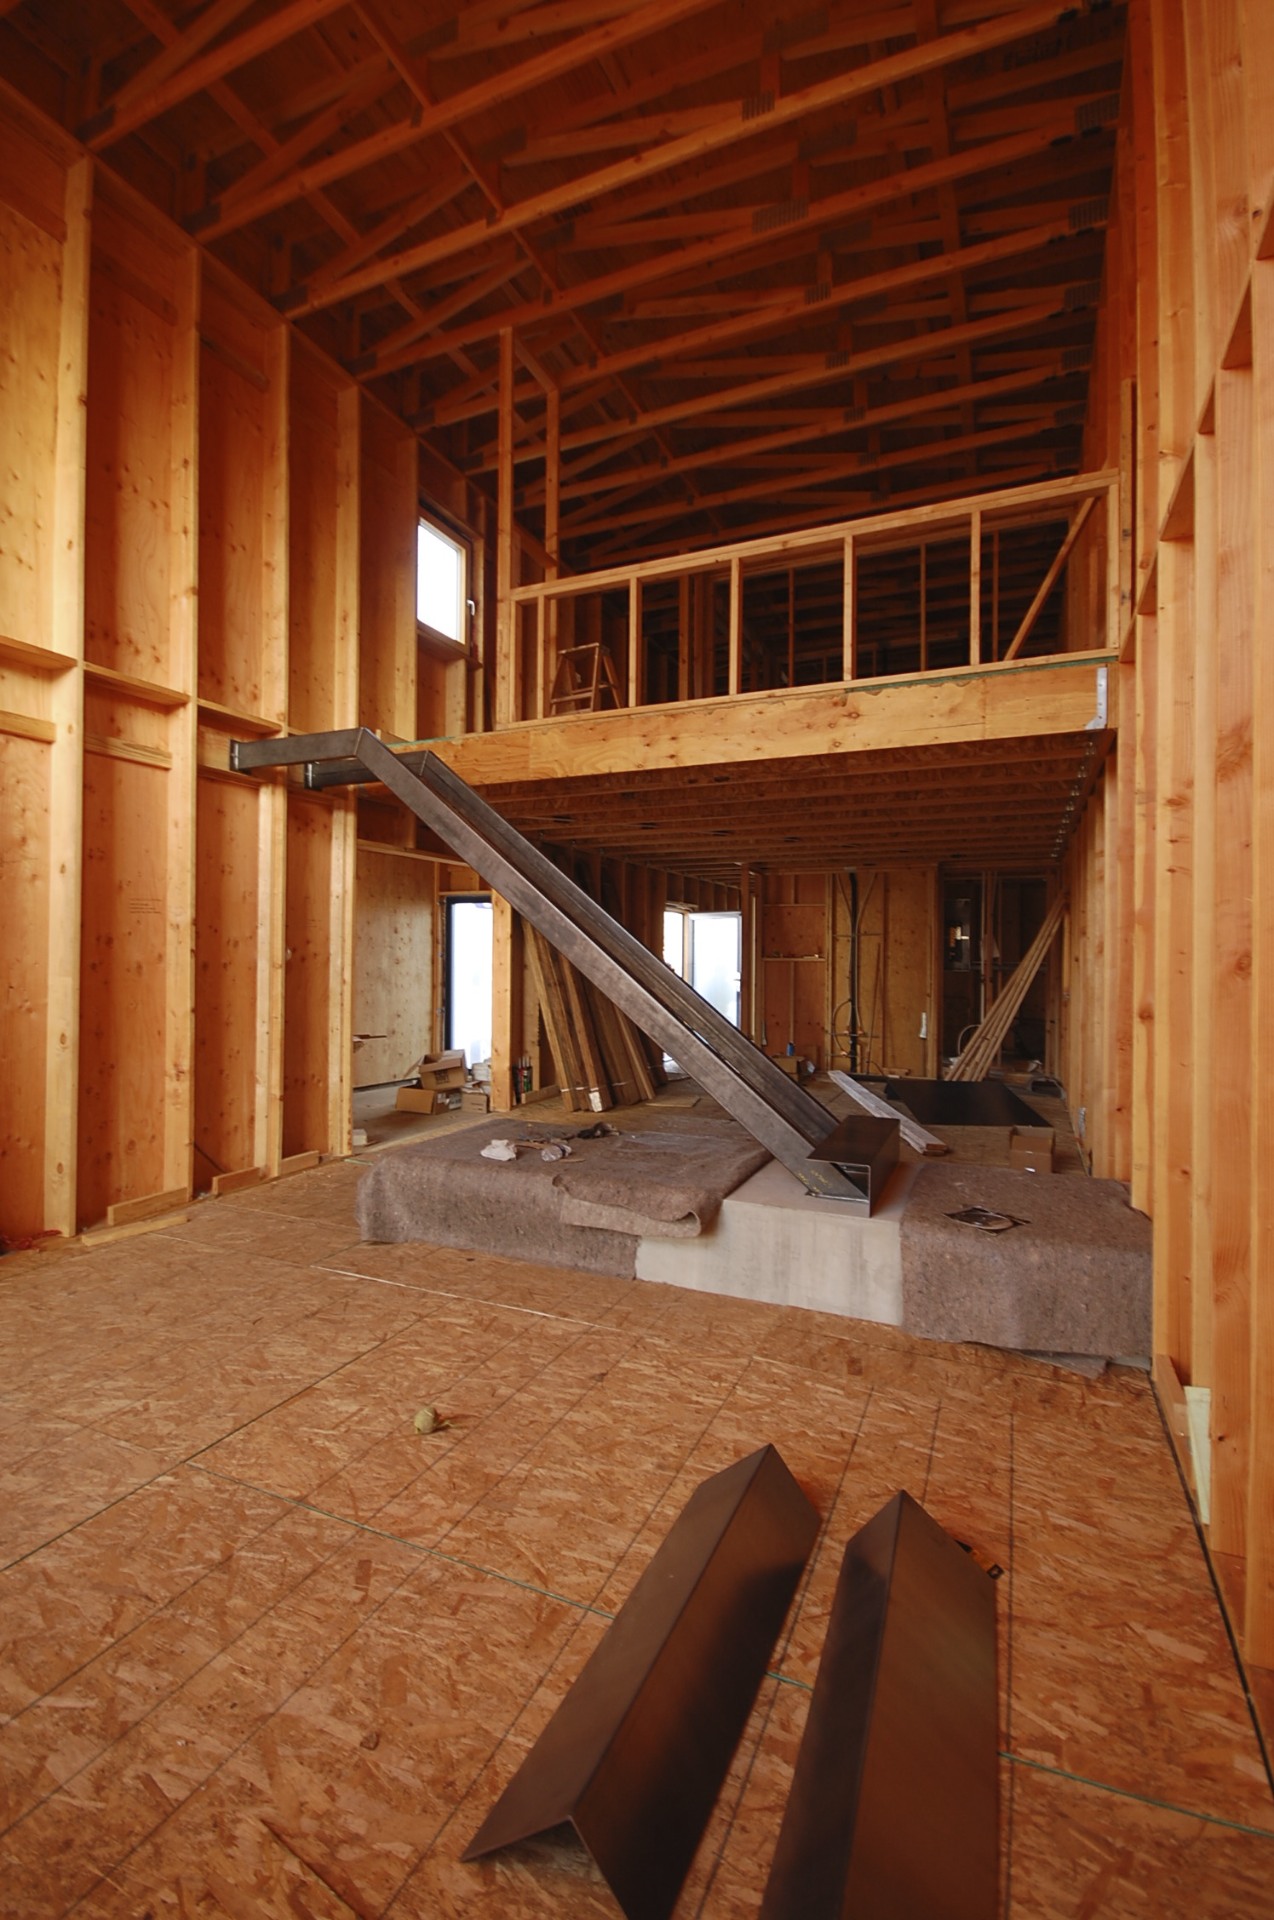

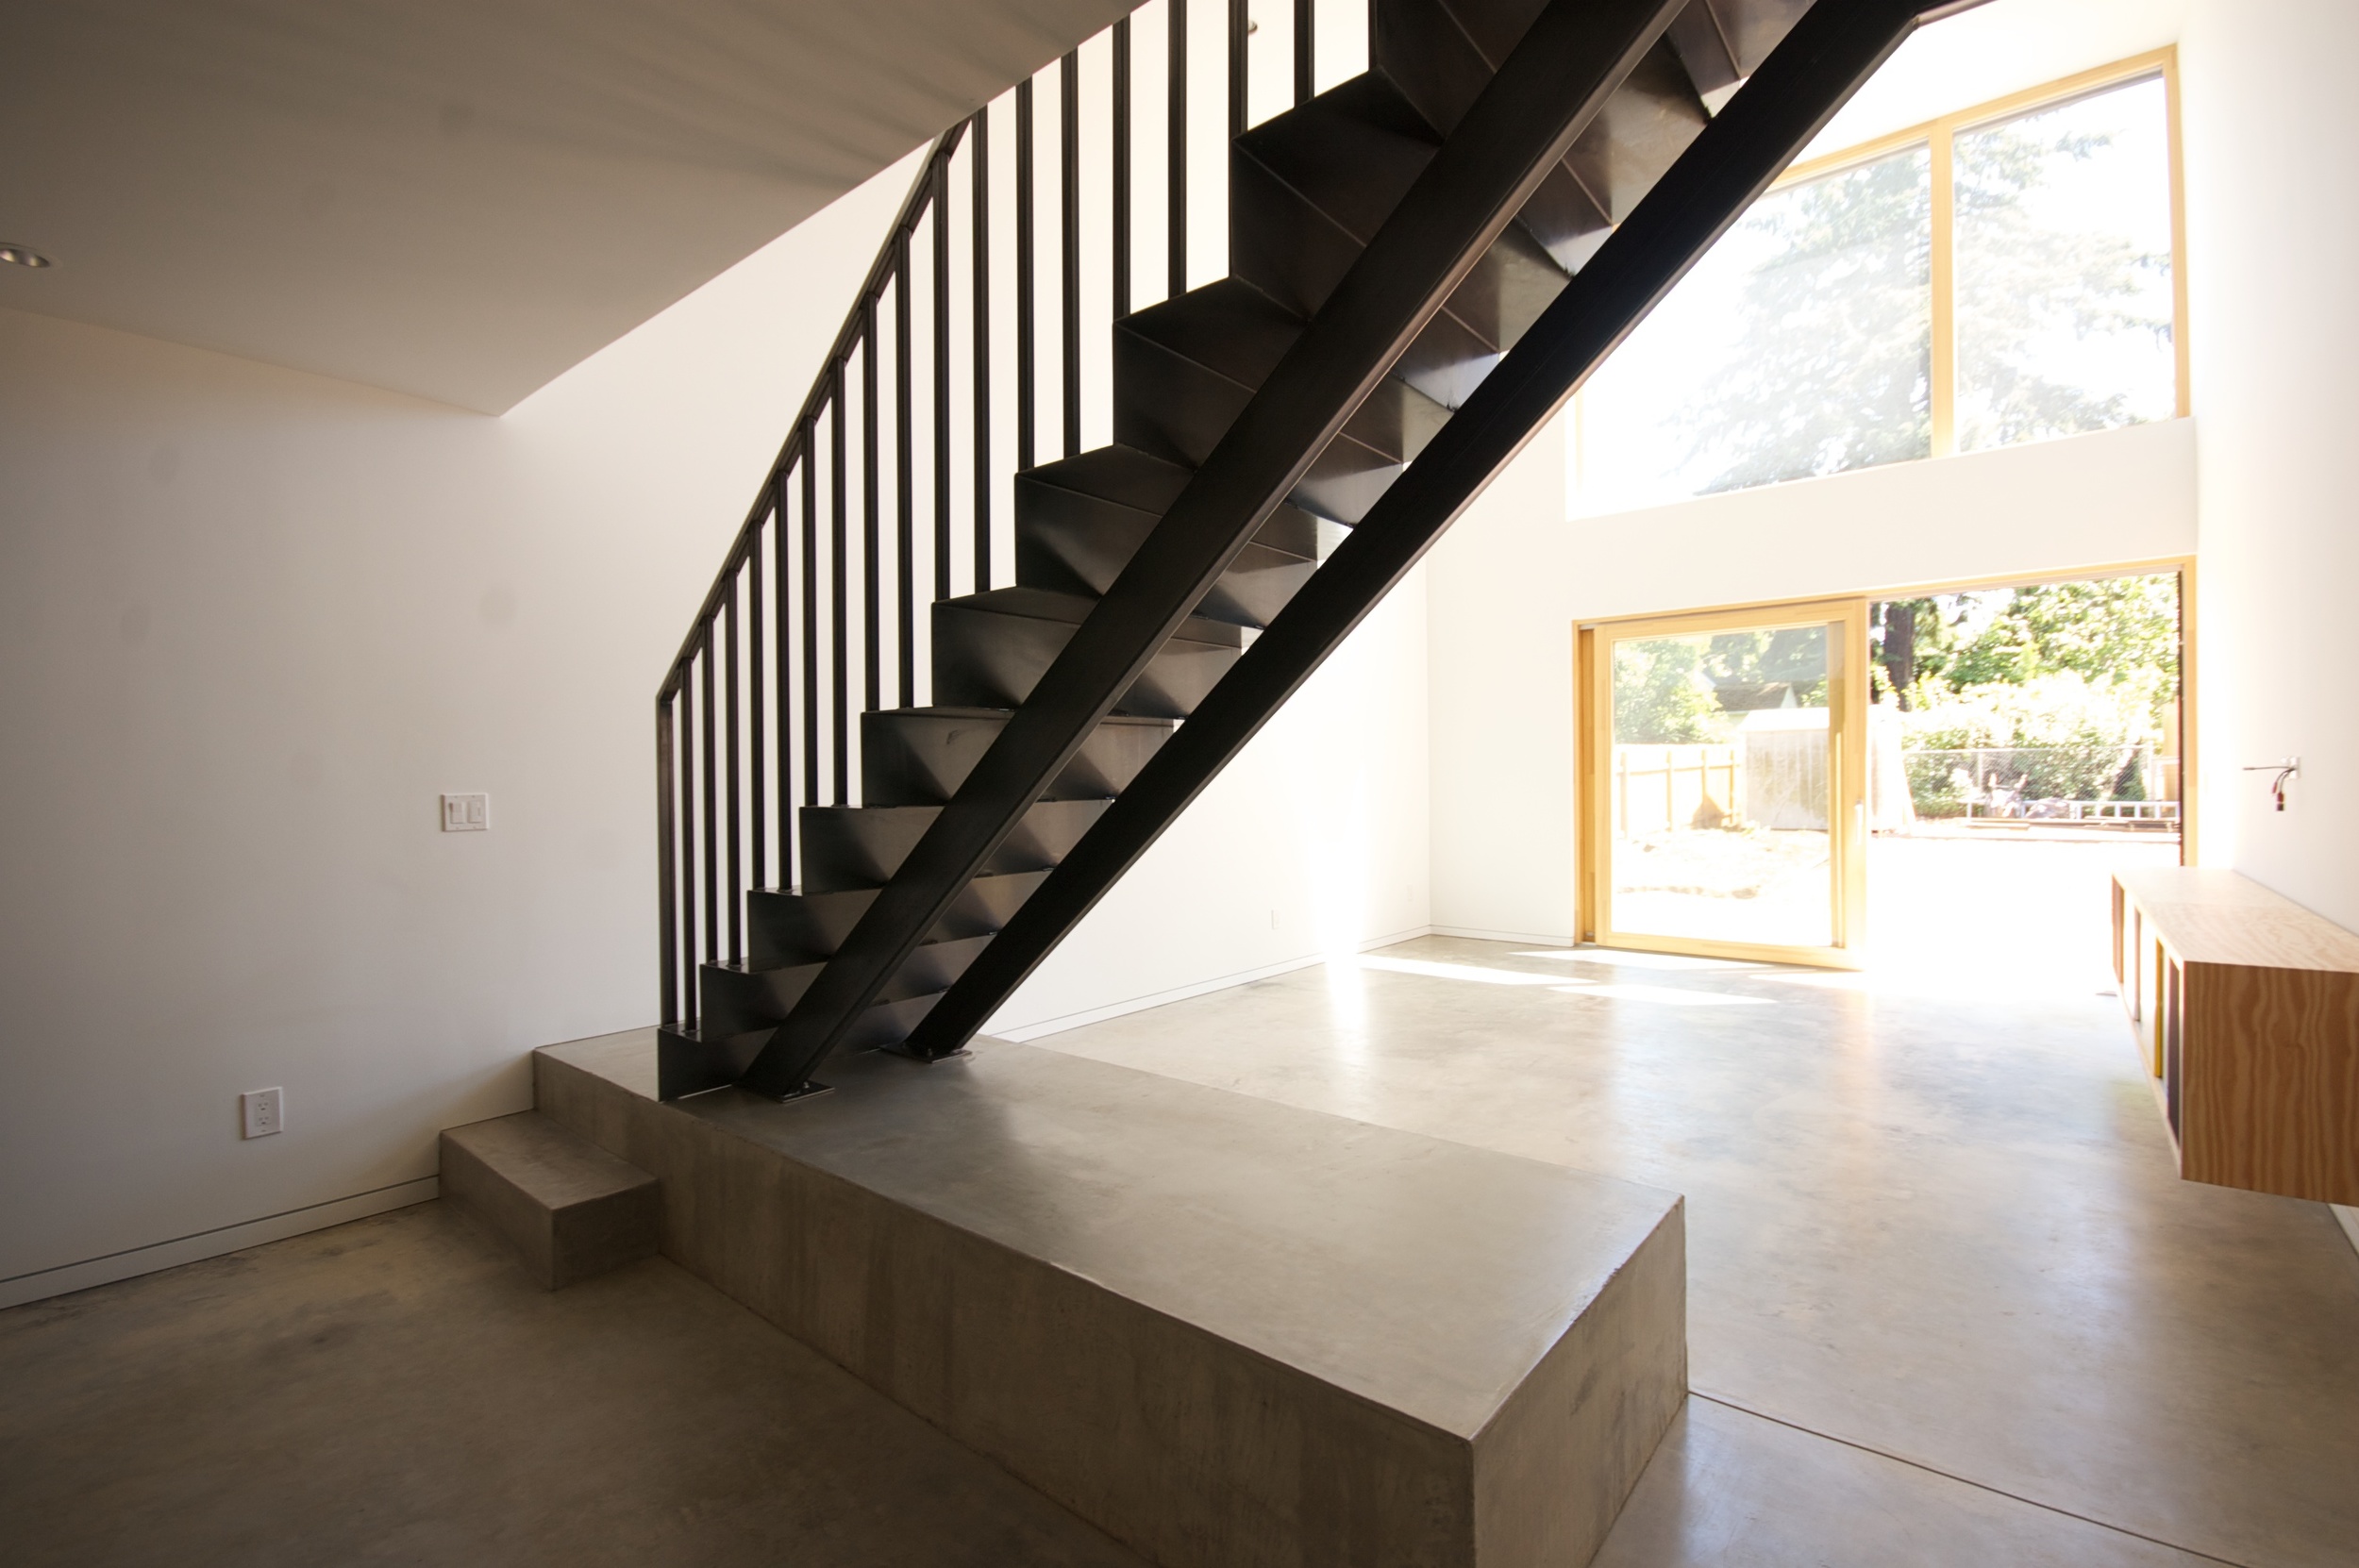
stringers are tube steel bolted to concrete landing and wood wall

tread risers are 1/8" thick bent plate steel
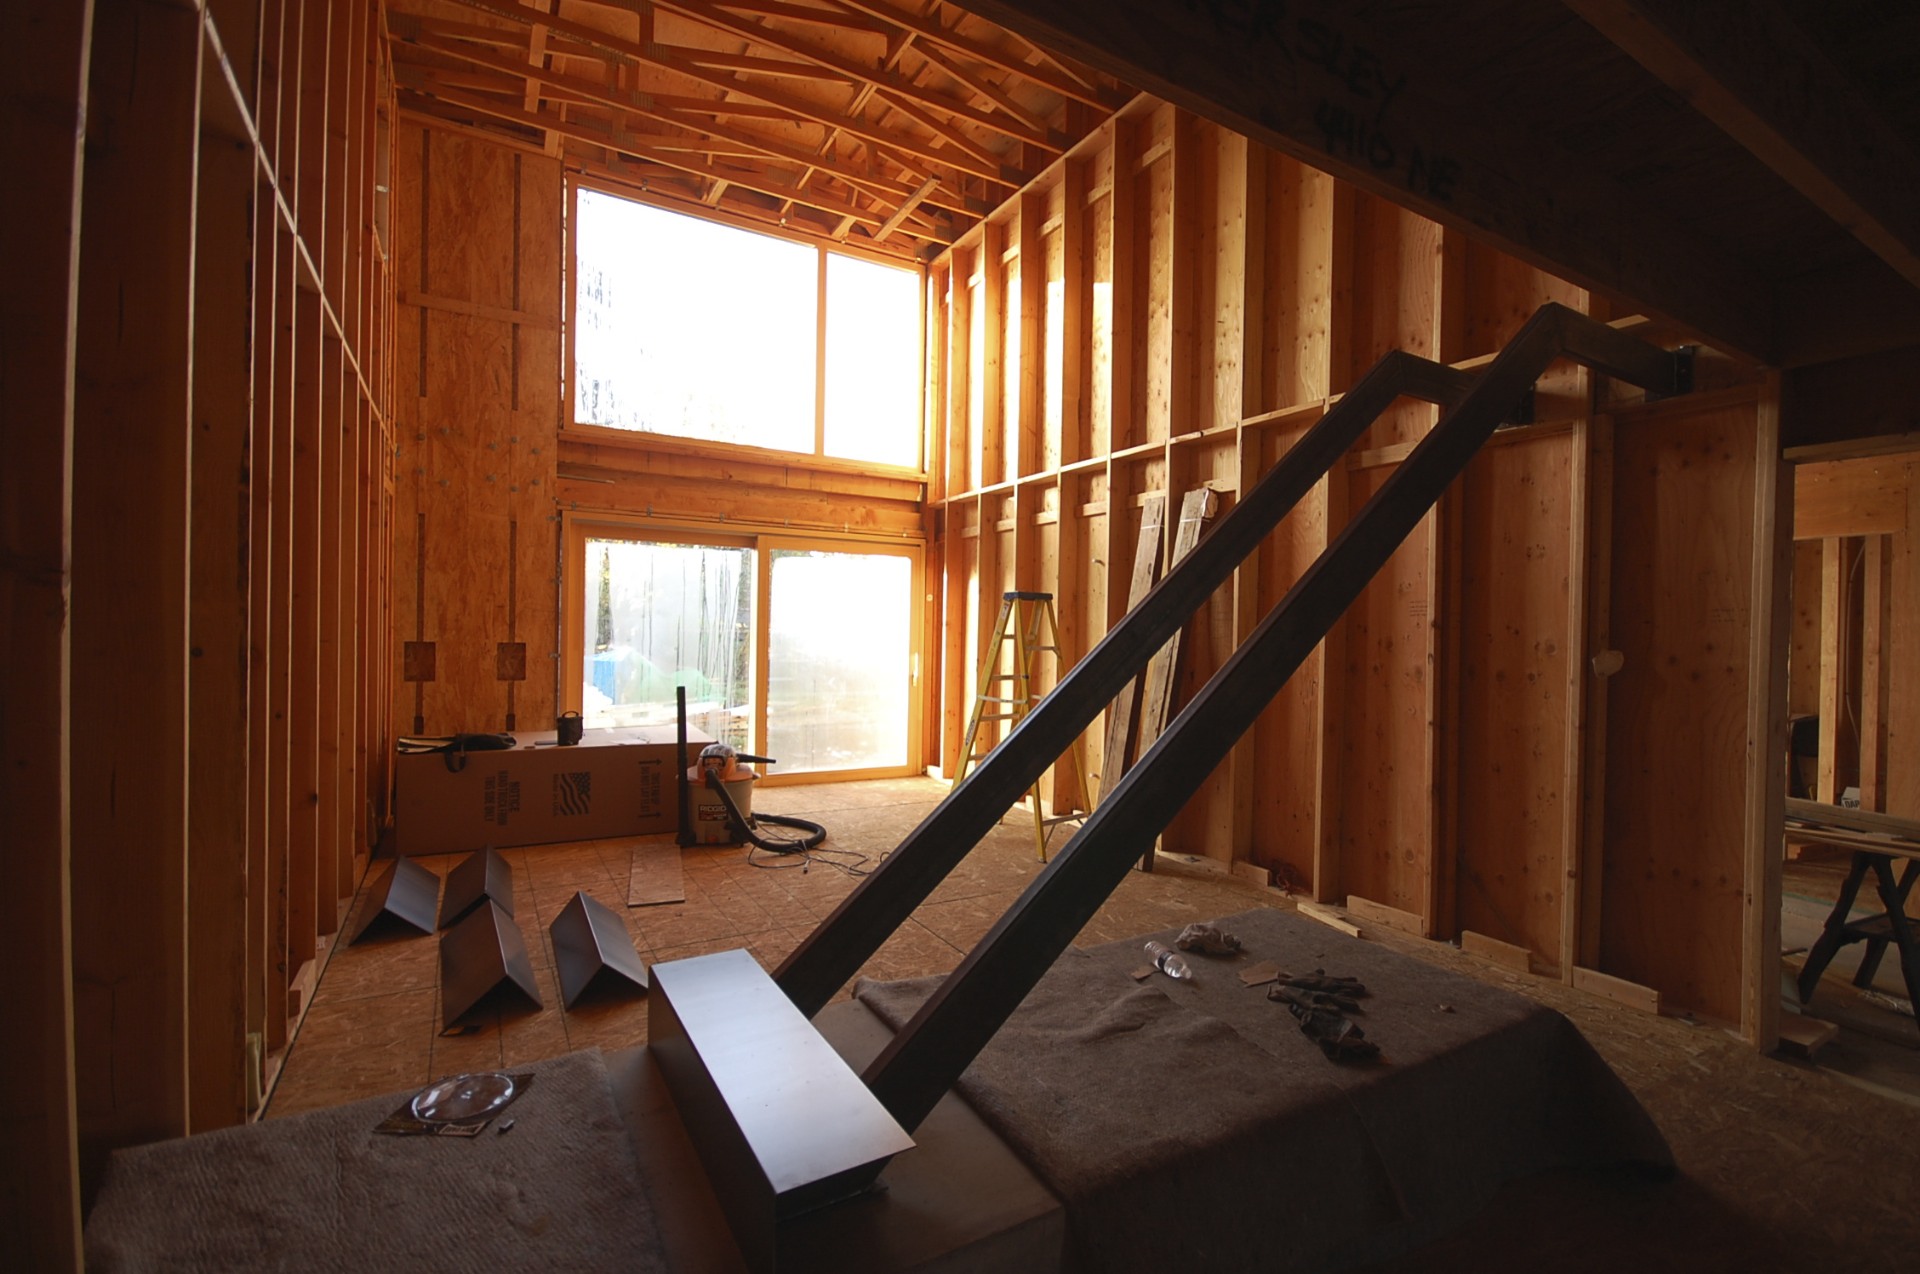

everything is fit up and welded in place

guardrail is 1" sq tube steel verticals


steel will be left natural with all the signs of fabrication exposed

a clear coat will be applied at completion
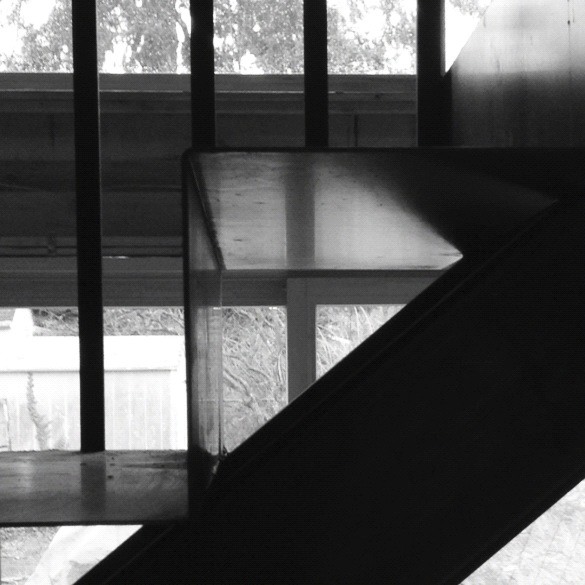
still more to go but we think it's coming along nicely.
thanks to alameda metal works for their fine work.